


Contents: Removal ⇩ Installation ⇩
Removal
1. Using a pry bar, pry up each lower corner and disconnect the cold air ducts from the instrument panel vents.
2. Remove the screw securing the back side of the deflectors to the instrument panel.
3. Remove the three screws securing the inner side of the deflectors to the instrument panel.
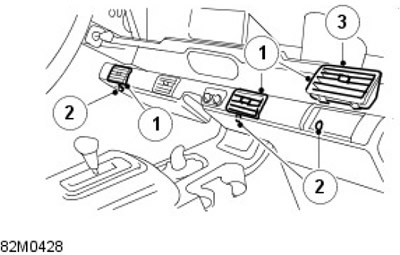
4. Lift and move the instrument panel deflectors away from the evaporator housing.
5. Remove the capillary tube from the evaporator fins.
6. Disconnect the fan lock relay electrical connector.
7. Remove the two screws securing the cover to the rear of the instrument panel deflectors.
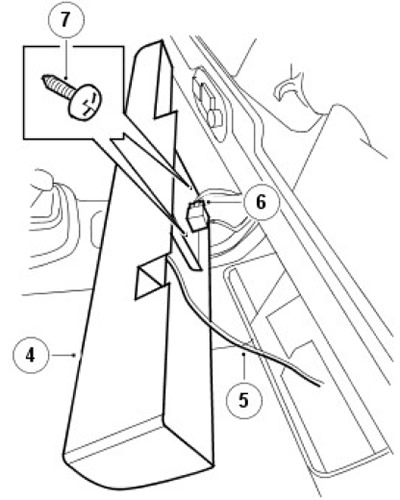
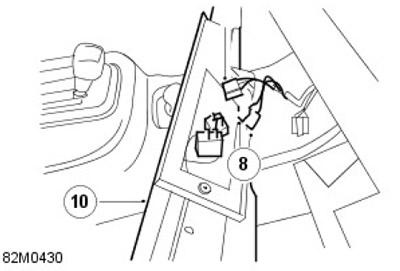
8. Release the two connectors on the temperature controller.
9. Disconnect the electrical connector on the fan switch.
10. Remove the instrument panel deflectors.
11. Remove the control handles from the switches.
12. Remove the switch panel.
13. Unscrew the nuts securing the switches to the instrument panel deflectors.
14. Remove the temperature controller.
15. Remove the fan switch.
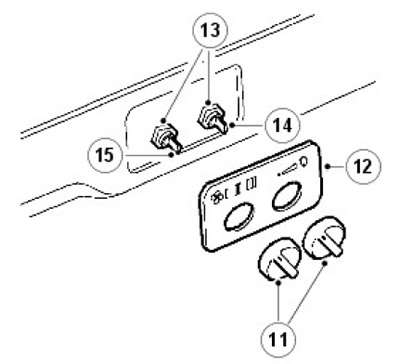
16. Move the elements to the new instrument panel deflectors.
Installation
1. Install the instrument panel deflectors as an assembly and connect the fan switch electrical connector.
2. Connect the connectors on the temperature controller.
[The material was taken from a website lrman.ru]
3. Install the capillary tube on the right side of the instrument panel vents.
4. Screw the screws securing the cover to the rear of the instrument panel deflectors.
5. Connect the electrical connector of the fan lock relay.
6. Install the instrument panel deflectors and insert the 60mm capillary tube into the evaporator fins.
7. Install the deflectors on the instrument panel and above the evaporator housing and secure with screws.
8. Install cold air ducts.
9. Perform a system check.
For more information, refer to the chapter: Refrigerant System Checks (412-00 Climate Control System - General Information, General Procedures).
Comments on this article