


Contents: Dismantling ⇩ Assembly ⇩
The following equipment is required:
- Cutting wire and handles
- Glazier's knife
- Glass Replacement Kit
- Caulking gun
- Suction cups
- Felt covered table or stand for laying glass
Dismantling
1. Remove the rear wiper arm.
WINDSHIELD WIPERS AND WASHERS, REPAIR WORK, Windshield wiper arm for the luggage compartment door.
2. Remove the tailgate panel.
DOORS, REPAIR WORK, Inner panel - upper luggage compartment door.
3. Remove the inner side trims of the luggage compartment door.
4. Remove the outer trim of the luggage compartment glass.
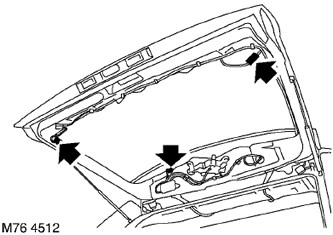
5. Disconnect the 3 connector blocks from the door glass.
6. Protect exterior painted surfaces adjacent to glass.
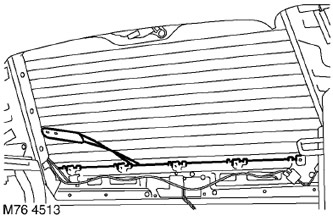
7. From inside the car, carefully cut through the sealing layer of the lower edge of the glass with a glazier's knife. Do not use a Kent knife as the glass is very close to the door frame.
8. If necessary, you can use a cutting wire to cut through the remaining sealant layer on the sides and top of the glass.
9. Secure the suction cups and, with the help of an assistant, remove the glass and place it on the stand.
CAUTION: Place the glass on the felt covering and be careful not to damage the darkening film. Do not place the glass on its edge, this may cause chips, which will then cause cracks.
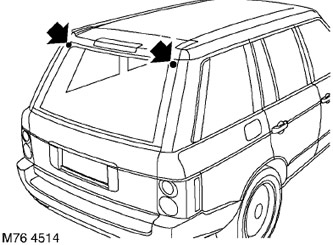
10. Remove the two glass support blocks from the door frame.
Assembly
1. Carefully remove any remaining sealant from the body opening to obtain a smooth surface.
2. If the glass is not being replaced: Carefully remove any remaining sealant to obtain a smooth surface without damaging the tinting tape.
3. Install the overlay on the glass.
4. Install the support blocks on the door frame.
5. Place the glass against the door and align it with the center of the opening.
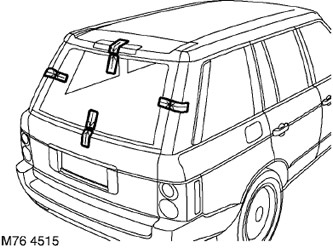
6. Use protective tape to fix the glass position in the center of the window opening.
7. Remove the glass and place it on the stand.
8. Wipe the mating surfaces of the opening and glass with solvent.
9. Treat the body surfaces where bare metal is exposed with a phosphoric acid etching solution.
10. Apply primer to the etched areas of the door frame.
11. Apply a layer of special primer to the glass mating surface and let the primer dry.
12. Apply the renewing compound to the layer of old sealant on the body and let it dry.
13. Install the pre-cut tip onto the sealant cartridge, remove the cap, shake the cartridge and install it onto the sealant gun. If necessary, reshape the tip to obtain the required sealant bead cross-section.
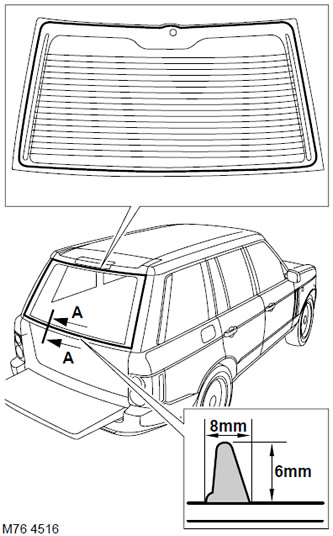
14. Apply a continuous bead of sealant to the glass as shown.
- Size 'A' = 8 mm (0.31 inches).
- Size 'B' = 11 mm (0.43 inches).
15. With the help of an assistant, install the glass and align it with the marks on the tapes. Press the glass lightly to ensure a tight connection of the sealant with the body opening.
16. Remove the protective layer and remaining tape.
17. Connect the connector blocks to the tailgate glass.
18. Check the tightness of the seal. If necessary, apply additional sealant. If water is used to check the tightness, allow the seal to dry before checking. Run a stream of water over the peripheral surface of the door glass and check whether water leaks into the passenger compartment. Mark the leaks. Dry the glass and sealant, then apply additional sealant.
19. Install the inner side trims of the luggage compartment lid.
20. Install the tailgate panel.
DOORS, REPAIR WORK, Inner panel - upper luggage compartment door.
21. Install the windshield wiper arm.
WINDSHIELD WIPERS AND WASHERS, REPAIR WORK, Windshield wiper arm for the luggage compartment door.
Comments on this article