Removing
1. Remove the hatch located in a luggage carrier on the left side.
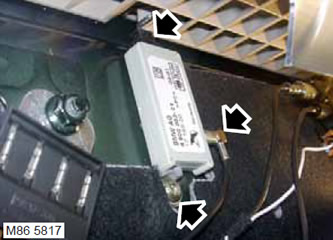
2. Disconnect the coaxial cable.
3. Loosen the Torx screw securing the amplifier.
4. Disconnect the block and remove the amplifier.
Installation
1. Install the amplifier and connect the block.
2. Install the booster and tighten the Torx screw to 6 Nm.
3. Connect the coaxial wire.
4. Replace the hatch.
Comments on this article