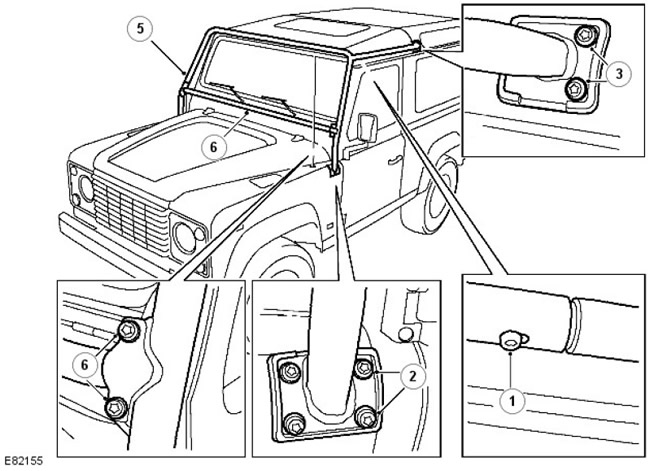
Removing
1. Remove the Torx bolts on both sides securing the top of the rollover protection beam from the roof beam.
2. Using assistance to support the roll-over protection beam on the windshield, remove the four Torx bolts on both sides that secure the roll-over protection beam to the wing support.
3. Turn out on both sides bolts Torx fastenings of the top beam to a support of a roof.
4. Slide the top beams back to disengage them from the main ROPS beam assembly.
5. Remove the primary roll-over protection beam assembly from the vehicle.
6. Remove the two Torx bolts and nuts on both sides, if necessary, and disconnect the lower cross member from the main roll-over guard.
Installation
1. Install the lower cross member into the support brackets of the main ROPS member and secure with Torx bolts and nuts to 25 Nm.
2. Ensure that the rubber pads are correctly installed on the ROPS support brackets.
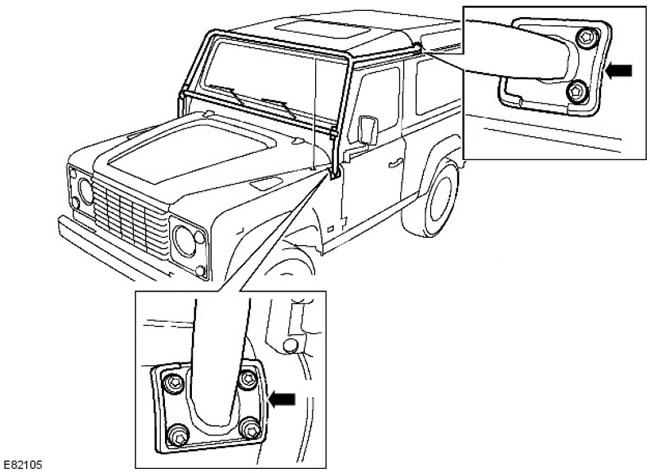
3. Call a helper, install the rollover protection beam and place it on the wings.
4. Slide the top beams into the ROPS main beam, position on the roof support and secure with Torx bolts to 25 Nm.
5. Attach the ROPS to both roof posts with Torx bolts. Tighten to 25 Nm.
6. Attach the top beams to the main rollover protection beam and tighten the bolts to 25 Nm.
Comments on this article