Contents: Removal ⇩ Installation ⇩
Removal
1. Remove the wing splash guard.
For more information, refer to the chapter: Mudguard (501-02 Front body panels, Removal and installation).
2. Remove the radiator grille.
For more information, refer to the chapter: Radiator Grille (501-08 Exterior trim, Removal and installation).
3. Release the fasteners and remove the cooling fan shroud.
4. Remove the air filter grille from the front fender.
5. Remove the four screws securing the air intake elbow to the wing.
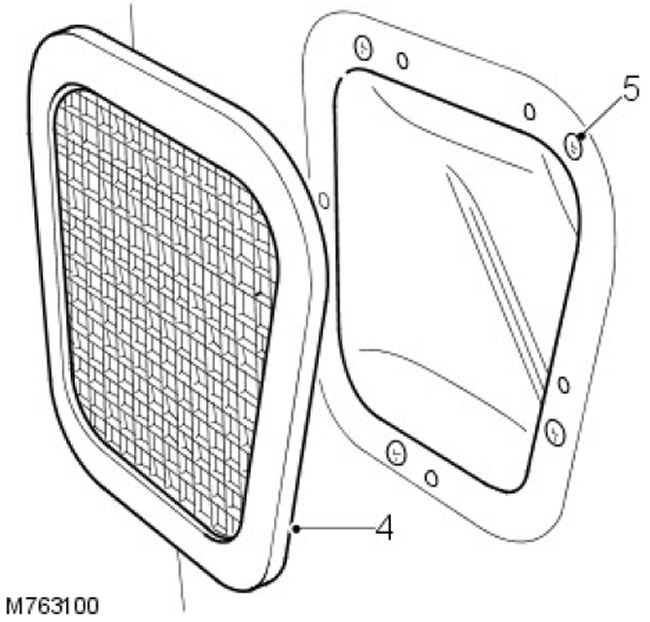
6. Remove 7 screws and remove the heater air intake grille from the wing.
7. Remove the two screws securing the heater air intake bracket to the inner wing. Remove the bracket.
8. Remove the heater air intake from the wing and remove the seal.
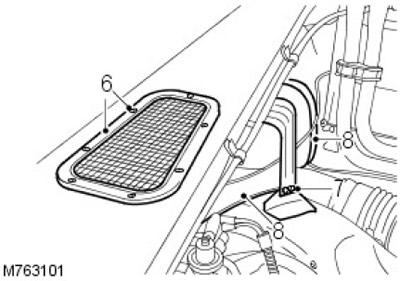
9. Remove the two bolts securing the EGR solenoid valve to the inner fender and set aside.
10. Unscrew the three studs securing the expansion tank pipe to the inner wing.
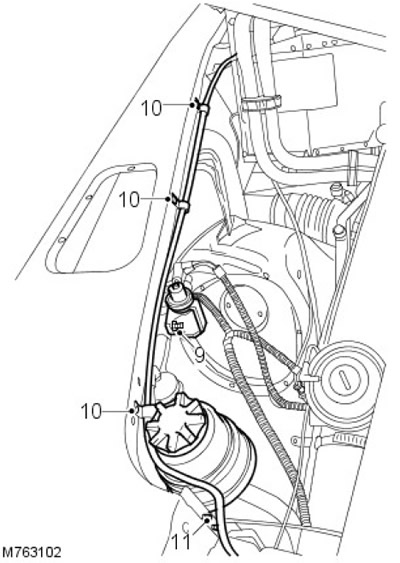
11. Remove the two bolts securing the PAS reservoir to the inner wing and set aside.
12. Remove the four bolts securing the outer wing to the inner wing.
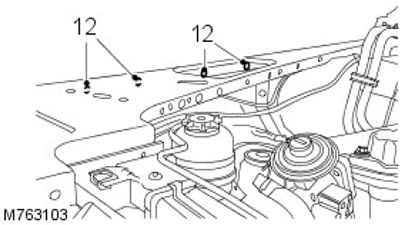
13. Unscrew the four nuts securing the radiator support bracket to the wing.
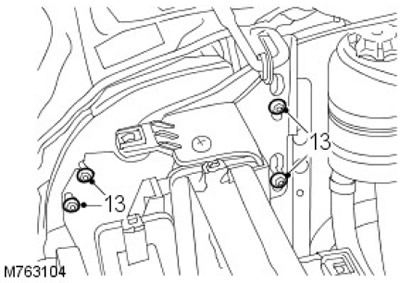
14. Loosen the screw and disconnect the cable from the hood latch.
15. Release the cable housing from the hood lock.
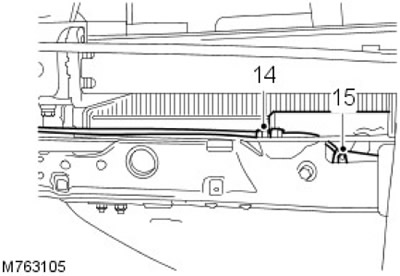
16. Push the center sections out of the studs securing the wheel arch extension to the wing, remove the studs and remove the wheel arch extension.
17. Remove the bolt securing the inner and outer wings to the chassis.
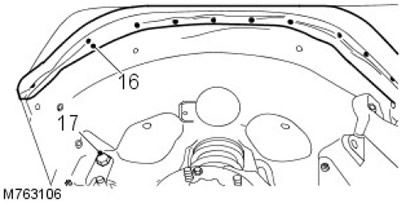
18. Unscrew the nut and remove the bolt securing the support post to the wing.
19. Remove the four bolts securing the wing to the "A" pillar.
20. Remove the bolt securing the wing to the bulkhead.
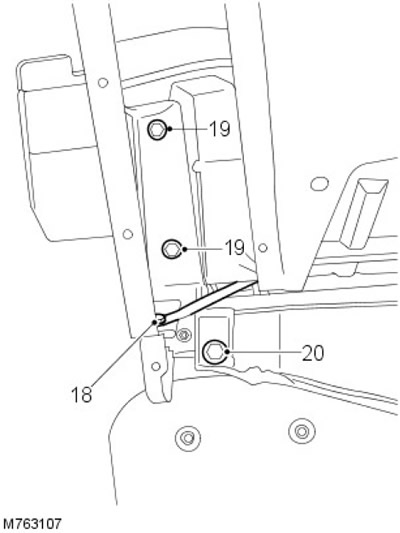
21. Disconnect the electrical connectors of the headlight, side light, turn signal repeater and turn signal.
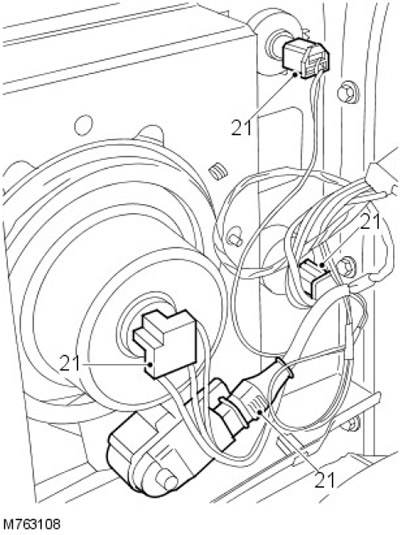
22. Call an assistant and remove the wing.
23. Remove the bolt and grille support bracket.
24. Remove the four screws securing the side light and turn signal.
25. Remove the two screws securing the headlight trim panel to the wing and remove the trim panel.
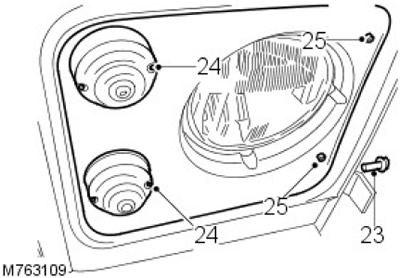
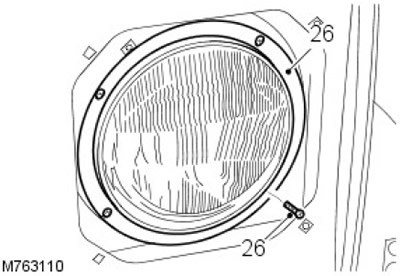
26. Remove the four screws and remove the headlight from the wing, remove the sealing ring.
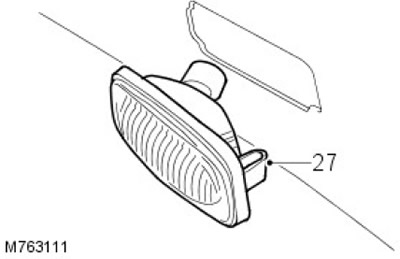
27. Release the side turn signal repeater from the wing.
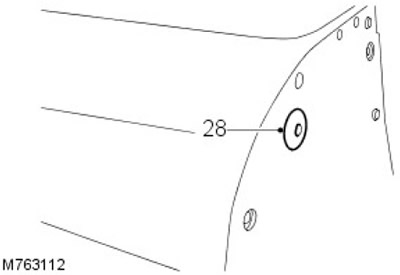
28. Remove the hood cable sealing bushing.
Installation
1. Install the hood cable sealing bushing.
2. Install the side turn signal repeater on the fender.
3. Install the headlight sealing ring, install the headlight and tighten the screws.
4. Install the headlight trim panel, parking light and turn signal lights and tighten the screws.
5. Install the grille support bracket and tighten the bolt.
6. Call an assistant, install the fender on the body and the hood cable on the fender.
7. Connect the electrical connectors of the headlight, side light, turn signal and side turn signal repeater.
8. Screw in the bolt securing the wing to the bulkhead.
9. Screw in the four bolts securing the wing to the "A" pillar.
10. Install the nut and bolt securing the support post to the wing.
11. Screw in the bolt securing the inner and outer wings to the chassis.
12. Screw on the four nuts securing the radiator bracket to the wing.
13. Install the four bolts securing the outer wing to the inner wing.
14. Check the position of the wing and finally tighten all bolts.
15. Install the wheel arch extension onto the wing and install the mounting studs.
16. Install the PAS tank on the fender and tighten the bolts.
17. Install the expansion tank pipe and secure it with studs.
18. Install the EGR solenoid valve and tighten the bolts.
19. Install the seal and heater air intake.
20. Install the heater air intake bracket and tighten the bolts.
21. Install the heater air intake grille and tighten the screws.
22. Align the air filter intake elbow, tighten the screws and install the grille.
23. Install the wing splash guard.
For more information, refer to the chapter: Mudguard (501-02 Front body panels, Removal and installation).
24. Connect the hood release cable to the lock and tighten the screw.
25. Install the cooling fan shroud.
26. Install the radiator grille.
For more information, refer to the chapter: Radiator Grille (501-08 Exterior trim, Removal and installation).
Comments on this article