Contents: Removal ⇩ Installation ⇩
Removal
1. Disconnect the ground cable from the battery. For more information, refer to Specification.
2. Remove the mixing chamber panel. For more information, refer to Accumulating Chamber (80.15.62)
3. Remove the headlight assembly. For more information, refer to Headlight Assembly (86.40.49)
4. Remove the fender splash guard. For more information, refer to Fender Splash Guard (76.10.48)
5. Remove the fender molding. For more information, refer to Front Fender Molding (76.43.54)
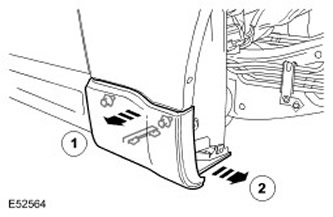
6. Remove the lower fender molding. Release the 4 clips.
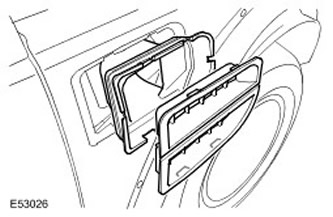
7. Remove the air intake grille on the wing.
- Release the 4 clamps.
- Remove the air duct.
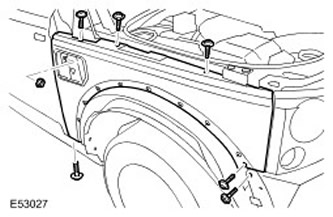
8. Remove the front fender.
- Remove 6 Torx head bolts.
- Unscrew the nut.
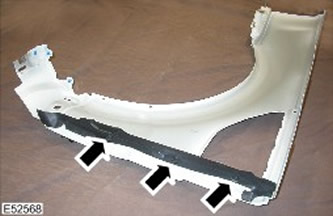
9.
NOTE: Do not perform further disassembly if the part is removed only for access.
Remove the rear fender trim. Remove the 3 clips.
Installation
1. Install the rear wing trim. Engage the 3 fasteners.
2. Install the front fender.
- Screw in the bolts and tighten them. (tightening torque 10 Nm).
- Tighten the nut (tightening torque 10 Nm).
4. Install the lower fender molding. Engage the retainers.
5. Install the fender molding. For more information, refer to Front Fender Molding (76.43.54)
6. Install the fender splash guard. For more information, refer to Fender Splash Guard (76.10.48)
7. Install the headlight assembly. For more information, refer to Headlight Assembly (86.40.49)
8. Install the mixing chamber panel. For more information, refer to Accumulating Chamber (80.15.62)
9. Connect the ground cable to the battery. For more information, refer to Specification.
Comments on this article