Car seat repair Land Rover Discovery 3

Specification
Tightening torque specifications Name Nm lb-f Lower seat belt attachment point to seat Torx head bolt 40 30 Fastening the front seat belt buckle to the front seat torx head bolt 40 30 Front Seat Torx...
Tightening torque specifications Name Nm lb-f Lower seat belt attachment point to seat Torx head bolt 40 30 Fastening the front seat belt buckle to the front seat torx head bolt 40 30 Front Seat Torx...

The structure and technical description of the seats
Component arrangement NOTE: Right-hand drive component locations are shown. Left-hand drive components are located similarly. Item name Spare part catalog number Description 1 - Driver's seat cushion...
Component arrangement NOTE: Right-hand drive component locations are shown. Left-hand drive components are located similarly. Item name Spare part catalog number Description 1 - Driver's seat cushion...

Manual adjustment of front seats
Item name Spare part catalog number Description 1 - Height adjustment (driver's seat only) 2 - Tilt angle adjustment 3 - Longitudinal position adjustment (move forward/backward) 4 - Adjusting the...
Item name Spare part catalog number Description 1 - Height adjustment (driver's seat only) 2 - Tilt angle adjustment 3 - Longitudinal position adjustment (move forward/backward) 4 - Adjusting the...

Front seats with electrical adjustment
Item name Spare part catalog number Description 1 - Longitudinal position adjustment (move forward/backward) 2 - Backrest tilt adjustment 3 - Seat cushion height adjustment Longitudinal position...
Item name Spare part catalog number Description 1 - Longitudinal position adjustment (move forward/backward) 2 - Backrest tilt adjustment 3 - Seat cushion height adjustment Longitudinal position...

Driver's seat with memory adjustments
Item name Spare part catalog number Description 1 - Seat position memory button 2 - Preset adjustment buttons 3 - Seat position adjustment buttons The memory control unit can store up to three sets...
Item name Spare part catalog number Description 1 - Seat position memory button 2 - Preset adjustment buttons 3 - Seat position adjustment buttons The memory control unit can store up to three sets...

Position of mirrors when reversing
To give the driver a better view of the curb when reversing, the outside rearview mirrors can tilt downwards. The factory setting is a certain angle, but the owner can change it. To memorize the...
There is 1 a comment
To give the driver a better view of the curb when reversing, the outside rearview mirrors can tilt downwards. The factory setting is a certain angle, but the owner can change it. To memorize the...
There is 1 a comment
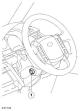
Steering column adjustment
The memory control unit stores the data on the tilt and reach adjustment of the steering column. The tilt and reach adjustment of the steering column is adjusted using the joystick on the left side...
The memory control unit stores the data on the tilt and reach adjustment of the steering column. The tilt and reach adjustment of the steering column is adjusted using the joystick on the left side...

Seat Memory Controller
Item name Spare part catalog number Description 1 - Memory controller The memory controller, located under the driver's seat, receives a number of input signals and generates a number of output...
Item name Spare part catalog number Description 1 - Memory controller The memory controller, located under the driver's seat, receives a number of input signals and generates a number of output...

Heated seats
Front seat heating switches Front seat heaters are available for both manual and power-operated seats. The heaters are controlled by the Automatic Temperature Control Controller (ATCM). When the...
Front seat heating switches Front seat heaters are available for both manual and power-operated seats. The heaters are controlled by the Automatic Temperature Control Controller (ATCM). When the...

Seat control system diagram
NOTE: A = Regular wires; D = local CAN bus Item name Spare part catalog number Description 1 - Driver's door open contact sensor 2 - Driver's seat longitudinal adjustment drive 3 - Driver's seat...
NOTE: A = Regular wires; D = local CAN bus Item name Spare part catalog number Description 1 - Driver's door open contact sensor 2 - Driver's seat longitudinal adjustment drive 3 - Driver's seat...
Diagnostics and testing of seats
General information Seat diagnostics can be divided into three main parts: seat movement, memory and seat heating. The seat heating is controlled by the Automatic Temperature Control Module, so some...
General information Seat diagnostics can be divided into three main parts: seat movement, memory and seat heating. The seat heating is controlled by the Automatic Temperature Control Module, so some...
Index of DTC codes
NOTE: Generic scan tools cannot read the codes listed or can only read 5-digit codes. Match the 5 digits from the scan tool with the first 5 digits of the listed 7-digit code to identify the fault....
NOTE: Generic scan tools cannot read the codes listed or can only read 5-digit codes. Match the 5 digits from the scan tool with the first 5 digits of the listed 7-digit code to identify the fault....

40/20/40 split rear seat
Removal 1. NOTE: Torx head bolts can be reused. Free the back seat. Remove 2 Torx head bolts. Fold the rear seat forward. Disconnect the electrical connector. Remove 2 Torx head bolts. 2. Remove the...
Removal 1. NOTE: Torx head bolts can be reused. Free the back seat. Remove 2 Torx head bolts. Fold the rear seat forward. Disconnect the electrical connector. Remove 2 Torx head bolts. 2. Remove the...

60/40 split rear seat
Removal NOTE: This procedure describes the removal and installation of both the left and right seats. 1. NOTE: Torx head bolts can be reused. Release the right rear seat fastening. Fold the left seat...
Removal NOTE: This procedure describes the removal and installation of both the left and right seats. 1. NOTE: Torx head bolts can be reused. Release the right rear seat fastening. Fold the left seat...

Front Seat Cushion Heater Mat
Removal 1. Remove the front seat cushion upholstery. For more information, refer to Front Seat Cushion Cover (78.30.01) 2. Remove the front seat cushion heater. Installation 1. Install the front seat...
Removal 1. Remove the front seat cushion upholstery. For more information, refer to Front Seat Cushion Cover (78.30.01) 2. Remove the front seat cushion heater. Installation 1. Install the front seat...

Front Seat Back Heating Mat
Removal 1. Remove the front seat back upholstery. For more information, refer to Front Seat Backrest Trim (78.90.08) 2. NOTE: The illustration shows the front seat cushion heating mat. Removing the...
Removal 1. Remove the front seat back upholstery. For more information, refer to Front Seat Backrest Trim (78.90.08) 2. NOTE: The illustration shows the front seat cushion heating mat. Removing the...

Seat guide
Removal 1. Remove the front seat belt buckle. For more information, refer to Front Seat Belt Buckle (76.73.30) 2. Remove the side trim of the front seat cushion. Remove 2 Torx head bolts. Release the...
Removal 1. Remove the front seat belt buckle. For more information, refer to Front Seat Belt Buckle (76.73.30) 2. Remove the side trim of the front seat cushion. Remove 2 Torx head bolts. Release the...

Front seat cushion upholstery
Removal 1. Remove the front seat cushion assembly. For more information, refer to Front Seat Cushion (78.10.12/99) 2. Release the front seat cushion trim fastening. Release the 13 clips. 3. Remove...
Removal 1. Remove the front seat cushion assembly. For more information, refer to Front Seat Cushion (78.10.12/99) 2. Release the front seat cushion trim fastening. Release the 13 clips. 3. Remove...

Third Row Seat Cushion Trim
Removal 1. Remove the auxiliary seat cushion assembly. Remove the 2 Torx bolts. 2. Remove the third row seat cushion latch covers. Remove 4 screws. 3. NOTE: Mark the installation position. Remove the...
Removal 1. Remove the auxiliary seat cushion assembly. Remove the 2 Torx bolts. 2. Remove the third row seat cushion latch covers. Remove 4 screws. 3. NOTE: Mark the installation position. Remove the...

Rear seat back upholstery with 40/20/40 split
Removal 1. Remove the inner seat back hinge cover. Release the side clip of the backrest upholstery. Remove the screw. Release the 2 clamps. 2. Remove the outer cover of the seat back hinge. Remove...
Removal 1. Remove the inner seat back hinge cover. Release the side clip of the backrest upholstery. Remove the screw. Release the 2 clamps. 2. Remove the outer cover of the seat back hinge. Remove...

Rear seat back upholstery with 60/40 split
Removal NOTE: This procedure requires removal of the left and right seat trim. 1. Left seat only: Remove the seat belt retractor cover and guide. Remove the two screws. 2. Remove the rear seat...
Removal NOTE: This procedure requires removal of the left and right seat trim. 1. Left seat only: Remove the seat belt retractor cover and guide. Remove the two screws. 2. Remove the rear seat...

Front seat back upholstery
Removal 1. Switch the SRS system to safe mode. For more information, refer to the Standard Techniques used at the service station. 2. Remove the front seat belt buckle. For more information, refer to...
Removal 1. Switch the SRS system to safe mode. For more information, refer to the Standard Techniques used at the service station. 2. Remove the front seat belt buckle. For more information, refer to...

Third Row Seat Back Upholstery
Removal 1. Fold the seat cushion forward. 2. Remove the inner seat back hinge covers. Release the clamp. 3. Remove the seat back latch covers. Remove 2 screws. 4. Remove the seat back upholstery....
Removal 1. Fold the seat cushion forward. 2. Remove the inner seat back hinge covers. Release the clamp. 3. Remove the seat back latch covers. Remove 2 screws. 4. Remove the seat back upholstery....

Front seat
Removal CAUTION: Before performing any work on the SRS system, read the relevant information carefully. CAUTION: Always disconnect the battery before working on the SRS system. Disconnect the ground...
Removal CAUTION: Before performing any work on the SRS system, read the relevant information carefully. CAUTION: Always disconnect the battery before working on the SRS system. Disconnect the ground...

Front Seat Position Control Switch
Removal 1. Remove the front seat cushion side trim. Remove 2 screws. Release the 3 clamps. 2. Remove the front seat control switch. Disconnect the electrical connector. Remove the front seat control...
Removal 1. Remove the front seat cushion side trim. Remove 2 screws. Release the 3 clamps. 2. Remove the front seat control switch. Disconnect the electrical connector. Remove the front seat control...

Front seat cushion
Removal NOTE: This procedure removes the seat cushion as an assembly. There is a separate procedure for removing the seat cushion trim. 1. Remove the front seat cushion assembly. Release and...
Removal NOTE: This procedure removes the seat cushion as an assembly. There is a separate procedure for removing the seat cushion trim. 1. Remove the front seat cushion assembly. Release and...

Third Row Seat Cushion
Removal NOTE: This procedure removes the seat cushion assembly. There is a special procedure for removing and installing the cushion cover. 1. Remove the third row seat cushion. Remove 2 Allen bolts....
Removal NOTE: This procedure removes the seat cushion assembly. There is a special procedure for removing and installing the cushion cover. 1. Remove the third row seat cushion. Remove 2 Allen bolts....

Third row seat
Removal NOTE: Third row seats must be removed in pairs. 1. Remove the luggage compartment fasteners. Remove the 4 Torx head bolts. 2. Remove the luggage compartment trim panels. Release the 4 clips....
Removal NOTE: Third row seats must be removed in pairs. 1. Remove the luggage compartment fasteners. Remove the 4 Torx head bolts. 2. Remove the luggage compartment trim panels. Release the 4 clips....

Rear seat cushion cover with 40/20/40 split
Removal 1. Remove the outer seatback hinge cover. Fold the rear seat forward. Remove the screw. 2. Remove the inner seat back hinge cover. Release the side clip of the backrest upholstery. Release 2...
Removal 1. Remove the outer seatback hinge cover. Fold the rear seat forward. Remove the screw. 2. Remove the inner seat back hinge cover. Release the side clip of the backrest upholstery. Release 2...

Rear seat cushion cover with 60/40 split
Removal NOTE: This procedure requires removal of the left and right rear seat cushion trim. 1. Fold the seat cushion forward. 2. Release the left rear seat cushion trim. Release the clip. 3. Remove...
Removal NOTE: This procedure requires removal of the left and right rear seat cushion trim. 1. Fold the seat cushion forward. 2. Release the left rear seat cushion trim. Release the clip. 3. Remove...

Front seat tilt motor
Removal 1. Remove the front seat. For more information, refer to Front Seat (78.10.44/99) 2. Remove the front seat cushion side trim. Remove 2 Torx head screws. Release the 3 clamps. 3. Release the...
Removal 1. Remove the front seat. For more information, refer to Front Seat (78.10.44/99) 2. Remove the front seat cushion side trim. Remove 2 Torx head screws. Release the 3 clamps. 3. Release the...

Front seat rail electric motor
Removal NOTE: The front seat runner motor is supplied as part of the front seat lower frame assembly. 1. Remove the front seat. For more information, refer to Front Seat (78.10.44/99) 2. Remove the...
Removal NOTE: The front seat runner motor is supplied as part of the front seat lower frame assembly. 1. Remove the front seat. For more information, refer to Front Seat (78.10.44/99) 2. Remove the...

Front seat height adjustment motor
Removal NOTE: The front seat height adjustment motor is supplied as part of the front seat frame assembly. 1. Remove the front seat belt buckle. For more information, refer to Front Seat Belt Buckle...
Removal NOTE: The front seat height adjustment motor is supplied as part of the front seat frame assembly. 1. Remove the front seat belt buckle. For more information, refer to Front Seat Belt Buckle...
This section is available on russian, bulgarian, belarusian, ukrainian, serbian, croatian, romanian, polish, slovak, hungarian
Similar sections from Land Rover repair manuals:
• Body and coating: Seat belt system Land Rover Freelander 2 (2006-2014)
• Body and coating: Seats Land Rover Range Rover 3 (2001-2012)
• Body and coating: Seats Land Rover Defender 2007+ (2007-2016)
• Body and coating: Seat belt system Land Rover Freelander 2 (2006-2014)
• Body and coating: Seats Land Rover Range Rover 3 (2001-2012)
• Body and coating: Seats Land Rover Defender 2007+ (2007-2016)