


Contents: Dismantling ⇩ Assembly ⇩
Dismantling
1. Remove the left drive shaft.
DRIVE SHAFTS, REPAIR WORK, Drive shaft - front - left.
DRIVE SHAFTS, REPAIR WORK, Drive shaft - front - right.
2. Place the drive shaft in a vice.
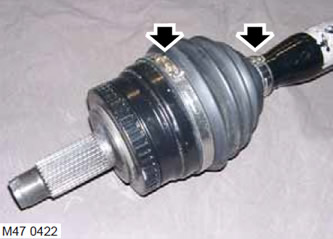
3. Remove and discard both clamps securing the protective cover.
4. Slide the protective cover along the shaft to gain access to the joint.
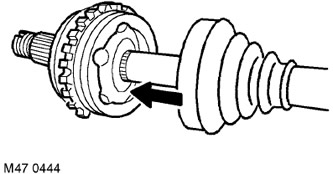
5. Using a punch acting on the inside of the joint, remove the joint from the shaft.
6. Remove and discard the drive shaft retaining ring.
7. Remove the protective cover from the shaft.
Assembly
1. Wipe the drive shaft.
2. Place the new protective cover on the shaft.
3. Install a new snap ring onto the end of the drive shaft.
4. Install the outer constant velocity joint onto the shaft, use a screwdriver to insert the retaining ring into the groove of the joint and slide the joint completely onto the shaft.
5. Lubricate the joint with grease from the tube.
6. Place the protective cover over the joint and secure it to the joint and shaft with new clamps.
7. Install the drive shaft in place.
DRIVE SHAFTS, REPAIR WORK, Drive shaft - front - left.
DRIVE SHAFTS, REPAIR WORK, Drive shaft - front - right.
Comments on this article