Dismantling
1. Put the car on a lift.
2. Disconnect the negative plug from the storage battery.
3. Raise the vehicle on a lift.
4. Raise the vehicle so that the driveshaft can turn.
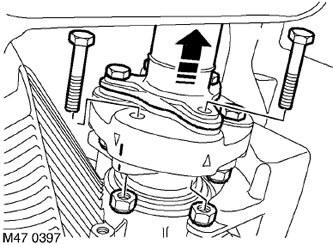
5. Turn away 6 nuts and remove bolts of fastening of a cardan shaft to an elastic coupling Throw away nuts of fastening.
6. Move the cardan shaft back and remove the flexible coupling and centering flange.
7. Mark the cardan shaft and splined bushing of the final drive shank with mounting marks for reassembly.
8. Remove cardan shaft.
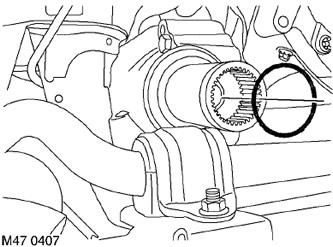
9. Remove and discard the final drive tail spline o-ring.
Assembly
1. Wipe the splines of the cardan shaft.
2. Install a new O-ring.
3. Apply some lubricant to the splines and seal contact surfaces.
FILLING CAPACITIES, USED OPERATING LIQUIDS, OILS AND SEALANTS, Lubrication system.
4. Install the cardan shaft.
5. Check and, if necessary, replace the centering flange gasket.
6. Clean the mating surfaces of the coupling and flange.
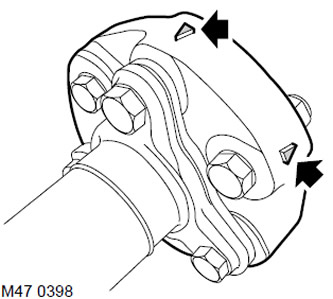
7. Connect the coupling to the flange so that the arrows on the coupling coincide with the position of the mounting bolts, as shown in the figure.
8. Install the clutch mounting bolts and tighten the new nuts to 64 Nm.
9. Lower the car on wheels.
10. Lower the lift.
11. Attach the negative plug to the storage battery.
Comments on this article