Dismantling
1. Put the car on a lift.
2. Disconnect the negative plug from the storage battery.
3. Remove the rear driveshaft.
DRIVE SHAFTS, REPAIR WORKS, Cardan shaft - rear.
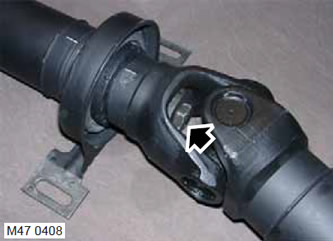
4. Put mounting marks on the propeller shaft to facilitate subsequent assembly.
5. Turn out the screw connecting forward and back parts of a cardan shaft.
6. Remove the rear of the driveshaft.
7. Remove the shim from the shaft.
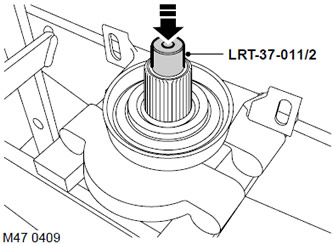
8. Place the press arms under the intermediate support as shown.
9. Install tool LRT-37-011/2 on the end of the cardan shaft and press the shaft out of the bearing.
Assembly
1. Clean the cardan shaft parts, bearing and matching flanges.
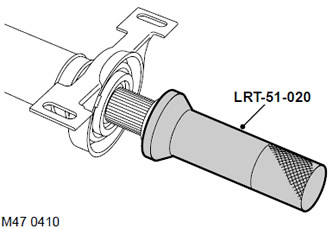
2. Using tool LRT-51-020, install the intermediate support on the cardan shaft.
3. Install the shim on the propeller shaft.
4. Align the mounting marks and splines of the front and rear of the driveshaft.
5. Make sure that the threaded part of the screw connecting the front and rear parts of the propeller shaft is clean and dry, apply Loctite STC 50552 paste to it and tighten it with a torque of 97 Nm.
6. Install the rear driveshaft.
DRIVE SHAFTS, REPAIR WORKS, Cardan shaft - rear.
7. Lower the lift.
8. Connect the negative terminal to the battery.
Comments on this article