Checking
WARNING: Avoid skin contact with used axle oil. Used axle oil contains potentially harmful contaminants that can cause skin cancer or other serious skin conditions.
1. Park the car on a horizontal surface.
2. Using a 13mm square drive wrench, remove the filler/inspection plug.
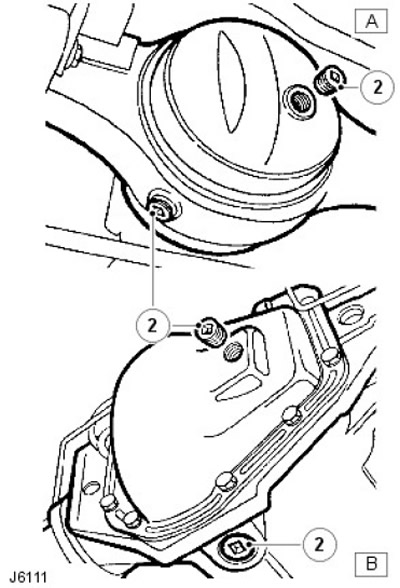
| Pos. | Spare part number | Name |
| A | - | Front and rear axles - models 90; Front axle - models 110/130 |
| B | - | Rear axle - models 110/130 |
3. If necessary, add new oil to the level where oil begins to flow out of the filler/check hole. Drain off excess oil and wipe the surrounding area dry.
For more information, please refer to the chapter: Specifications (205-02 Rear Drive Axle/Differential, Specifications).
4. Clean and screw in the filler/inspection plug.
The article is based on data from the website LRman.ru
Replacement
WARNING: Avoid skin contact with used axle oil. Used axle oil contains potentially harmful contaminants that can cause skin cancer or other serious skin conditions.
1. Place the vehicle on a level, horizontal surface and place a suitable oil drain pan under the axle.
2. Using a 13mm square drive wrench, remove the drain plug and filler/inspection plug from the axle housing and wait until the oil has completely drained.
3. Clean and screw in the drain plug.
4. Fill with new oil until the oil starts to flow out of the filler/check hole. Drain off any excess oil and wipe the surrounding area dry.
5. Clean and replace the filler/inspection plug.
Drive shafts
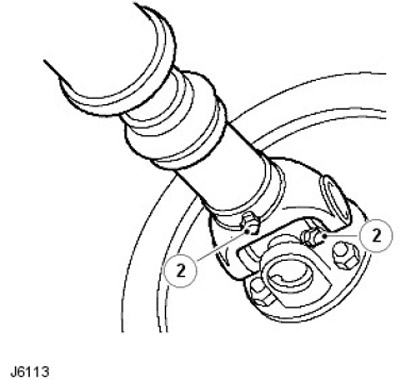
1. Clean the area around the front universal joint grease nipple.
2. Fill the oiler with the recommended grease.
Comments on this article