


Contents: Dismantling ⇩ Assembly ⇩
Dismantling
1. Remove the drive shaft.
DRIVE SHAFTS, REPAIR WORK, Drive shaft - front - left.
DRIVE SHAFTS, REPAIR WORK, Drive shaft - front - right.
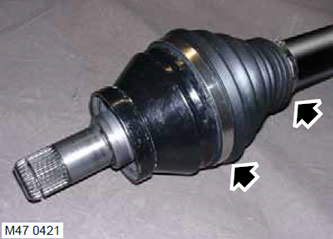
2. Remove and discard both clamps securing the protective cover.
The left drive shaft is shown in the figure.
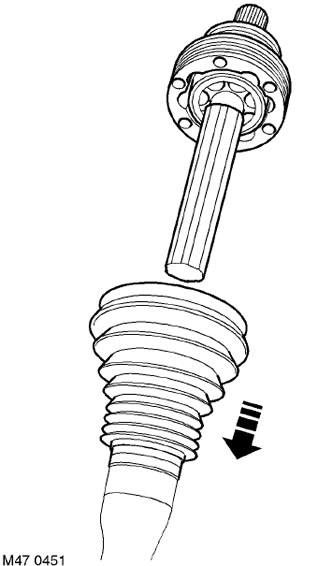
3. Slide the protective cover along the shaft to gain access to the joint.
4. Remove excess grease from the hinge and its inner part.
5. Apply alignment marks to the drive shaft and joint for subsequent assembly.
6. Remove the joint and inner part from the shaft.
7. Remove the protective cover from the shaft and discard it.
Assembly
1. Wipe the drive shaft, joint and interior.
2. Place the new protective cover on the shaft.
3. Install the joint and inner part onto the drive shaft so that the mounting marks align.
4. Lubricate the joint with grease from the tube.
5. Place the protective cover on the joint and secure it to the joint and shaft with new clamps.
The material was taken from a website (lrman.ru)
6. Install the drive shaft in place.
DRIVE SHAFTS, REPAIR WORK, Drive shaft - front - left.
DRIVE SHAFTS, REPAIR WORK, Drive shaft - front - right.
Comments on this article