Contents: Removal ⇩ Installation ⇩
Removal
Warnings:
- After completing repairs, inspect the fuel system for leaks. Failure to do so could result in injury.
- Do not carry or use a cell phone while working with or in the immediate vicinity of any fuel related components. There is a risk of ignition of flammable vapors. Failure to follow these instructions may result in injury.
- Do not smoke or carry a lighted cigarette or open flame of any type when working on or near fuel-related components. There is a risk of ignition of flammable vapors. Failure to follow these instructions may result in injury.
- If fuel gets into your eyes, rinse them with cold water or a special eye wash solution and seek medical attention immediately.
- This procedure involves handling fuel. Always be prepared for possible fuel splashing and use caution when handling fuel. Failure to follow these instructions may result in injury.
- Wash your hands thoroughly after handling fuel, as prolonged contact with the skin may cause irritation. If irritation occurs, seek medical attention.
Warnings:
- Diesel fuel injection equipment is manufactured to very precise tolerances and very small clearances. Therefore, absolute cleanliness is required when working with these components.
- Be sure to plug all open ports and lines. Failure to do so may result in dirt entering the fuel injection system.
- Keep the area of the service station where the vehicle is being worked on as clean and dust-free as possible. Dirt and dust from clutch, brake, machining, or welding work can contaminate the fuel system and cause problems later.
1.
WARNING: Never work on a vehicle supported only by a jack. Always support the vehicle with special stands.
Raise and support the vehicle.
2. Drain the fluid from the cooling system.
For more information, refer to the chapter: Draining/filling coolant and bleeding air from the cooling system (303-03 Engine Cooling - ID4 2.4L Diesel Engine, General Procedures).
3.
Warnings:
- Plug all openings. Use new caps.
- Liquid leakage is inevitable, use a container to collect the leaking liquid.
Disconnect 2 fuel lines.
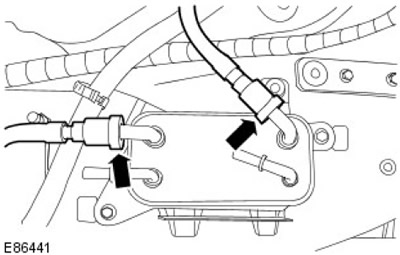
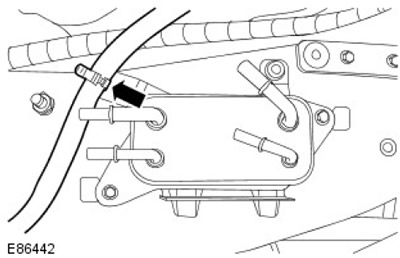
4. Release the fuel return line from the clamp.
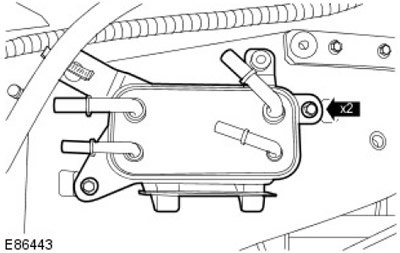
5. Remove the fuel cooler. Remove the two bolts.
Installation
1. Install the fuel cooler. Tighten the bolts (tightening torque 23 Nm).
2. Secure the fuel return line to the clamp.
3.
NOTE: Remove and discard plugs.
Connect the fuel lines.
4. Remove air from the fuel system.
For more information, refer to the chapter: Bleeding Air from the Low Pressure Fuel System (310-00 Fuel Delivery System - General Information, General Procedures).
5. Fill the cooling system with coolant and bleed air from the system.
(The article was taken from this resource: www.LRman.ru)
For more information, refer to the chapter: Draining/filling coolant and bleeding air from the cooling system (303-03 Engine Cooling - ID4 2.4L Diesel Engine, General Procedures).
Comments on this article