Removing
1. Remove the end cap of the control panel on the passenger side.
CAR INTERIOR PARTS, REPAIR WORKS, End panel - control panel.
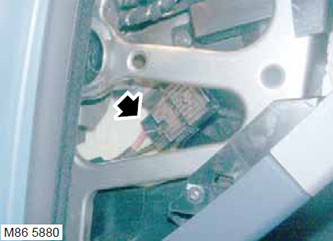
2. Release the relay socket for access. To do this, turn it counterclockwise.
3. Remove the windshield heating relay from the block.
Installation
1. Establish the relay of heating of a windshield in a block.
2. Replace the panel.
CAR INTERIOR PARTS, REPAIR WORKS, End panel - control panel.
3. Replace the end panel.
CAR INTERIOR PARTS, REPAIR WORKS, End panel - control panel.
Comments on this article