Contents: Removal ⇩ Installation ⇩
Removal
1. Remove the door trim panel and plastic covering.
For more information, refer to the chapter: Front Door Trim Panel (501-05 Interior trim, Removal and installation).
2. Remove the reinforcement panel.
For more information, refer to the chapter: Front Door Reinforcement Panel (501-03 Lockable body parts, Removal and installation).
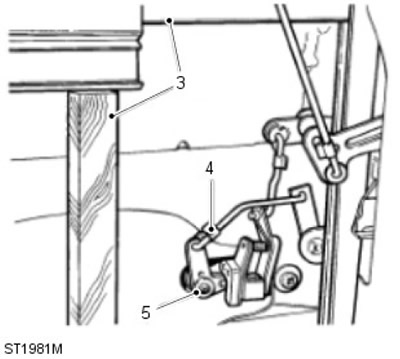
3. Lift and support the glass to gain access to the latch mechanism.
4. Release the spring clip and disconnect the rod from the lock drive lever.
5. Remove one screw and detach the lock lever assembly.
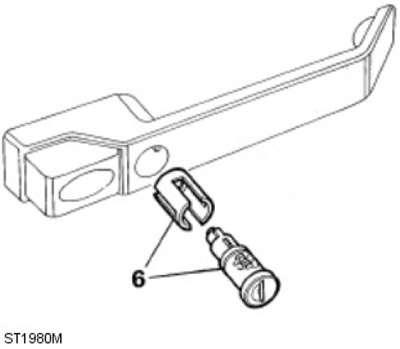
6. Remove the lock cylinder from the outside door handle assembly with the lock sleeve.
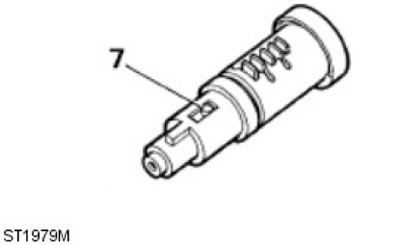
7. To remove the cylinder from the plastic mounting sleeve, press the spring-loaded button and disconnect the sleeve.
Installation
NOTE: If installing a new cylinder, make sure the number on the cylinder matches the number on the supplied key.
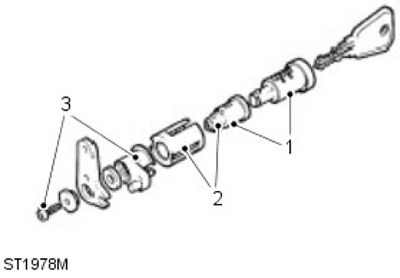
1. Place the plastic mounting sleeve onto the cylinder until the spring-loaded clips are in the required position.
2. Install the cylinder and plastic sleeve assembly onto the locking sleeve and insert into the outer handle, repeating step 6 in reverse order.
3. Assemble the lock lever components as shown in the illustration and, working from the inside of the door panel, insert them into the cylinder assembly and secure with one screw.
4. Connect the rod to the lock lever and secure it with a spring clamp, repeating the operations in step 4 in reverse order.
5. Install the front door reinforcement panel.
For more information, refer to the chapter: Front Door Reinforcement Panel (501-03 Lockable body parts, Removal and installation).
(The article is based on information from the website lrman.ru)
6. Install the plastic sheet.
7. Install the door trim panel.
For more information, refer to the chapter: Front Door Trim Panel (501-05 Interior trim, Removal and installation).
Comments on this article