Removing
1. Remove the door reinforcement panel and support the glass with a board.
For more information, refer to the chapter: Front door reinforcement panel (501-03 Lockable body elements, Removal and installation).
2. Disconnect the drive rod from the handle drive lever.
3. Disconnect the drive link from the locking lever on the handle.
4. Disconnect the push button drive rod and linkage from the latch mechanism.
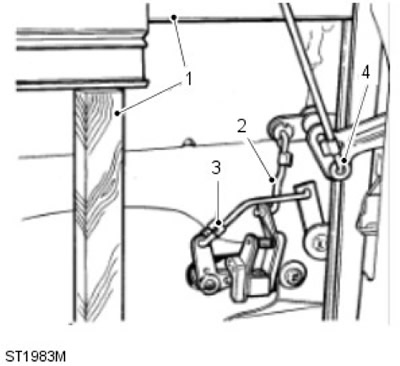
5. Remove the two screws and remove the handle assembly from the door.
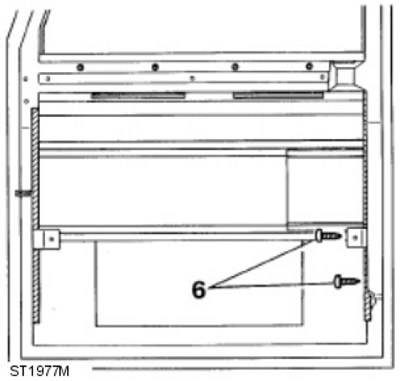
6. Remove the two self-tapping screws securing the lower end of the window glass guide.
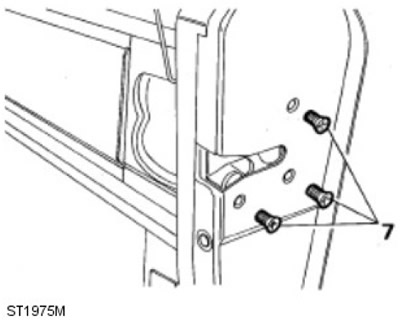
7. Remove the three screws securing the latch assembly to the door.
8. Being careful not to damage the guide, disconnect it from the latch and remove the latch assembly from the door.
Installation
1. Gently slide the window rail back just enough to allow the latch to slide into place.
2. Attach the latch to the door with three screws.
3. Secure the window rail with two screws, making sure the gasket is in place and the screw heads are below the bottom end of the rail (to avoid glass damage).
4. Install the handle and secure it with two screws, making sure the bezel stays in place.
5. Connect drive rod to handle drive arm and secure with spring clip.
6. Connect the drive rod to the locking lever and secure with the spring clip.
7. Connect the push button drive rod and linkage to the latch lever and secure with the spring clip.
8. Install the base plate.
For more information, refer to the chapter: Front door reinforcement panel (501-03 Lockable body elements, Removal and installation).
Comments on this article