


Contents: Removal ⇩ Installation ⇩
Removal
1. Remove the door trim panel.
For more information, refer to the chapter: Rear Door Trim Panel (501-05 Interior trim, Removal and installation).
2. Carefully remove the plastic sheet to reveal the mechanism.
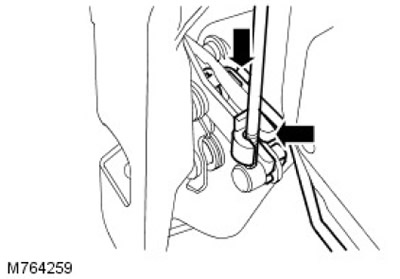
3. Release the clamp, disconnect and remove the lock solenoid rod.
4. Release the clamp and disconnect the inner handle rod from the latch mechanism.
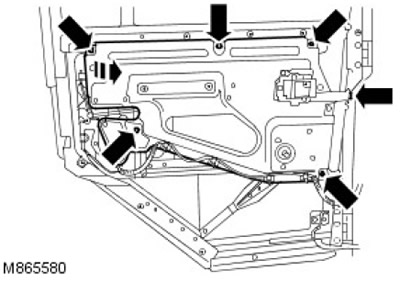
5. Remove the 3 screws securing the support panel.
6. Loosen the remaining bolts and nut, move the support panel away from the door and keep it in this position for access.
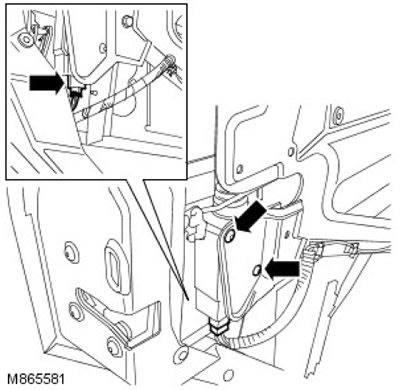
7. Disconnect the electrical connector of the solenoid.
8. Remove the 2 screws securing the electromagnet.
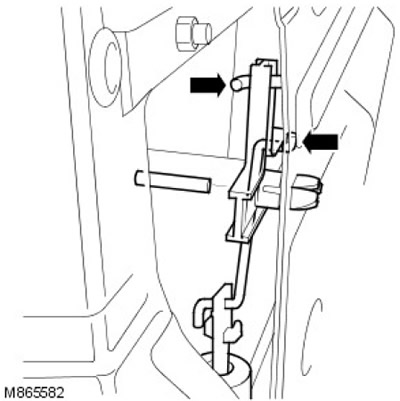
9. Remove the center pin from the crankshaft axle and release the axle from the support panel.
10. Disconnect the crank from the lock button rod and remove it from the lock solenoid rod.
11. Remove the door lock solenoid.
12. Remove the rod from the electromagnet.
Installation
1. Connect the rod to the electromagnet, install the electromagnet, install the crank lever and connect the lock buttons to the rod.
[The original article is located on: LRman.ru]
2. Secure the crank arm to the support panel and install the center pin.
3. Check the position of the electromagnet and screw in and tighten the screws.
4. Connect the electrical connector of the solenoid.
5. Screw in the support panel bolts and tighten all bolts and nut to 10 Nm (7 ft·lbs).
6. Connect the inner handle rod to the latch and secure with the clamp.
7. Install and secure the electromagnet rod.
8. Install the plastic sheet.
9. Install the door trim panel.
For more information, refer to the chapter: Rear Door Trim Panel (501-05 Interior trim, Removal and installation).
Comments on this article