Contents: Dismantling ⇩ Assembly ⇩
This operation also applies to the rear door lock.
Dismantling
1. Make sure the door glass is fully raised.
2. Remove the plastic shield from the door panel.
DOORS, REPAIR WORK, Plastic shield of the door panel - front door.
DOORS, REPAIR WORK, Plastic shield of the door panel - rear door.
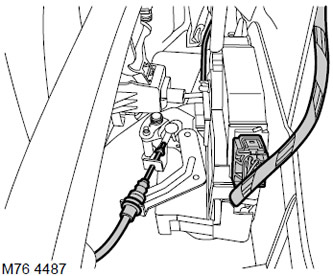
3. Disconnect the lock button rod from the door lock.
4. Remove the rod.
5. Disconnect the connector block from the door lock.
6. Disconnect the manual door opening cable from the lock assembly.
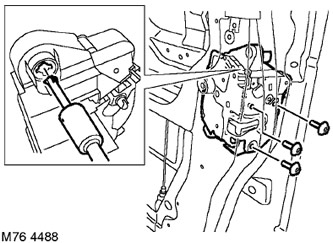
7. Remove the 3 screws securing the lock to the door.
8. On the driver's door, release the locking drum cover from the lock.
9. Remove the lock assembly through the opening in the door.
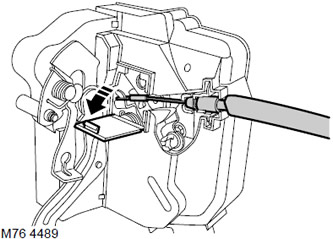
10. Remove the lock assembly with the door release cable from the inside.
11. Open the protective cover of the lock.
12. Release the release cable retainer from the lock.
13. Separate the release cable from the lock.
14. Remove the release cable.
Assembly
1. Attach the release cable to the lock and close the lock protective cover.
2. Install the lock into the door. On the driver's door, align the locking drum cover with the lock.
3. Install the Torx lock mounting screws and tighten them to 10 Nm.
4. Attach the outer door opening cable to the lock.
5. Connect the shoe to the lock connector.
6. Attach the lock button rod to the lock.
7. Check how the door lock works.
8. Install the door panel plastic shield.
DOORS, REPAIR WORK, Plastic shield of the door panel - front door.
DOORS, REPAIR WORK, Plastic shield of the door panel - rear door.
Comments on this article