Contents: Dismantling ⇩ Assembly ⇩
Dismantling
1. Remove the rear door glass.
DOORS, REPAIR WORK, Rear door glass.
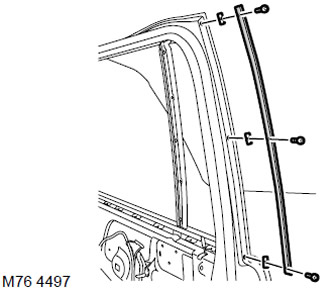
2. Remove the 3 screws securing the rear trim to the door frame and remove the trim.
3. Remove the rear trim retaining clips from the door frame.
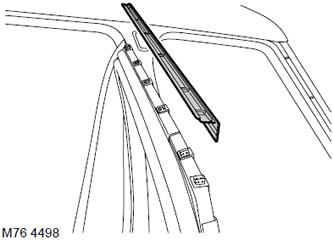
4. Remove the upper door trim.
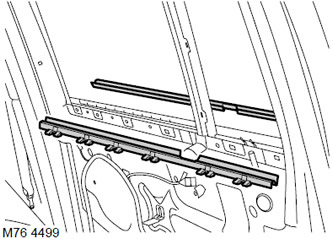
5. Remove the outer seal.
6. Remove the inner seal.
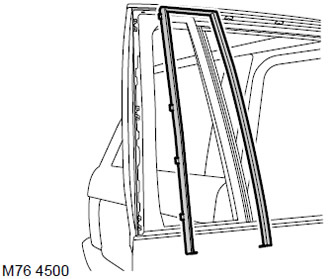
7. Remove the outer trim of the fixed glass.
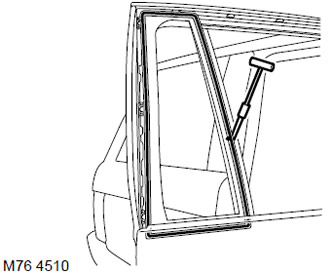
8. Using a cutter, carefully cut through the seal between the glass and the door frame.
9. Remove the fixed side glass.
Assembly
1. Carefully remove any remaining seal from the door frame to create a smooth surface.
2. Processing the removed glass: Carefully remove the remaining sealant to obtain a smooth surface without damaging the darkening tape.
3. Wipe the glass and door frame surfaces in contact with the seal with solvent.
4. Treat the areas of the door frame where bare metal is visible with a phosphoric acid etching solution.
5. Apply primer to the etched areas of the body.
6. Install the pre-cut tip onto the sealant cartridge, remove the cap, shake the cartridge and install it onto the sealant gun. If necessary, reshape the tip to obtain the desired sealant bead cross-section.
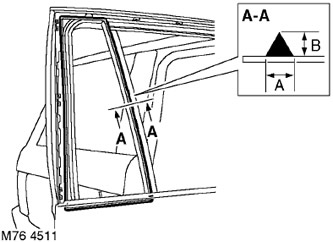
7. Apply a continuous bead of sealant to the door frame. Dimension 'A' = 7 mm. Dimension 'B' = 11 mm.
8. Install and center the glass in the door frame. Press the glass lightly to ensure a tight connection with the seal.
9. Install the glass trim.
10. Install the inner door seal.
11. Install the outer door seal.
12. Install the upper door trim.
13. Install the rear trim retainers onto the door frame.
14. Install and secure the rear door trim.
15. Install the rear door glass.
DOORS, REPAIR WORK, Rear door glass.
16. Check the tightness of the seal. If necessary, apply additional sealant. If water is used to check the tightness, allow the seal to dry before checking. Run a stream of water over the peripheral surface of the door glass and check whether water leaks into the passenger compartment. Mark the leaks. Dry the glass and seal, then apply additional sealant.
Comments on this article