


Contents: Removal ⇩ Installation ⇩
Removal
1. Disconnect the ground wire from the battery.
For more information, refer to the chapter: Disconnecting and connecting the battery (414-01 Battery, Battery Mounting and Cables, General Procedures).
2.
WARNING: Never work on a vehicle supported only by a jack. Always support the vehicle with special stands.
Raise and support the vehicle.
3.
NOTE: Place a container to collect any spilled liquid.
Disconnect the left exhaust gas recirculation (EGR) heat exchanger coolant hose.
- To minimize coolant loss, clamp the hoses.
- Release the clamp.
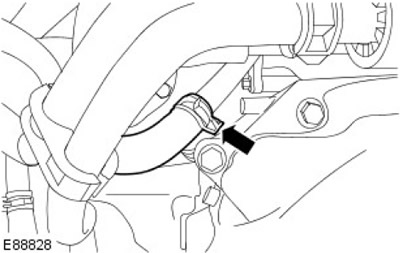
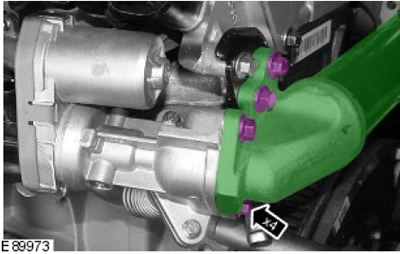
4. Disconnect the EGR heat exchanger from the EGR valve and from the EGR heat exchanger bracket.
- Remove 4 bolts.
- Remove the gasket and discard it.
5. Disconnect the right EGR heat exchanger coolant hose.
- To minimize coolant loss, clamp the hoses.
- Release the clamp.
- Disconnect the coolant hoses from the EGR heat exchanger.

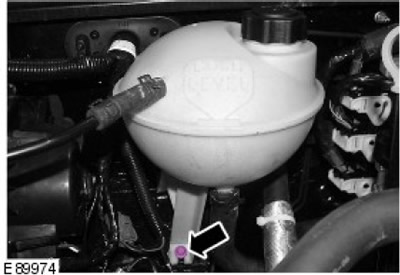
6. Reinstall the coolant expansion tank. Remove the bolt.
7.
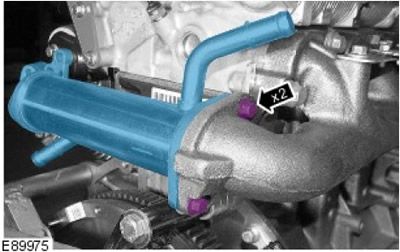
NOTE: Engine shown removed for clarity.
Remove the EGR cooler.
- Remove two bolts.
- Remove the gasket and discard it.
Installation
1.
NOTE: Clean the contact surfaces of the elements.
Install a new EGR heat exchanger.
- Install a new gasket.
- Tighten the bolts (tightening torque 23 Nm).
2. Secure the expansion tank of the cooling system. Tighten the bolt (tightening torque 10 Nm).
3. Connect the right EGR heat exchanger coolant hose.
- Secure with a clamp.
- Attach the coolant supply hoses to the EGR heat exchanger.
- Remove the clamps from the hoses.
4. Attach the EGR heat exchanger to the EGR valve and EGR heat exchanger bracket.
- Install a new gasket.
- Tighten the bolts (tightening torque 23 Nm).
5. Connect the left EGR heat exchanger coolant hose.
- Secure with a clamp.
- Remove the clamps from the hoses.
- Remove the container.
6. Connect the ground wire to the battery.
For more information, refer to the chapter: Connecting the Battery (414-01 Battery, Battery Mounting and Cables, General Procedures).
7. Check the coolant level and top up if necessary.
Comments on this article