Removing
1. Put the car on a lift.
2. Disconnect the wire "masses" from the battery.
3. Remove the switch of system of dynamic stabilization. For more information, refer to Switch for optimizing suspension and handling performance (86.65.11)
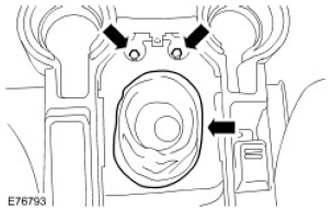
4. Disconnect a basic arm of the mechanism of a gear change.
- Remove the 2 gearshift support bracket bolts.
- Remove a protective cover of the lever of a gear change.
5.
WARNING: It is forbidden to carry out work on a vehicle supported only by a jack. Always place secure supports under the vehicle.
Raise and support the vehicle.
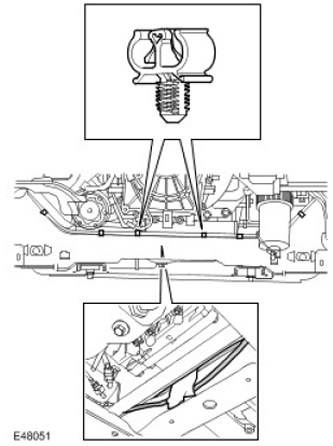
6. Remove the fuel tank heat shield. Remove 3 bolts and remove 2 nuts.
7.
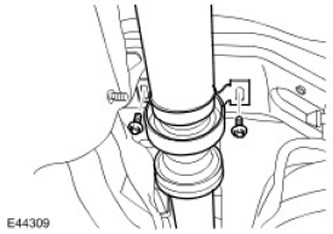
CAUTION: Mark the position of the driveshaft flange in relation to the pinion flange.
CAUTION: To avoid damaging the pivot or boot, do not allow the drive shaft to hang unsecured on one side.
Disconnect the drive shaft from the transfer case drive flange. Remove 6 Torx head screws and washers.
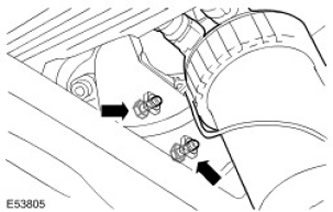
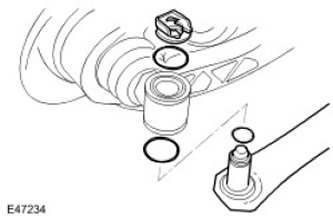
8. Turn out 2 bolts of fastening of a support of the central bearing of a power shaft.
9.
CAUTION: To avoid damaging the pivot or boot, do not allow the drive shaft to hang unsecured on one side.
Using a suitable clamp, move and secure the drive shaft to the exhaust system.
10. Remove the engine bottom cover. For more information refer to Motor Protection (76.10.50)
11. Remove the front drive shaft. For more information refer to Front Driveshaft - 2.7L Diesel (47.15.02)
12. Remove the heat shield of the exhaust system.
- Remove the 2 front exhaust heat shield nuts.
- Release the bulkhead heat shield.
- Remove the 5 remaining exhaust heat shield nuts.
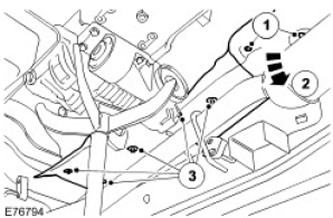
13. Turn out 2 bolts of a basic arm of a turbocharger.
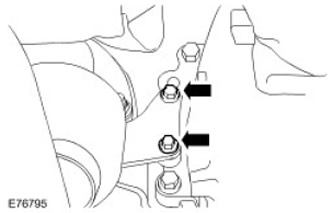
14. Loosen the turbocharger support bracket nut and move the turbocharger support bracket.
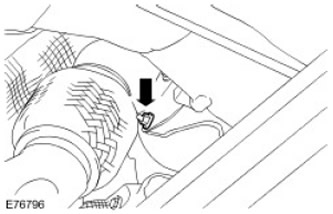
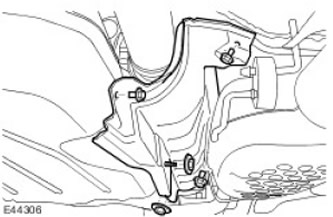
15. Release and move the fuel cooler.
16. Remove the fuel filter housing and support bracket. Turn out 2 bolts.
17. Attach the vacuum hose to the front of the chassis cross member.
- Release 6 clips.
- Secure the part with adhesive tape.
- Remove 2 clips.
18.
WARNING: The prescribed hose clamp must be used.
CAUTION: Before disconnecting or removing components, make sure that the area around the contact surfaces and connections is clean. Close all open connections to avoid contamination of the system.
Disconnect the clutch fluid hose.
- Remove the clamp.
- Secure the hose with a clamp.
- Remove the O-ring and discard it.
- Remove the clamp.
- Remove the o-rings and discard them.
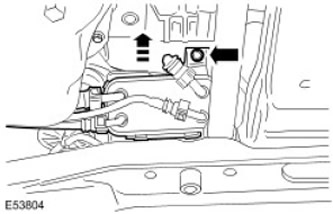
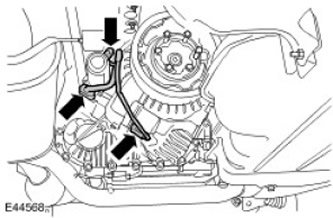
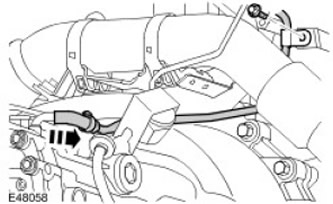
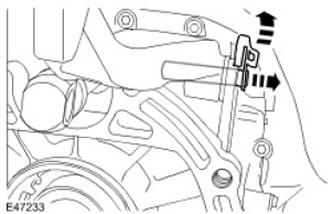
20. Remove the wiring harness from the transfer case.
- Disconnect the 3 electrical connectors of the transfer case.
- Turn out a bolt of a plait of electroconducting.
- Release the wiring harness from the clamp.
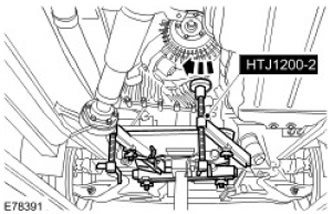
21. Install the special tool on the gearbox. Attach the gearbox to the special tool.
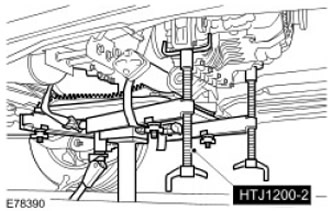
22. Lower the rear of the transmission to provide access.
23. Disconnect the wiring harness from the gearbox.
- Disconnect 2 electrical connectors.
- Turn out 2 bolts.
- Release the wiring harness from the clamp.

24.
CAUTION: Be sure to plug all open connections to avoid contamination of the system.
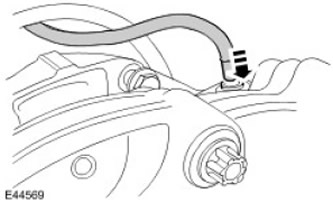
Disconnect the transmission breather line.
25.
CAUTION: Be sure to plug all open connections to avoid contamination of the system.
Disconnect the transfer case vent line.
26. Remove the left bypass exhaust pipe support bracket. Turn out 3 bolts.
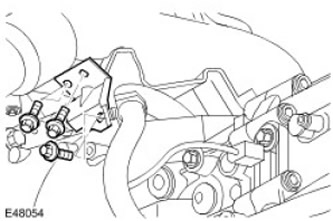
27. Remove the right exhaust bypass pipe support bracket. Turn out 3 bolts.
28. Move the wiring harness to gain access to the center support bracket for the exhaust bypass pipe.
29. Remove the center support bracket for the bypass exhaust pipe. Turn out 2 bolts.
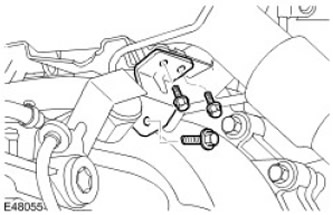
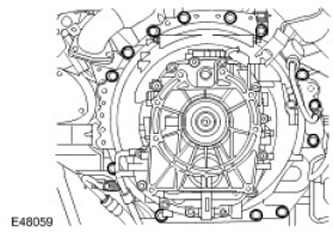
30. Turn out 14 bolts of a transmission.
31.
WARNING: Make sure the gearbox remains horizontal.
Disconnect the gearbox from the engine and move it back 40 mm.
32. Using a gearbox jack, rotate the gearbox to gain access to the shift mechanism.
33.
NOTE: The transfer box has been removed for clarity.
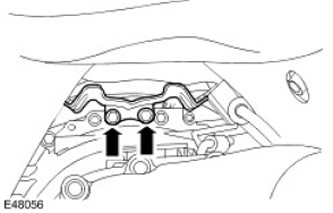
Disconnect the gearshift mechanism from the gearbox.
- Release the clamp.
- Disconnect the pin.
34.
WARNING: Make sure the gearbox remains horizontal.
Remove the gearbox with an assistant.

35. Remove the transmission from the transmission jack.
Comments on this article