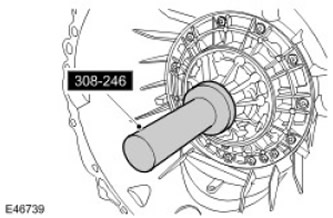
Special tool
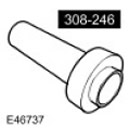 Torque converter seal installer 308-246 Torque converter seal installer 308-246 | 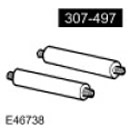 Torque converter support handles 307-497 (LRT-44-010) Torque converter support handles 307-497 (LRT-44-010) |
Removing
1.
WARNING: It is forbidden to carry out work on a vehicle supported only by a jack. Always place secure supports under the vehicle.
Raise and support the vehicle.
2. Remove the transfer case. For more information refer to Transfer case - 4.0L (41.20.25.99)
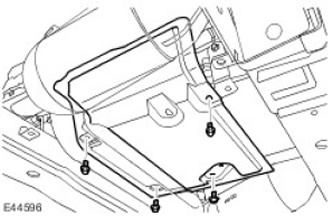
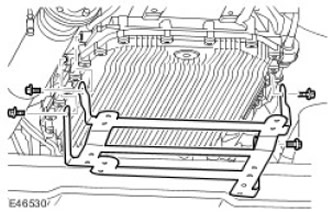
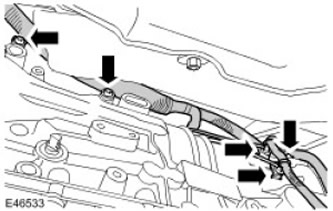
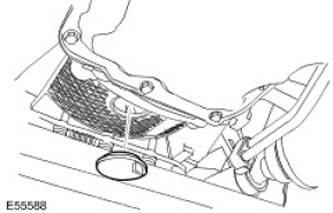
3. Remove the transmission heat shield. Turn out 4 bolts.
4. Disconnect the selector cable.
- After securing the clamping sleeve with an additional wrench, loosen the locknut.
- Press the latch and release the cable.
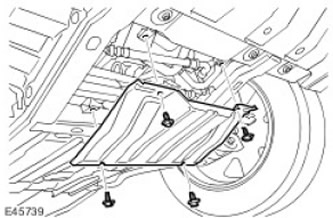
5. Remove the transmission heat shield bracket. Turn out 4 bolts.
6. Remove the fuel line heat shield.
- Turn out 2 bolts.
- Disconnect the fuel lines from the 3 clamps.
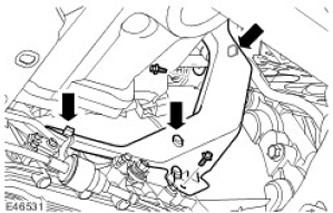
7. Remove the radiator access panel. Turn out 4 bolts.
8.
CAUTION: Be sure to plug all open connections to avoid contamination of the system.
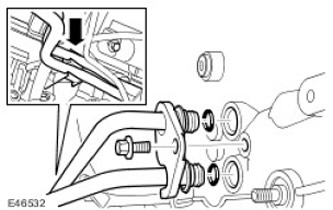
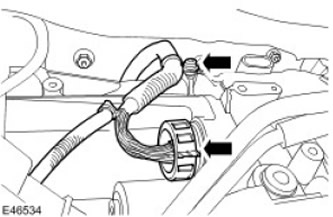
Disconnect transmission lines.
- Turn out a bolt.
- Release the clamp.
- Remove and discard both O-rings.
9. Disconnect the wiring harness from the left side of the transmission.
- Remove 3 Torx screws.
- Release 2 clips.
10. Disconnect the wiring harness from the right side of the transmission.
- Remove the Torx screw.
- Disconnect the electrical connector.
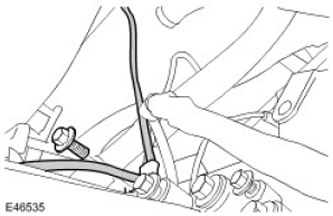
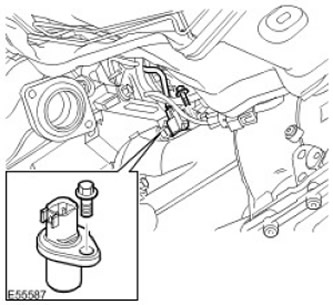
11. Release the transmission breather line clamp. Turn out a bolt.
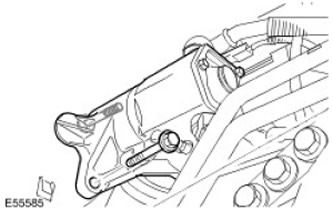
12. Unfasten the starter.
- Turn out 2 bolts.
- Take the starter aside and tie it down.
13. Disconnect the floppy disk.
- Rotate the crankshaft to access the bolts.
- Turn out 4 bolts.
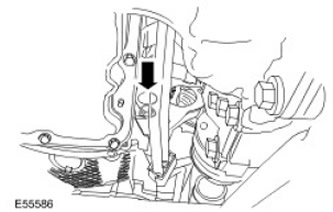
14. Remove the crankshaft position sensor (TFR).
- Disconnect the electrical connector.
- Turn out a bolt.
15. Remove the access port plug.
16.
CAUTION: Support the engine. When the transmission is removed, the engine will drop forward.
CAUTION: Support the transmission on a transmission jack.
CAUTION: Make sure the torque converter is not disconnected from the transmission.
Remove the gearbox with an assistant.
- Jack up the transmission using a transmission jack.
- Remove 8 bolts.
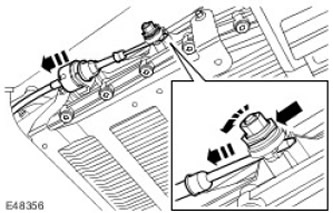
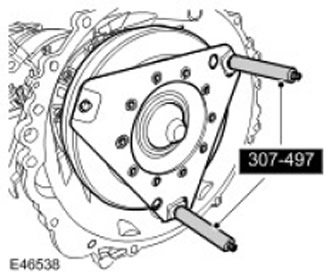
17. Install the torque converter holder.
18.
NOTE: Do not further disassemble if the part is removed only for access.
Remove the transmission from the transmission jack.
19. Remove the torque converter holder.
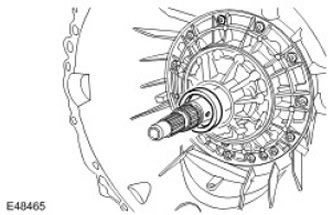
20. Using the special tools, remove the torque converter.
21. Carefully remove and discard the torque converter fluid seal.
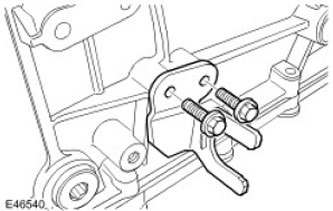
22. Remove the selector cable bracket. Turn out 2 bolts.
23.
CAUTION: Be sure to plug all open connections to avoid contamination of the system.
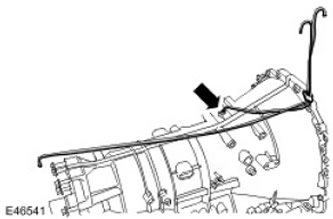
Remove transmission breather pipes. Squeeze the retaining ring.
24. Remove the selector lever. Loosen the nut.
Installation
CAUTION: If the automatic transmission fluid is very dirty or contains metal particles, install a new transmission fluid cooler and new lines at the same time as the new transmission.
1. Fix the selector lever. Tighten the nut with a tightening torque of 12 Nm.
2. Install transmission breather lines. Fasten with a clip.
3. Attach the selector cable bracket. Tighten the bolts with a tightening torque of 10 Nm.
4. Using the special tool, install a new torque converter oil seal. Clean the sealing face.
5.
CAUTION: Make sure the torque converter is fully engaged in the oil pump drive.
Install the torque converter.
- Clean the contact surface of the seal.
- Remove special tools.
7.
CAUTION: Support the transmission on a transmission jack.
Place the gearbox on a gearbox jack.
8. Remove the torque converter holder.
9.
CAUTION: Apply recommended grease to torque converter bushing. For more information, refer to Specification
Install the gearbox with an assistant.
- Clean the contact surfaces of the parts.
- Tighten the bolts with a tightening torque of 45 Nm.
- Rotate the crankshaft to access the bolts.
- Tighten the bolts with a tightening torque of 45 Nm.
12. Connect the wiring harness.
- Tighten the Torx screws.
- Connect the electrical connector.
- Clear the details.
- Install new o-rings.
- Fasten with a clip.
- Tighten the bolt with a tightening torque of 10 Nm.
- Tighten the bolts with a tightening torque of 10 Nm.
- Fasten with clips.
16. Fasten the selector cable.
17. Install the transfer case. For more information refer to Transfer case - 4.0L (41.20.25.99)
18. Adjust the selector cable. For more information, refer to Selector Lever Cable Adjustment (44.30.04)
19. Check the transmission fluid level and top up if necessary. For more information, refer to Checking the Transmission Fluid Level (44.24.06)
20. Install the transmission heat shield. Tighten the bolts with a tightening torque of 10 Nm.
Comments on this article