Dismantling
1. Remove the heater, fan and air conditioner assembly (HEVAC).
HEATING AND VENTILATION, REPAIR WORK, Heater assembly / heater, ventilation and air conditioning control unit (HEVAC) - dismantling for easier access and installation.
2. Turn the HEVAC unit upside down.
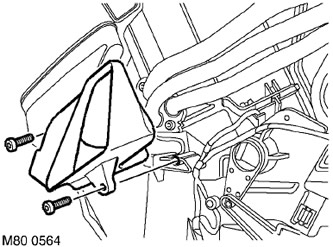
3. Remove the 2 Torx screws securing the left duct elbow to the HEVAC unit. Remove the duct elbow.
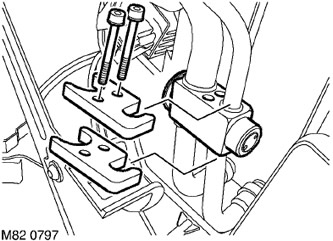
4. Turn out 4 screws like Torx and remove a spring clamp from the right knee of an air duct of a heater. Remove the duct elbow.
5. Disconnect the connector from the evaporator sensor connector, release the cable and remove the evaporator sensor.
6. Disconnect the connector block and remove the fan motor that supplies air to the rear of the passenger compartment.
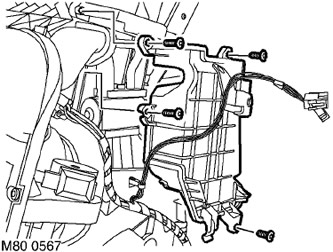
7. Remove the 4 Torx screws securing the TXV box cover and move it to the side.
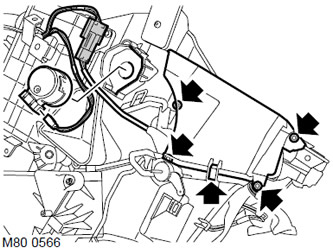
8. Remove the 7 Torx screws and 3 spring clips from the bottom access panel of the HEVAC unit.
9. Release the two latches and remove the access panel.
10. Remove 2 Allen type screws securing A/C piping to TXV unit, release retainers, disconnect piping, remove and discard O-rings.
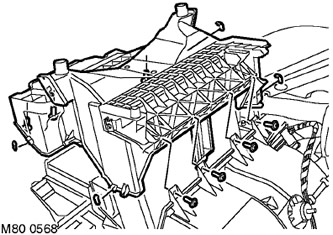
11. Remove the TXV block.
12. Remove the evaporator assembly.
Assembly
1. Clean the mating surfaces and sealing locations of the evaporator, TXV unit, and A/C piping.
2. Lubricate new O-rings with clean special oil and install them on the evaporator lines.
3. Replace the evaporator assembly.
4. Install the TXV unit on the air conditioner piping, install the clamps, tighten the fixing screws and tighten them with a torque of 6 Nm.
5. Install and secure the access panel.
6. Install and secure the cover of the TXV unit.
7. Install the electric motor on the heater unit, connect the connector block.
8. Carefully install the evaporator sensor and secure the bushing.
9. Attach the connector block to the sensor and secure the cable.
10. Install the right heater duct elbow onto the HEVAC unit and secure with the retainer and screws.
11. Install the left elbow of the heater air duct on the HEVAC unit and secure it with screws.
12. Install the HEVAC unit in the control panel.
HEATING AND VENTILATION, REPAIR WORK, Heater assembly / heater, ventilation and air conditioning control unit (HEVAC) - dismantling for easier access and installation.
Comments on this article