


Contents: Dismantling ⇩ Assembly ⇩
Before disconnecting the battery, make sure that all requirements and conditions contained in the section on disconnecting the battery are met.
GENERAL INFORMATION, Precautions when working with electrical equipment.
Dismantling
1. Place the vehicle on a lift.
2. Disconnect the negative battery terminal.
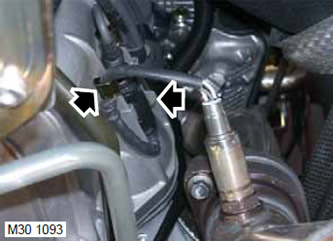
3. Loosen the clamp securing the upper oxygen sensor wire, remove the connector from the mount and disconnect it.
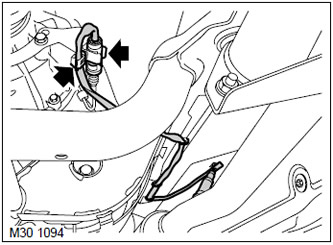
4. Remove the wires of the lower heated oxygen sensors from the clamp, disconnect the connector.
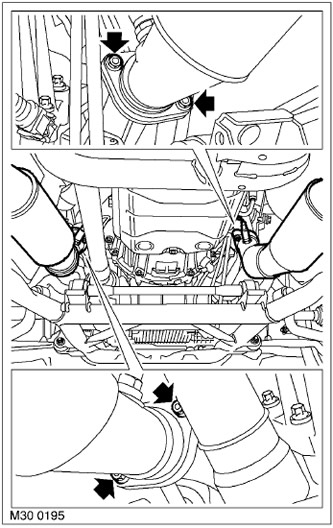
5. Unscrew and dispose of the 4 nuts securing the intake pipe flange to the exhaust manifold, disconnect the intake pipe from the manifold and set it aside.
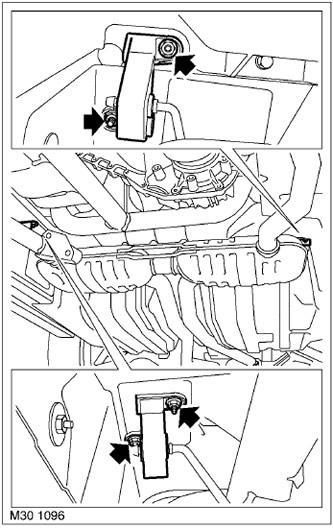
6. Unscrew and dispose of the 4 nuts securing the middle muffler suspension to the body.
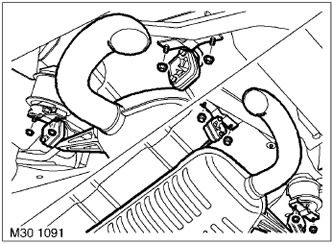
7. Unscrew the 8 nuts securing the rear muffler suspension cushion to the body and, with the help of a partner, remove the exhaust system assembly from the vehicle.
NOTE: If disassembly was performed only to provide access to other system components, no further disassembly operations should be performed.
8. Unscrew 2 nuts and remove the inertia shock absorber.
9. Remove 6 rubber cushions from the main system assembly, remove the rubber cushions from the system suspension points on the body.
10. Remove the downstream heated oxygen sensors (HO2S) from the exhaust system and discard the sealing washers.
Assembly
1. Install the inertia shock absorber and tighten the bolts. Tightening torque 25 N·m.
2. Install the exhaust system suspension cushions in place.
3. Wipe the flanges of the inlet pipe and outlet manifold.
4. Wipe the heated oxygen sensor (HO2S) housings, sealing washers and mating surfaces.
5. Install new sealing washers on the oxygen sensors (HO2S) and lubricate the threads on the sensors with anti-seize grease. Screw in and tighten the sensors. Tightening torque is 50 N·m.
CAUTION: Be careful not to allow anti-seize grease to come into contact with the active portion of the oxygen sensor (HO2S).
6. Install rubber pads on the system suspension points and on the main system assembly.
7. With the help of a partner, install the exhaust system on the car, align the flanges, lightly tighten the bolts and nuts. Attach the rear pair of muffler brackets to the body and lightly tighten the bolts.
8. Attach the remaining system fastening elements to the body, screw on the nuts and tighten them to a torque of 25 Nm.
9. Check the correct position of the exhaust system.
10. Align the exhaust system flanges and tighten the new nuts evenly. Tightening torque 45 N·m.
11. Connect the negative battery terminal.
12. Start the engine. With the engine running, check the exhaust system for leaks. (no exhaust gas breakthrough).
The original source of the article is the website www.LRman.ru
Comments on this article