WARNING: In order for the smoke test equipment to work correctly, the pressure in the compressed air supply line must be between 3.5 and 12 bar (50-175 psi). Exceeding the maximum pressure is not allowed. Failure to follow this instruction may result in damage to the smoke leak test equipment.
NOTE: Before performing this procedure, make sure the vehicle battery is fully charged and serviceable.
NOTE: On vehicles with a 3.0L TDV6 engine, both air filter outlets must be smoked, regardless of whether or not the right turbocharger and related hoses are to be checked.
NOTE: In some cases, it may be necessary to remove pans, trim panels, or engine cover to gain access to all potential leaks.
NOTE: The illustrations may differ in some details, but the fundamental points are completely true.
NOTE: For more detailed information on the operation of the smoke leak test equipment, refer to the equipment manufacturer's instruction manual supplied with the equipment.
1.
WARNING: If the smoke test equipment is attached to the hood, use additional support to prevent the hood from falling off. Failure to do so may result in injury.
Install the smoke leak test equipment in an appropriate location under the hood.
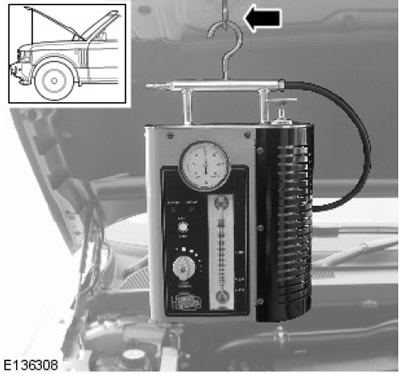
2. Connect a suitable compressed air line to the smoke test equipment.
3. Connect the positive power lead of the smoke leak test equipment to the positive battery terminal.
4.
WARNING: Do not connect the negative cable of the smoke leak test equipment to the negative battery terminal.
Connect the negative lead of the smoke leak test equipment to a suitable ground point on the vehicle body.
5.
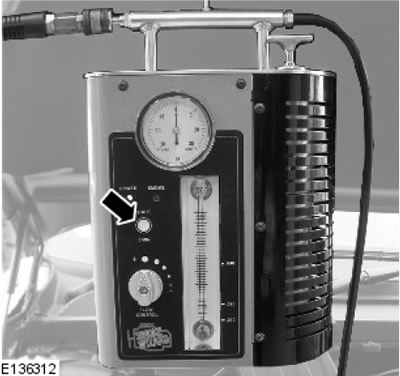
NOTE: A flashing green light indicates low battery voltage. In this case, charge the battery and ensure that the battery is fully charged before using the smoke leak test equipment.
Observe the power indicator LED on the smoke leak test equipment. Make sure the indicator is solid green.

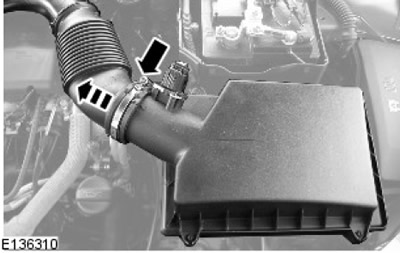
6.
NOTE: In some cases, it may be necessary to remove the air filter (filters), to access the air filter outlet pipes.
NOTE: In some cases it may be necessary to plug one of the air filter outlets. To close the hole, use the plugs included in the delivery.
Disconnect the outlet (branch pipes) air filter.
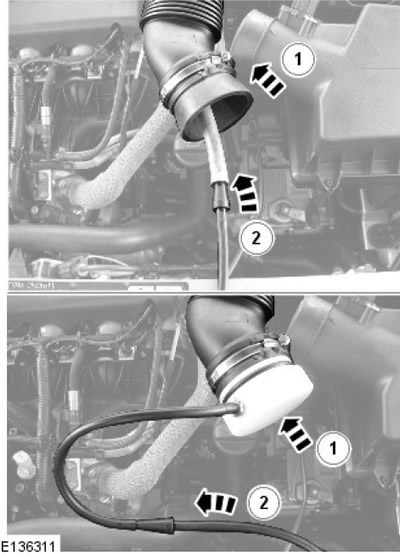
7.
NOTE: Ensure that the fume leak test equipment adapter is firmly attached to the air filter outlet. This connection must be airtight.
Connect the supply hose of the smoke leak test equipment to the air filter outlet.
- 1. Install the appropriate adapter on the air filter outlet.
- 2. Connect the supply hose of the smoke leak test equipment to the connection hose of the adapter.
8.
NOTE: The flow control must be in the fully open position.
NOTE: Smoke is generated for 5 minutes. The smoke-tight equipment switches off automatically after this time has elapsed.
Turn on the smoke test equipment.
9. Remove the oil filler cap and wait until a continuous stream of smoke comes out of the oil fill hole. Install the oil filler cap.
10.
NOTE: The longer the smoke leaves the leak, the more the leak will stain with the fluorescent dye.
With the help of the flashlight included in the package, look at the escaping smoke, illuminating it with white light. Alternatively, use an ultraviolet lamp to look for fluorescent dye deposits at the leak.
Comments on this article