Contents: Dismantling ⇩ Assembly ⇩
Before disconnecting the battery, make sure that all requirements and conditions contained in the section on disconnecting the battery are met.
GENERAL INFORMATION, Precautions when working with electrical equipment.
NOTE: When removing the control panel support, mark the cable routing locations.
This will help you route and install the cables correctly when installing the support on your vehicle.
Dismantling
1. Follow all safety rules when working with passive safety systems.
GENERAL INFORMATION, Safety precautions when working with the airbag system (SRS).
2. Remove the center console.
CAR INTERIOR PARTS, REPAIR WORK, Center console.
3. Remove the passenger airbag.
RESTRAINT SYSTEMS FOR DRIVER AND PASSENGERS, REPAIR WORK, Airbag module - front passenger.
4. Remove the air suspension control panel.
CAR INTERIOR PARTS, REPAIR WORK, Switch panel - air suspension.
5. Remove the lower control panel shields.
CAR INTERIOR PARTS, REPAIR WORK, Side panel - center console.
6. Remove the cassette and CD player unit.
NAVIGATION AND ON-BOARD ENTERTAINMENT SYSTEM, REPAIR WORK, Cassette/CD player.
7. Remove the instrument panel.
INSTRUMENTS, REPAIR WORK, Instrument panel.
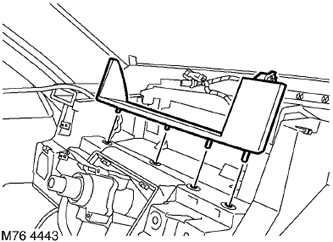
8. Loosen and remove the lower instrument panel trim.
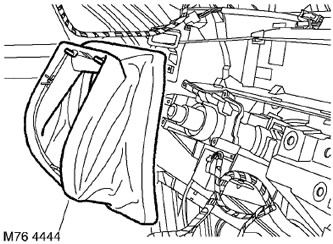
9. Loosen and remove the upper steering column housing.
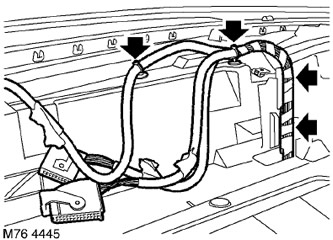
10. Release the 4 fasteners securing the instrument panel wiring harness to the support.
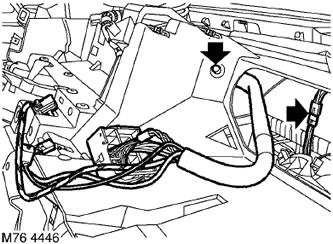
11. Release the cassette and CD player harness retainer.
12. Remove the sun sensor connector block.
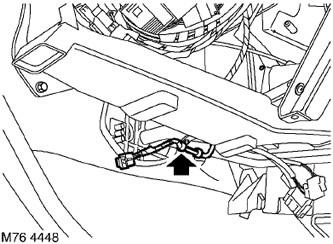
13. Release the retaining clip of the wiring harness going down on the driver's side.
14. Mark the position of the harness for subsequent assembly.
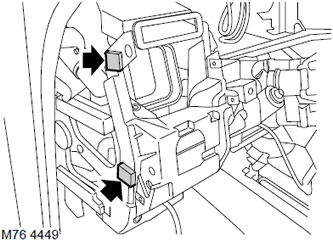
15. Mark the position of the foam strip at the ends of the support for subsequent assembly and remove this strip.
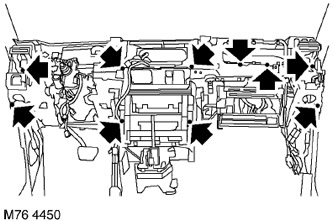
16. Remove the 10 Torx screws securing the instrument panel support and remove the support from the vehicle.
NOTE: If disassembly was performed only to provide access to other system components, no further disassembly operations should be performed.
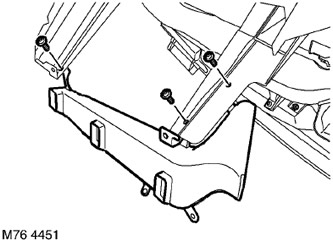
17. Remove the 3 Torx screws securing the lower air duct on the driver's side and remove the air duct.
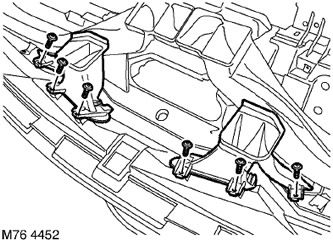
18. Remove the 3 Torx screws securing the left windshield vent and remove the vent.
19. Remove the 3 Torx screws securing the right windshield vent and remove the vent.
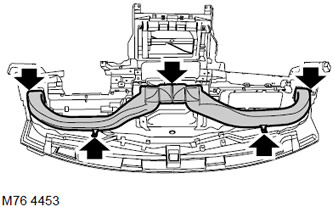
20. Remove the 3 Torx screws securing the driver's face level air duct and remove the duct.
21. Remove the 2 remaining Torx screws securing the passenger face air duct and remove the duct.
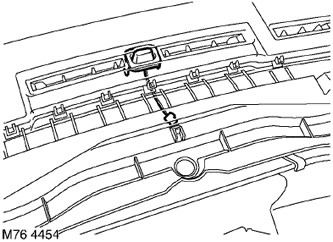
22. Release the clips and remove the sun sensor.
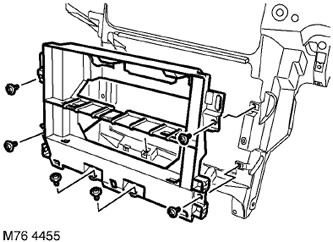
23. Remove the 6 Torx screws securing the heater control unit bracket and remove the bracket.
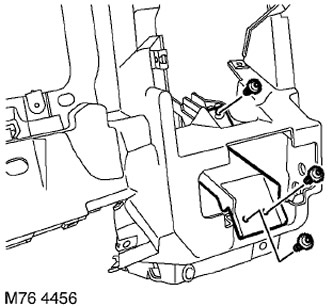
24. Remove the 3 Torx screws securing the bottle holder and remove the holder.
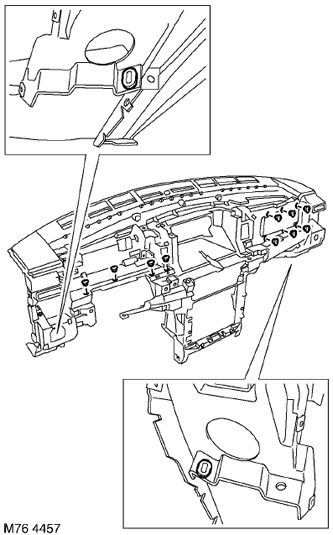
25. Remove the 4 lower instrument panel trim retainer inserts.
26. Unscrew the 6 plastic nuts securing the passenger airbag cover.
27. Remove the 2 side trim retainer inserts.
28. Remove the quick-lock nuts from the support 64.
Assembly
1. Install the quick-release nuts onto the support.
2. Install the side trim retainer inserts.
3. Install the airbag cover nuts.
4. Install the instrument panel trim retainer inserts.
5. Install the bottle holder and secure it with screws.
6. Install the heater control unit bracket and secure it with screws.
7. Install the solar sensor.
8. Install and secure the air supply ducts at face level with screws.
9. Install the glass blower ducts and secure them with screws.
10. Install the lower air ducts and secure them with screws.
11. With the help of an assistant, install the control panel support. Make sure that the cable harnesses are routed correctly and that the support is properly seated against the engine compartment bulkhead.
12. Replace and tighten the control panel support mounting screws.
13. Install foam strips onto the support.
14. Install the wiring harness retainer to the lower air duct.
15. Install the cassette/CD player harness retainer.
16. Connect the sun sensor connector block.
17. Install the instrument panel cable harness retainer.
18. Install and secure the upper steering column housing.
19. Install the lower instrument panel trim.
20. Install the instrument panel.
INSTRUMENTS, REPAIR WORK, Instrument panel.
21. Install the cassette and CD player unit.
NAVIGATION AND ON-BOARD ENTERTAINMENT SYSTEM, REPAIR WORK, Cassette/CD player.
22. Reinstall the lower side body panels.
CAR INTERIOR PARTS, REPAIR WORK, Side panel - center console.
23. Reinstall the air suspension control panel.
CAR INTERIOR PARTS, REPAIR WORK, Switch panel - air suspension.
24. Install the driver's airbag.
RESTRAINT SYSTEMS FOR DRIVER AND PASSENGERS, REPAIR WORK, Airbag module - front passenger.
25. Reinstall the center console.
CAR INTERIOR PARTS, REPAIR WORK, Center console.
Comments on this article