Dismantling
1. Remove the top control panel trim
VEHICLE INTERIOR PARTS, REPAIR WORKS, Control panel top trim - driver's side.
2. Remove the bottom trim of the control panel.
VEHICLE INTERIOR PARTS, REPAIR WORKS, Control panel lower trim - passenger side.
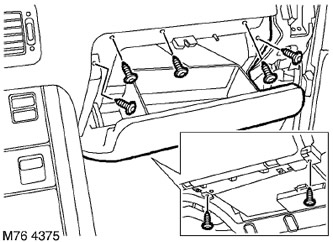
3. Remove the 2 Torx screws securing the glove box to the bottom of the control panel.
4. Open the glove box.
5. Remove the 5 Torx screws securing the glove box.
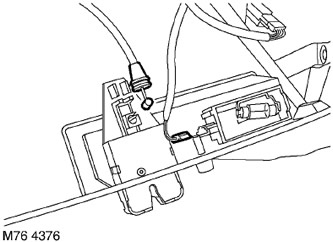
6. Disconnect the connector block from the glove box light.
7. Disconnect the wire from the glove box lock.
8. If fitted to the vehicle: Remove the 2 Torx screws securing the CD changer to the glove box.
9. If installed on a vehicle: Remove the CD changer from the glove box and disconnect the wire terminal and both connector blocks. Remove the CD changer.
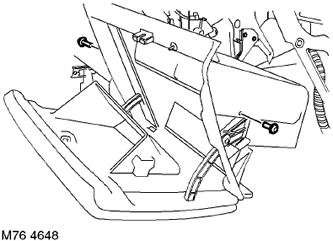
10. Remove the glove box assembly.
NOTE: Do not further disassemble if a component is being removed only for ease of access.
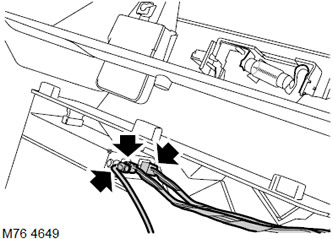
11. Remove the fuse remover.
12. Remove the clips from the glove box.
13. Remove the fuse block cover.
14. Remove the backlight cover.
15. Turn out 2 screws of fastening of the lock to a glove box.
16. Remove the lock plate and lock from the glove box.
Assembly
1. Align the lock and plate with the glove box, fix with screws.
2. Install the dome light on the glove box.
3. Replace the fuse box cover.
4. Install the clips in the glove box.
5. Install fuse remover.
6. Position the glove box on the control panel.
7. If fitted to the vehicle: Insert the CD changer into the glove box and connect the wire terminal and connector strips.
8. If fitted to vehicle: Install CD changer and secure with Torx screws.
9. Connect the wire to the glove box lock.
10. Attach the block to the backlight.
11. Fix the glove box with screws.
12. Close the glove box.
13. Replace the bottom control panel trim.
VEHICLE INTERIOR PARTS, REPAIR WORKS, Control panel lower trim - passenger side.
14. Replace the top trim.
VEHICLE INTERIOR PARTS, REPAIR WORKS, Control panel top trim - driver's side.
Comments on this article