Dismantling
1. Remove the top trim of the rack "D" body.
CAR INTERIOR PARTS, REPAIR WORKS, Overlay - rack "D" - top.
2. Remove the lower rack trim "D".
CAR INTERIOR PARTS, REPAIR WORKS, Overlay - rack "D" - bottom.
3. Remove the Allen screw securing the load securing ring to the floor of the luggage compartment, loosen and remove the ring assembly.
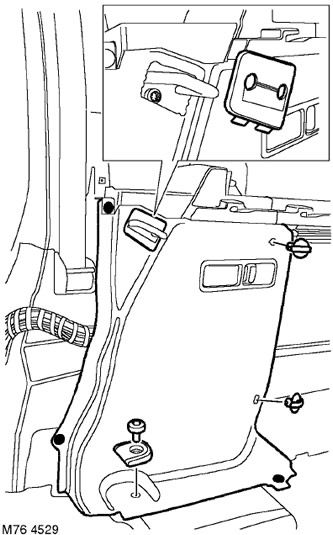
4. Release and remove facing of a clamp of a seat.
5. Remove the latch access panel.
6. Release the two twist locks.
7. Remove the 3 clips and remove the decorative panel assembly.
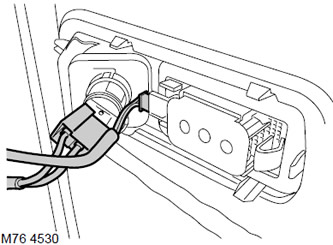
8. Disconnect the connector blocks from the ceiling light and from the socket for turning on additional equipment.
9. Remove the decorative panel.
Assembly
1. Install the decorative panel assembly and connect the connector blocks.
2. Install the latches and turn the rotatable latches to secure the panel.
3. Replace the access panel.
4. Establish facing of a clamp of a seat.
5. Install the weight ring by aligning the latches. Screw in and tighten the screw with a torque of 25 Nm.
6. Install the lower rack trim "D".
CAR INTERIOR PARTS, REPAIR WORKS, Overlay - rack "D" - bottom.
7. Reinstall the top trim of the rack "D" body.
CAR INTERIOR PARTS, REPAIR WORKS, Overlay - rack "D" - top.
Comments on this article