Dismantling
1. Remove facing of the central console.
CAR INTERIOR PARTS, REPAIR WORKS, Cladding - center console.
2. Remove both side panels of the center console.
CAR INTERIOR PARTS, REPAIR WORKS, Side panel - center console.
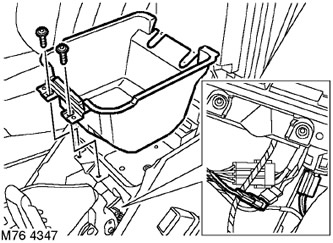
3. Turn out 2 Torx screws of fastening of a ware box, remove a box from the console.
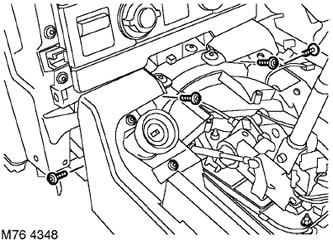
4. Remove the 2 Torx screws securing the ignition lock to the center console.
5. Remove the 4 Torx screws securing the center console to the control panel.
6. Remove 2 Torx screws and washers from glove box support.
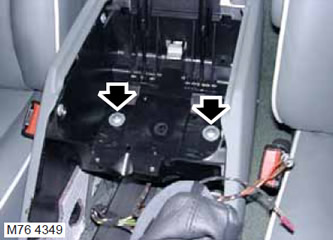
7. Turn out 2 screws of fastening of the back panel of the central console. Release the clips and remove the back panel.
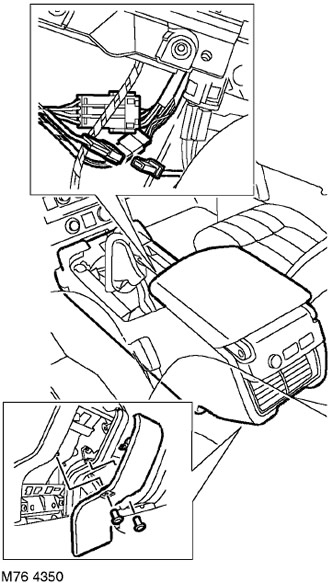
8. Raise the rear of the center console, disconnect the 3 connector blocks from the console and remove the air duct holder.
9. Remove the 3 wire terminals from the accessory power socket.
10. Carefully remove the center console.
CAUTION: Care must be taken not to damage painted and veneered surfaces.
Assembly
1. Position the center console and connect the connector blocks to the back of the console. Install the duct holder and align the console with the supports.
2. Fasten the center console with screws.
3. Install the back panel of the console and secure it with the clips and screws.
4. Install the ignition switch and secure it with screws.
5. Install glove box and secure with Torx screws.
6. Install both side panels of the center console.
CAR INTERIOR PARTS, REPAIR WORKS, Side panel - center console.
7. Establish facing of the central console.
CAR INTERIOR PARTS, REPAIR WORKS, Cladding - center console.
Comments on this article