Dismantling
1. Remove the lower rack trim "D".
CAR INTERIOR PARTS, REPAIR WORKS, Overlay - rack "D" - bottom.
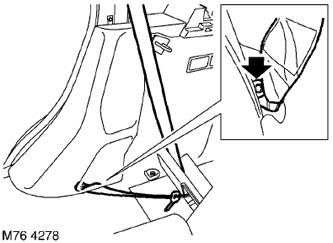
2. Remove and discard the Torx screw for the lower seat belt anchor.
3. Release the top trim of the rack "D" from the seat belt webbing and remove the pad.
Assembly
1. Pass the seat belt through the top of the rack "D", install the lower belt support and tighten the Torx screw to 50 Nm.
2. Replace the trim.
CAR INTERIOR PARTS, REPAIR WORKS, Overlay - rack "D" - bottom.
Comments on this article