Contents: Removal ⇩ Installation ⇩
Special tool(s)
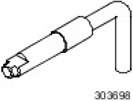 | Torque Setting Tool, Crankshaft 303-698 |
Removal
1.
WARNING: Never work on a vehicle supported only by a jack. Always support the vehicle with special stands.
Raise and support the vehicle.
2. Disconnect the ground wire from the battery.
For more information, refer to the chapter: Disconnecting and connecting the battery (414-01 Battery, Battery Mounting and Cables, General Procedures).
3. Remove the timing belt cover.
For more information, refer to the chapter: Timing Cover (30301 Engine - Diesel engine ID4 2.4L, On-car repair).
4. Remove the crankshaft position sensor (CSP).
For more information, refer to the chapter: Crankshaft Position Sensor (CPS) (303-14 Electronic controls - Diesel engine ID4 2.4L, Removal and installation).
5.
CAUTION: Do not turn the crankshaft when the special tool is fully inserted into the flywheel. Failure to do so may result in damage to the vehicle.
Turn the crankshaft to 50 degrees before TDC. Insert the special tool through the CKP sensor hole.
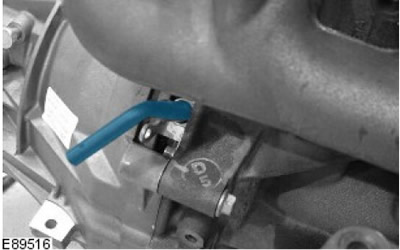
6. Using suitable 6mm diameter rods, lock the camshaft sprockets.
7. Loosen the 6 camshaft sprocket bolts.
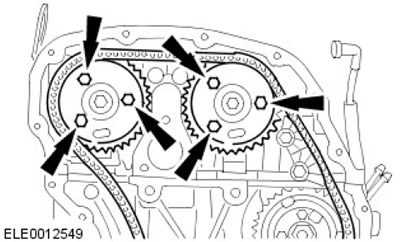
8. Loosen the 4 bolts of the fuel injection pump sprocket.
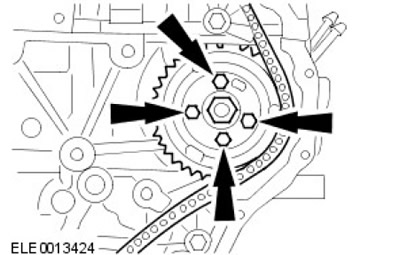
9. Loosen and secure the timing chain tensioner.
- 1. Take the dog away.
- 2. Press in the latch.
- 3. Insert the appropriate pin.
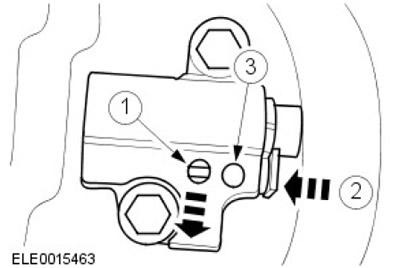
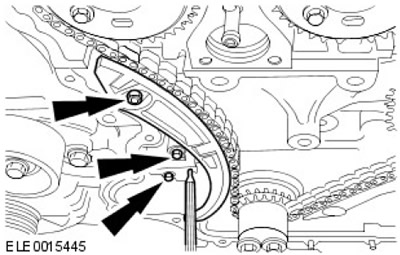
10. Remove the timing chain tensioner and the right timing chain guide.
- Remove two bolts.
- Remove the nut.
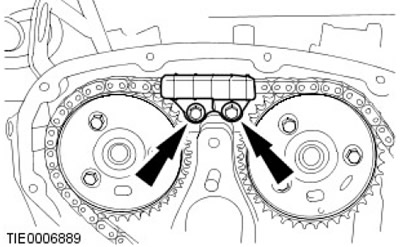
11. Remove the upper timing chain guide. Remove the two bolts.
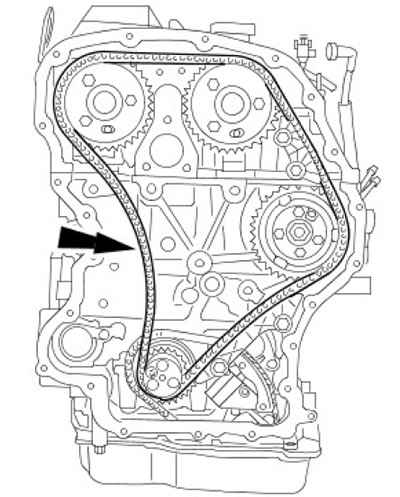
12. Remove the timing chain.
Installation
1.
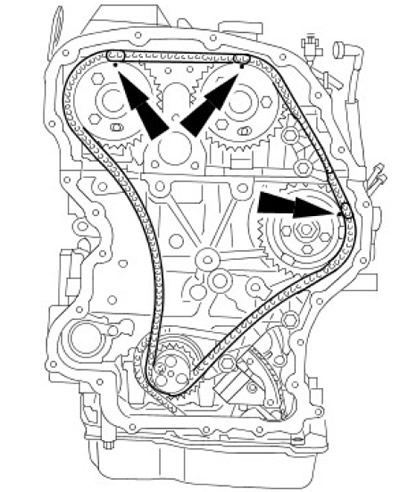
CAUTION: Make sure the painted links are aligned with the timing marks. Failure to do so may result in damage to the vehicle.
Install the timing chain.
2.
CAUTION: Make sure the timing chain tensioner is fully retracted before installation. Failure to do so may result in vehicle damage.
Install the timing chain guides and tensioner.
- Tighten the bolts (tightening torque 15 Nm).
- Tighten the nut (tightening torque 15 Nm).
3. NOTE: Make sure the timing chain tensioner is completely released.
Unlock the timing chain tensioner. Remove the stud.
4. Secure the camshaft sprockets and the fuel injection pump sprocket.
- Tighten the intake camshaft sprocket mounting bolt to 35 Nm.
- Tighten the fuel injection pump sprocket bolts to 33 Nm.
5. Remove the special tool.
6. Remove the 6mm rods.
7. Turn the crankshaft clockwise 2 full turns.
8.
CAUTION: Make sure the special tool is properly installed on the flywheel.
Check the valve timing by inserting a special tool into the CKP sensor hole.
9. Check the camshaft timing by inserting a suitable 6mm diameter rod into the camshaft sprocket holes.
The original article can be found here lrman.ru
10. Remove the special tool.
11. Remove the 6mm rods.
12. Install the CKP sensor.
For more information, refer to the chapter: Crankshaft Position Sensor (CPS) (303-14 Electronic controls - Diesel engine ID4 2.4L, Removal and installation).
13. Install the timing cover.
For more information, refer to the chapter: Timing Cover (30301 Engine - Diesel engine ID4 2.4L, On-car repair).
14. Connect the ground wire to the battery.
For more information, refer to the chapter: Connecting the Battery (414-01 Battery, Battery Mounting and Cables, General Procedures).
Comments on this article