Dismantling
1. Remove the glove box assembly.
CAR INTERIOR PARTS, REPAIR WORKS, Glove box.
Removing the glove box is necessary to gain access to the screws securing the control panel cable harness.
2. Remove the control panel cover.
PARTS OF THE CAR INTERIOR, REPAIR WORKS, Control panel - removal for access to the place of repair and installation in place.
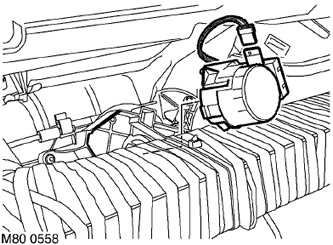
3. Disconnect the connector block and remove the stepper motor that controls the air distribution.
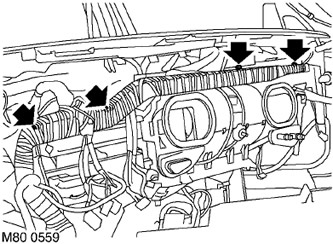
4. Remove the Torx screws and nuts from the back of the control panel cable harness channel. Release the latches so that you can slide the cable harness and make it easier to access. Do not cut the clamps securing the harness to the shelf.
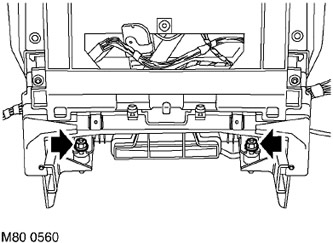
5. Remove the 2 nuts securing the HEVAC unit to the control panel bracket.
6. Note how the HEVAC harness is routed before removing the assembly.
7. With the help of an assistant, remove the HEVAC assembly from the control panel.
Assembly
1. Position the HEVAC unit in the control panel.
2. In case of contamination, clean the HEVAC cable harness and rods from dirt.
3. Install and tighten the nuts securing the HEVAC unit to the control panel.
4. Position the cable harness groove and attach it to the control panel bracket.
5. Install a stepper motor on the heater control unit, connect the connector block.
6. Replace the control panel shroud.
PARTS OF THE CAR INTERIOR, REPAIR WORKS, Control panel - removal for access to the place of repair and installation in place.
7. Install the glove box assembly.
CAR INTERIOR PARTS, REPAIR WORKS, Glove box.
Comments on this article