Contents: Examination ⇩ Adjustment ⇩
Examination
1. Raise the front of the vehicle.
CAUTION: Do not work under a vehicle supported solely by a jack or lift. Always support the vehicle with safety stands.
2. Remove the front wheel.
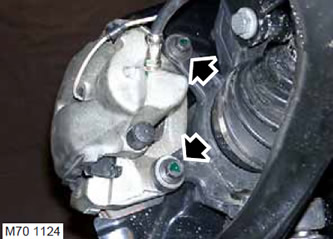
3. Remove the two screws securing the caliper to the wheel bearing support. Remove the caliper from the support and secure it to the side.
CAUTION: Do not allow the caliper to hang by the brake hose.
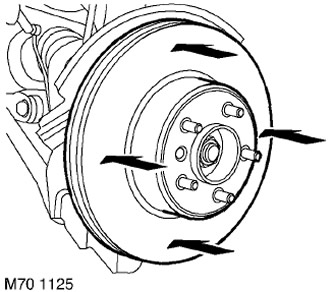
4. Measure the brake disc thickness at four points using a micrometer. Replace the disc if its thickness or the spread of measured values is outside the standard values. The thickness of a new brake disc is 30 mm. The maximum permissible thickness is 28.4 mm. The maximum spread of values is 0.010 mm.
CAUTION: Brake discs should be replaced in pairs, unless one of the new discs requires replacement after less than 1,500 km of travel.
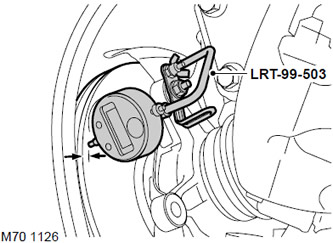
5. Mount the dial indicator to the LRT-99-503 fixture and secure the fixture to the inside of the wheel bearing support using the upper caliper mounting hole.
6. Move the indicator probe towards the disc so that it touches the disc surface 5 mm from the outer edge.
7. Replace the wheel and tighten the nuts to a torque of 140 Nm.
8. Set the indicator scale to zero and rotate the wheel one full revolution. The deviation of the indicator readings should not exceed 0.073 mm.
9. If the measured brake disc plane runout is outside the specified value, perform the following procedure.
Adjustment
1. Remove the front wheel.
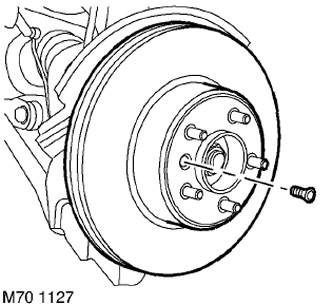
2. Remove the Allen screw securing the brake disc to the wheel hub flange.
3. Remove the brake disc.
4. Make sure the mating surfaces of the brake disc and hub flange are clean.
5. Install the brake disc on the hub flange, install the mounting screw and tighten it to a torque of 16 Nm.
6. Replace the wheel and tighten the nuts to a torque of 140 Nm.
7. Repeat the brake disc runout check discussed above.
8. If the brake disc runout values again exceed the limit values, replace the brake disc and/or wheel hub.
9. Remove the wheel.
10. Remove the indicator with the LRT-99-503 tool.
11. Install the caliper onto the wheel bearing support and tighten the screws to a torque of 110 Nm.
12. Reinstall the wheel and tighten the nuts to a torque of 140 Nm.
13. Press the brake pedal several times to ensure that the brake pads are in the correct position.
14. Remove the supports and lower the vehicle.
Comments on this article