Dismantling
1. Remove the front wheel arch liner.
EXTERIOR PARTS, REPAIR WORKS, Fender liner - front wheel arch.
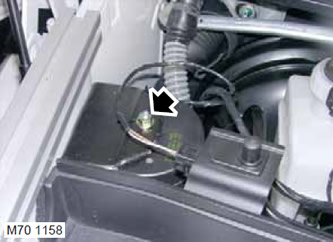
2. Remove the nut securing the siren to the bracket and move the siren to the side.
3. Install a container to collect leaking brake fluid.
CAUTION: Brake fluid can damage paintwork. If brake fluid comes into contact with painted surfaces, remove any traces of fluid immediately and wash the area with water.
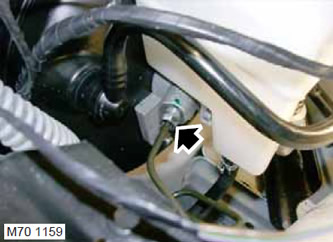
4. Disconnect the brake pipeline from the main brake cylinder.
CAUTION: Always plug fittings and openings to keep dirt out of the system.
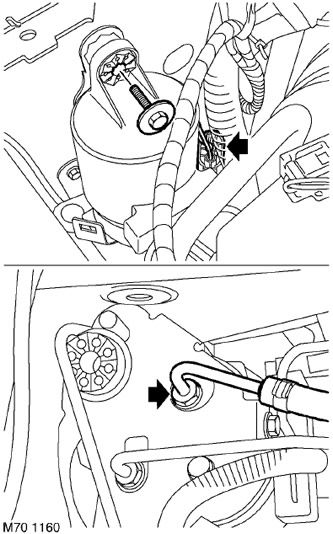
5. Disconnect the supply hose.
6. Remove the screw securing the pre-pressure pump bracket to the vehicle body.
7. Release the pump from the rubber support.
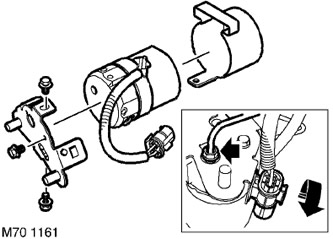
8. Disconnect the block with the electric cable.
9. Remove the pre-pressure pump.
NOTE: Do not further disassemble if the assembly is being removed for ease of access only.
10. Mark position of the brake pipeline and remove it.
11. Remove the cable block, remove the 3 screws and separate the bracket and pump cover.
Assembly
1. Install the mounting bracket and cover on the pre-pressure pump, screw in the screws and tighten them to 8 Nm.
2. Replace the cable block.
3. Clear places of accession of brake pipelines and tips of pipelines.
4. Attach the brake pipeline to the pump and lightly tighten the pipeline nut.
5. Attach the cable block.
6. Connect the pre-pressure pump to the rubber support.
7. Fit the screw securing the pre-pressure pump and tighten the screw to 8 Nm.
8. Connect the pre-pressure pump to the brake master cylinder and tighten the fasteners to 14 Nm.
9. Connect the supply hose to the main brake cylinder to the pre-pressure pump and tighten the fastener with a torque of 14 Nm.
10. Install the security siren on the bracket, screw on the fastening nut and tighten it with a torque of 8 Nm.
11. Reinstall the mudguard of the front wheel arch.
EXTERIOR PARTS, REPAIR WORKS, Fender liner - front wheel arch.
12. Purge air from the system using the procedure using the Testbook/r4 diagnostic tool.
Comments on this article