Dismantling
1. Remove the center console.
CAR INTERIOR PARTS, REPAIR WORKS, Center console.
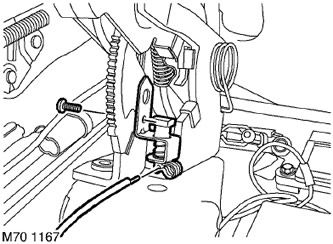
2. Remove the screw securing the switch.
3. Disconnect the cable from the switch.
4. Remove the switch.
Assembly
1. Connect the switch cable to the switch and position the switch on the parking brake lever so that the protrusion on the lever aligns with the hole in the switch. Install and tighten the fixing screw.
2. Reinstall the center console.
CAR INTERIOR PARTS, REPAIR WORKS, Center console.
Comments on this article