NOTE: If a new propeller shaft is to be installed, remove the protective sleeve from the front sliding joint.
NOTE: The removal procedure description may contain installation steps.
NOTE: Illustrations may differ in some details, but the fundamental points are completely true.
1. Raise the vehicle and place it on supports.
WARNING: Ensure that the vehicle is supported securely.
2. Remove the exhaust system. Refer to procedure: Exhaust System (309-00B Exhaust System - 2.2L Duratorq - Td4, Removal and Installation).
3.
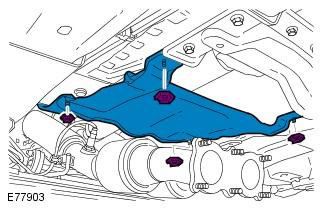
4. Tightening torque: 40 Nm
WARNING: Do not use a pry bar to disconnect the driveshaft joints from the transfer case or rear differential flanges.
Secure the driveshaft with suitable clamps. Use new bolts.
The article was copied from this resource lrman.ru
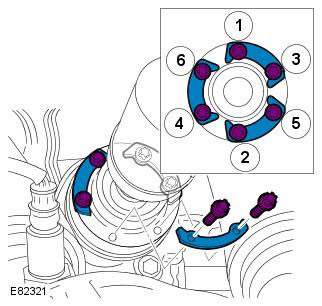
5. Tightening torque: 40 Nm
WARNING: Do not use a pry bar to disconnect the driveshaft joints from the transfer case or rear differential flanges.
Secure the driveshaft with suitable clamps. Use new bolts.
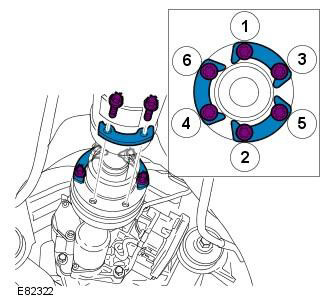
6. Tightening torque: 25 Nm
NOTE: All vehicles up to VIN 180237 and all vehicles with TD4 engine and automatic transmission starting with VIN 180238
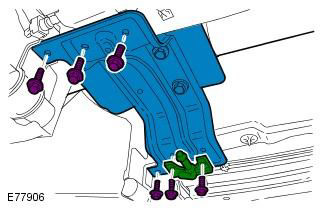
7. Tightening torque: 25 Nm
NOTE: This step requires the assistance of a second mechanic.
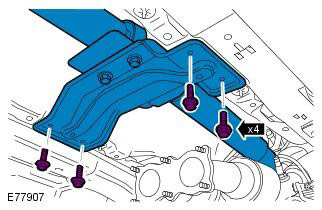
8. Tightening torque: 25 Nm
NOTE: Do not perform further disassembly if the component is removed only for access.
NOTE: All vehicles up to VIN 180237 and all vehicles with TD4 engine and automatic transmission starting with VIN 180238
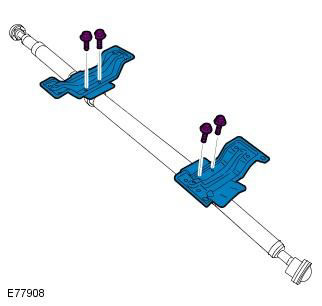
9. Tightening torque: 25 Nm
NOTE: Vehicles with TD4 engine and manual transmission, and all vehicles with Si6 engine starting with VIN 180238
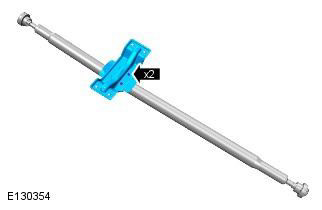
Installation
1. Install the elements back in place in reverse order.
Comments on this article