Exterior car body parts Land Rover Freelander 1

Front wing — removal and installation
Dismantling 1. Remove the front mudguard. EXTERIOR PARTS, REPAIR WORK, Front mudguard. 2. Remove the threshold trim. EXTERIOR PARTS, REPAIR WORK, Threshold trim. 3. Unscrew the 4 bolts securing the...
Dismantling 1. Remove the front mudguard. EXTERIOR PARTS, REPAIR WORK, Front mudguard. 2. Remove the threshold trim. EXTERIOR PARTS, REPAIR WORK, Threshold trim. 3. Unscrew the 4 bolts securing the...

Front mudguard — removal and installation
Dismantling 1. Raise the front of the vehicle. CAUTION: Do not work on or under a vehicle supported solely by a jack. Always support the vehicle with safety stands. 2. Remove the front wheel. 3....
Dismantling 1. Raise the front of the vehicle. CAUTION: Do not work on or under a vehicle supported solely by a jack. Always support the vehicle with safety stands. 2. Remove the front wheel. 3....

Rear mudguard — removal and installation
Dismantling 1. Raise the rear of the vehicle. CAUTION: Do not work on or under a vehicle supported solely by a jack. Always support the vehicle with safety stands. 2. Remove the wheel(s). 3. Remove...
Dismantling 1. Raise the rear of the vehicle. CAUTION: Do not work on or under a vehicle supported solely by a jack. Always support the vehicle with safety stands. 2. Remove the wheel(s). 3. Remove...

Lower engine protection shield
Dismantling 1. Raise the front of the vehicle. CAUTION: Do not work on or under a vehicle supported solely by a jack. Always support the vehicle with safety stands. 2. Unscrew the 2 screws securing...
Dismantling 1. Raise the front of the vehicle. CAUTION: Do not work on or under a vehicle supported solely by a jack. Always support the vehicle with safety stands. 2. Unscrew the 2 screws securing...

External rear view mirror with electric adjustment
Dismantling 1. Remove the front glass guide. 2. For vehicles prior to 2004 model year: Disconnect the 2 "Lucar" type electrical connectors from the tweeter and set the front glass guide aside. For...
Dismantling 1. Remove the front glass guide. 2. For vehicles prior to 2004 model year: Disconnect the 2 "Lucar" type electrical connectors from the tweeter and set the front glass guide aside. For...

Front mudguard — removal and installation
Dismantling 1. Turn the steering wheel to the extreme position. 2. Unscrew the 3 mudguard mounting screws. 3. Remove the mudguard. Installation 1. Install the mudguard on the body and secure it with...
Dismantling 1. Turn the steering wheel to the extreme position. 2. Unscrew the 3 mudguard mounting screws. 3. Remove the mudguard. Installation 1. Install the mudguard on the body and secure it with...

Rear mudguard — removal and installation
Dismantling 1. Unscrew the 3 mudguard mounting screws. 2. Remove the mudguard. Installation 1. Install the mudguard on the body and secure it with screws.
Dismantling 1. Unscrew the 3 mudguard mounting screws. 2. Remove the mudguard. Installation 1. Install the mudguard on the body and secure it with screws.

Spare wheel mounting bracket
Dismantling 1. Lower the tailgate glass. 2. Remove the 3 screws securing the high brake light bracket to the spare wheel support bracket. 3. Disconnect the connector and remove the lamp. 4. Unscrew...
Dismantling 1. Lower the tailgate glass. 2. Remove the 3 screws securing the high brake light bracket to the spare wheel support bracket. 3. Disconnect the connector and remove the lamp. 4. Unscrew...

Side rail for roof rack of 5-door car
Dismantling 1. Remove the side rail support pads. 2. Remove the 4 Torx screws securing the side rail to the roof. 3. Remove the side rail and 2 gaskets. NOTE: If disassembly was performed only to...
Dismantling 1. Remove the side rail support pads. 2. Remove the 4 Torx screws securing the side rail to the roof. 3. Remove the side rail and 2 gaskets. NOTE: If disassembly was performed only to...

Hood — removal and installation
Dismantling 1. Install the hood support to hold the hood in the raised position. 2. Cover the fenders with protective covers. If you are installing the hood later, mark the location of the hinges on...
Dismantling 1. Install the hood support to hold the hood in the raised position. 2. Cover the fenders with protective covers. If you are installing the hood later, mark the location of the hinges on...

Hood Lock Release Cable/Rod
Dismantling 1. Remove the hood lock. 2. Tie a rope to the end of the hood lock release cable and pull the cable out of the hood lock panel. 3. Untie the rope from the hood lock release cable. 4....
Dismantling 1. Remove the hood lock. 2. Tie a rope to the end of the hood lock release cable and pull the cable out of the hood lock panel. 3. Untie the rope from the hood lock release cable. 4....

Front bumper assembly — for cars up to 2004
Dismantling 1. Open the hood. 2. Loosen the 8 screws securing the mudguards to the bumper and remove the mudguards to provide access. 3. Unscrew the 2 screws securing the bumper to the brackets of...
Dismantling 1. Open the hood. 2. Loosen the 8 screws securing the mudguards to the bumper and remove the mudguards to provide access. 3. Unscrew the 2 screws securing the bumper to the brackets of...

Front bumper assembly — for cars after 2004
Dismantling 1. Open the hood. 2. Loosen the 8 screws securing the mudguards to the bumper and remove the mudguards to provide access. 3. Unscrew the 4 screws securing the bumper to the lower engine...
Dismantling 1. Open the hood. 2. Loosen the 8 screws securing the mudguards to the bumper and remove the mudguards to provide access. 3. Unscrew the 4 screws securing the bumper to the lower engine...

Rear bumper assembly — for cars up to 2004
Dismantling 1. Remove the rear mudguards. EXTERIOR PARTS, REPAIR WORK, Rear mudguard. 2. Remove both rear lights. LIGHTING, Headlight assembly - models up to 2004 model year, Rear combination light....
Dismantling 1. Remove the rear mudguards. EXTERIOR PARTS, REPAIR WORK, Rear mudguard. 2. Remove both rear lights. LIGHTING, Headlight assembly - models up to 2004 model year, Rear combination light....

Rear bumper assembly — for cars after 2004
Dismantling 1. Remove the rear mudguards. EXTERIOR PARTS, REPAIR WORK, Rear mudguard. 2. Remove both rear fog lights. LIGHTING, Headlight assembly - models up to 2004 model year, Combination light -...
Dismantling 1. Remove the rear mudguards. EXTERIOR PARTS, REPAIR WORK, Rear mudguard. 2. Remove both rear fog lights. LIGHTING, Headlight assembly - models up to 2004 model year, Combination light -...

Threshold trim — removal and installation
Dismantling 1. Raise the front of the vehicle. CAUTION: Do not work on or under a vehicle supported only by a jack. Always support the vehicle with safety stands. 2. Remove both jack point covers. 3....
Dismantling 1. Raise the front of the vehicle. CAUTION: Do not work on or under a vehicle supported only by a jack. Always support the vehicle with safety stands. 2. Remove both jack point covers. 3....

5-door car roof moldings
Dismantling 1. Remove the side decorative trims from the tailgate glass. DOORS, Removing the front door assembly to provide access to other components, installing the front door, Side trim of the...
Dismantling 1. Remove the side decorative trims from the tailgate glass. DOORS, Removing the front door assembly to provide access to other components, installing the front door, Side trim of the...
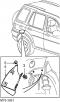
Rear part of the rear wheel arch extension
Dismantling 1. Raise the rear of the vehicle. 2. Remove the wheel(s). 3. 5-door models: Unscrew the 2 screws securing the extension to the corner of the wheel arch. 4. 5-door models: Remove the wheel...
Dismantling 1. Raise the rear of the vehicle. 2. Remove the wheel(s). 3. 5-door models: Unscrew the 2 screws securing the extension to the corner of the wheel arch. 4. 5-door models: Remove the wheel...

Rear small glass assembly — 3-door car
Dismantling 1. Remove the 2 Torx screws securing the rear small window hinge caps. 2. Remove the caps from the hinges. 3. Unscrew the 2 screws securing the hinges to the rear small glass. 4. Remove...
Dismantling 1. Remove the 2 Torx screws securing the rear small window hinge caps. 2. Remove the caps from the hinges. 3. Unscrew the 2 screws securing the hinges to the rear small glass. 4. Remove...
This section is available on russian, bulgarian, belarusian, ukrainian, serbian, croatian, romanian, polish, slovak, hungarian
Similar sections from Land Rover repair manuals:
• Body and interior: Exterior body parts Land Rover Discovery 1 (1989-1998)
• Body and coating: Exterior details Land Rover Range Rover 3 (2001-2012)
• Body and interior: Exterior body parts Land Rover Discovery 1 (1989-1998)
• Body and coating: Exterior details Land Rover Range Rover 3 (2001-2012)