Contents: Battery ⇩ Front seats ⇩ Rear seats ⇩ Seat belts ⇩ Lamps, sound signal and alarms ⇩ Cleaners and washers ⇩ Fine filter ⇩ Check for corrosion/cosmetic defects ⇩ Wheels and tires ⇩ Door locks and hinges ⇩
CAUTION: Please note that the service intervals "A" and "B" in the "Service Schedule" for vehicles operated under severe conditions may differ, both in frequency and mileage, from those for vehicles operated under normal conditions. Therefore, for vehicles operated under severe conditions, it is necessary to use the "Severe Conditions" section.
Unless otherwise specified, the above operations must be performed at each maintenance interval.
Battery
- Check the condition of the battery.
- Check the electrolyte level and top up if necessary.
Front seats
Front seat frame mounting bolts - every 2 years or 48,000 km.
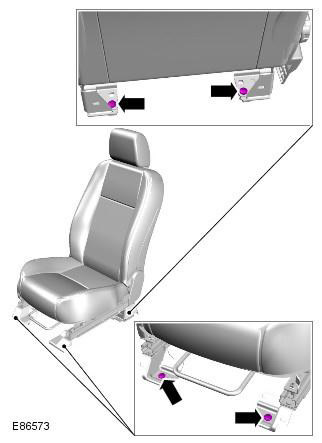
- Carefully remove the trim panels covering the front seat frame mounting screws with a Torx head.
- Check that the Torx head screws securing the front seat frame are securely tightened and that the frame cannot move even slightly.
- When finished, install the trim panels in place.
Rear seats
Rear seat frame mounting bolts - every 2 years or 48,000 km.
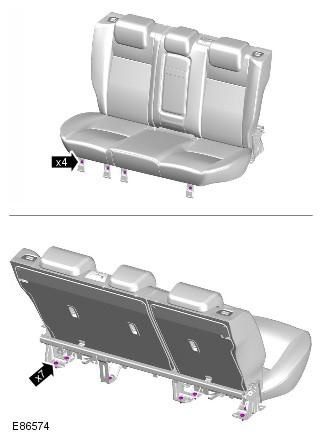
Check that the seat frame mounting bolts are securely tightened and that the frame cannot move even slightly.
Seat belts
Seat belts - every 2 years or 48,000 km. Front seat belt anchorages:
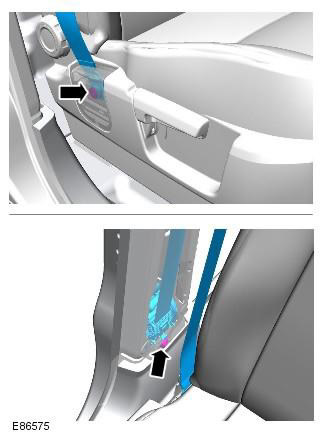
Rear seat belt anchorages:
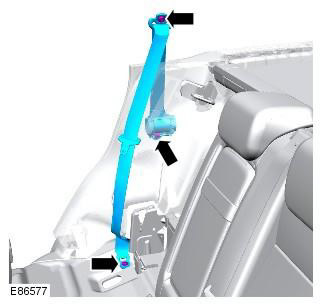
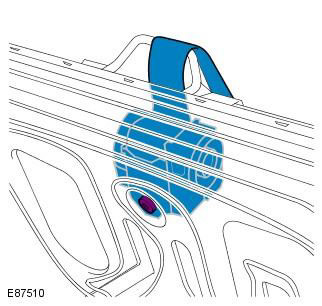
Inertia reel mounting - rear seat center belt:
Locking Fastener - Rear Seat Center Belt:
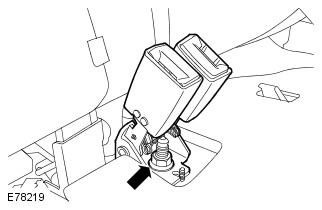
1. Pull the seat belt out fully and allow it to retract under the action of the retractor. Repeat the test for all seat belts.
2. Check the entire length of the seat belt for signs of wear or damage: repeat for all belts.
3. Attach each belt to its buckle, check the reliability of the connection of the lock plate to the buckle. Release the belt buckle and check that the buckle opens normally.
4. Check that all belts and buckles are securely fastened.
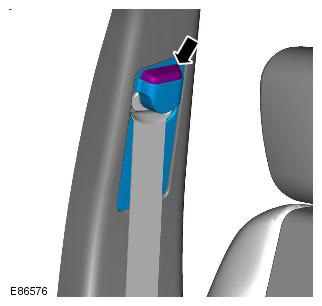
5. Make sure that the upper shoulder belt fastening bracket adjustment mechanism operates properly.
Lamps, sound signal and alarms
- Turn on the headlights, parking lights, fog lights, reversing lights and tail lights and check their operation.
- Check the operation of the automatic headlight beam height correction system (if the vehicle is equipped with one).
- Check the operation of the direction indicators and hazard warning lights.
- Check the operation of the brake lights.
- Check the condition of all exterior lighting device lenses. Pay special attention to the headlight and fog light lenses. They should not have any chips from gravel or cracks.
- Check the volume and clarity of the sound signal.
- Turn on the headlights and check the operation of the indicator of the remaining parking lights/headlights when opening the door.
- Check the operation of the interior lighting devices.
- Check the operation of the instrument panel indicator and signaling units.
Cleaners and washers
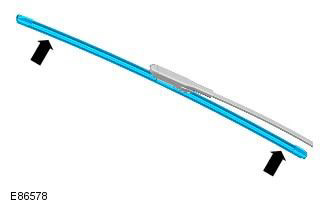
- Check the condition of all wiper blades and make sure they are not damaged or cracked.
- Check the fastening of the windshield wiper arms.
- Turn on the windshield washer and wiper. The washer jets must be clean and directed correctly.
- The front and rear wiper blades must operate smoothly, without sticking, in all modes.
Fine filter
Replace the fine filter. For more information, refer to the chapter: Pollen filter (412-01 Climate control, Removal and installation).
Check for corrosion/cosmetic defects
Annual inspection for corrosion/cosmetic defects is carried out according to the "Corrosion Inspection Checklist".
The article was copied from a resource lrman.ru
Wheels and tires
- Check that the tires comply with the vehicle manufacturer's specifications. For more information, refer to the chapter: Specifications (204-04 Wheels and Tires, Specifications).
- Check/adjust tire pressure, including spare tire. For more information, refer to the chapter: Specifications (204-04 Wheels and tires, Specifications).
- Vehicle with tires that have a unidirectional tread pattern: Mark the position of the wheels relative to the hub and the location of each wheel on the vehicle so that the wheel will be in the same position when installed.
- Loosen the wheel nuts. Raise the vehicle until the wheels are clear of the supporting surface. For more information, refer to the chapter: Raising the Vehicle (100-02 Jacking and Raising the Vehicle on a Lift, Description and Operating Principle).
- Remove the wheels.
- Inspect the tires for cuts, bulges, and peeling. Check the degree of wear of the tread pattern across the entire width of the tire and around the circumference; make sure the tread depth complies with local regulations.
NOTE: Do not install wheels yet.
Door locks and hinges
1. Check the operation of the locks on all doors, the hood and the fuel filler flap.
2. Lubricate the strips of all doors, the hood lock and the strip of the fuel filler flap.
Comments on this article