Dismantling
1. Remove the protective shield.
EXTERIOR PARTS, REPAIR WORKS, Engine protection - front.
2. Raise the front of the vehicle and jack it up.
WARNING: Do not work under a vehicle raised only on a jack or lift. Always install safety props.
3. Remove the front wheels.
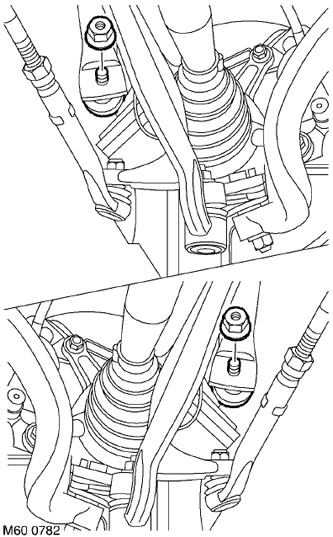
4. Turn away nuts of fastening of racks of the stabilizer of cross stability and disconnect racks from a bar of the stabilizer.
CAUTION: Use a socket wrench to prevent rotation of the ball joint.
5. If fitted to the vehicle: Remove the 2 nuts securing the anti-roll bar heat shield to the body and the 2 bolts securing the heat shield to the subframe. Remove the heat shield.
6. Install a brace under the rear cross tube of the front subframe.
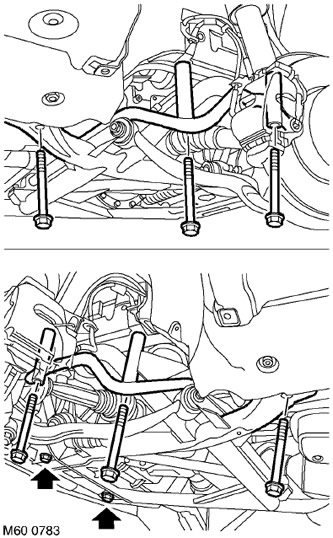
7. Remove 6 bolts and loosen 2 bolts (which are marked with arrows in the figure) front subframe mountings. Discard removed bolts.
8. Lower the bottom of the subframe.
9. Remove the remaining anti-roll bar heat shield fasteners and remove the shield.
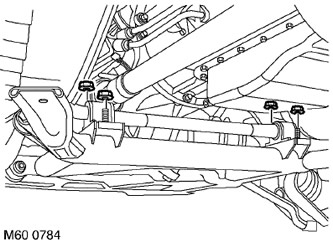
10. Turn away on 2 nuts of fastening of each support of the stabilizer of cross-section stability.
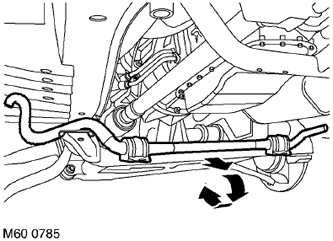
11. Move the anti-roll bar away from the subframe as shown in the figure and remove it from the vehicle.
CAUTION: Supports are included with the anti-roll bar and should not be removed from it.
Assembly
1. Bring the anti-roll bar to the sub-frame and set it to its original position.
2. Install the anti-roll bar mounts in their seats and lightly tighten the nuts.
3. Raise the subframe, install new bolts securing the subframe to the body and tighten them to 165 Nm (122 lb ft). Tighten the two rear bolts by turning them an additional 90°.
4. Tighten the bolts securing the subframe to the cross beam with a torque of 132.5 Nm (97 lb ft).
5. Connect the anti-roll bars, screw on the nuts and tighten them to a torque of 100 Nm (74 lb ft).
6. Replace wheels and tighten nuts to 140 Nm (103 (lb ft).
7. Remove props and lower the car.
8. Replace the protective shield.
EXTERIOR PARTS, REPAIR WORKS, Engine protection - front.
9. Tighten the anti-roll bar bar nuts to 19 Nm (14 lb ft).
10. Install anti-roll bar heat shields and tighten fasteners.
11. Check wheel alignment.
STEERING, ADJUSTMENTS, Front wheel alignment - check and adjustment.
Comments on this article