Contents: Dismantling ⇩ Installation ⇩
Dismantling
1. Raise the front of the vehicle.
CAUTION: Do not work under a vehicle supported only by a jack. Always support the vehicle with safety stands.
2. Remove the wheel(s).
3. Remove the lower engine protection shield.
EXTERIOR PARTS, REPAIR WORK, Lower engine protection shield.
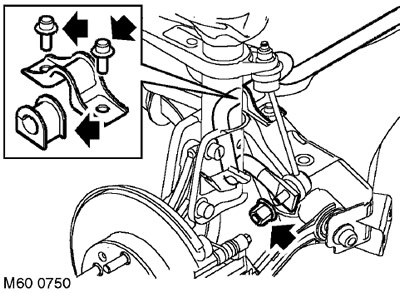
4. Using a wrench, loosen the two nuts and disconnect the stabilizer struts from the stabilizer bar.
5. Unscrew the 4 bolts securing the rubber-metal stabilizer bar mounts to the subframe. Do not throw away the brackets and rubber mount pads.
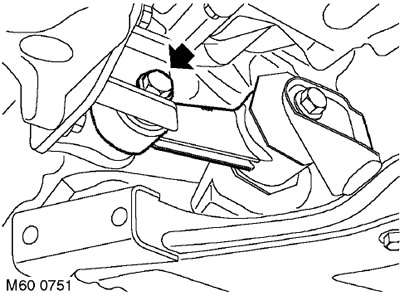
6. Loosen the bolt securing the engine support to the crankcase.
7. Place a support under the front subframe.
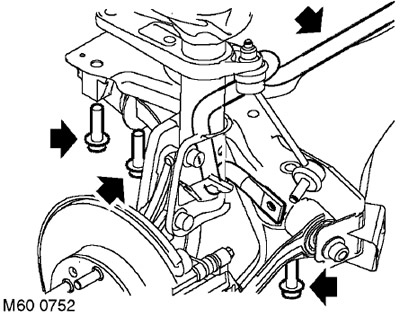
8. Unscrew the 4 bolts securing the rear silent blocks of both lower arms.
9. Unscrew and discard the 2 bolts securing the front subframe to the body.
10. Lower the front subframe to disconnect the stabilizer bar.
11. Remove the anti-roll bar.
Installation
1. Connect the anti-roll bar.
2. Raise the front subframe and align it with the body.
3. Install new subframe-to-body mounting bolts and tighten them to 190 Nm.
4. Install the rear lower arm silent block mounting bolts and tighten them to a torque of 105 Nm.
5. Connect the engine support and tighten its mounting bolt to a torque of 100 Nm.
6. Position the stabilizer bar support pads and brackets opposite their mounting locations.
7. Install the bolts securing the rubber-metal mounts of the anti-roll bar and tighten them to a torque of 23 Nm.
8. Connect the stabilizer links to the stabilizer bar. Install new nuts and tighten them with a wrench to 45 Nm.
9. Reinstall the lower engine protection shield.
EXTERIOR PARTS, REPAIR WORK, Lower engine protection shield.
10. Reinstall the wheel(s) and tighten the nuts to 115 Nm.
11. Remove the supports and lower the vehicle.
Comments on this article