Special tool (s)
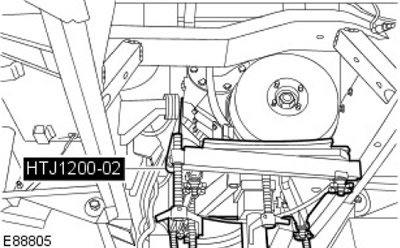
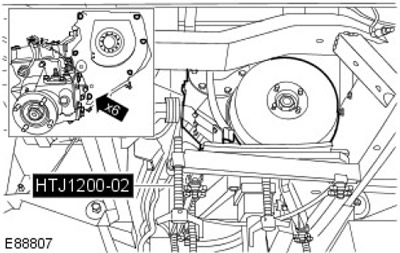
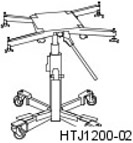 | Power unit jack assembly HTJ1200-02 |
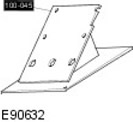 | Supporting part of the transfer case 100-045 |
Removing
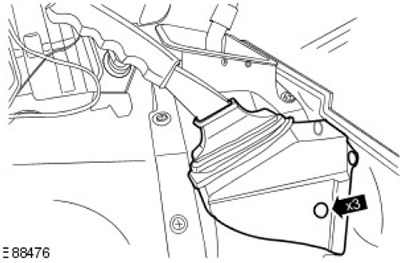
1. Release the protective cover of the parking brake lever. Release 3 clamps.
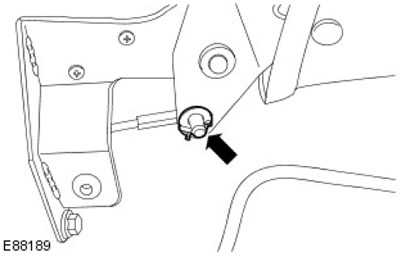
2. Remove the parking brake lever pin. Unscrew the pin.
3.
WARNING: It is forbidden to carry out work on a vehicle standing on only one jack. Always support the vehicle with jack stands.
Raise and support the vehicle.
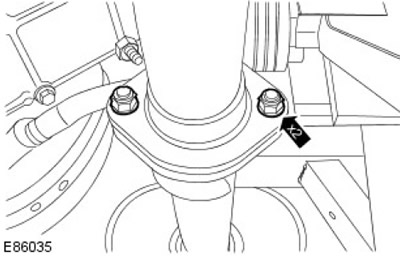
4. Disconnect the intermediate pipe from the catalytic converter. Remove and discard 2 nuts.
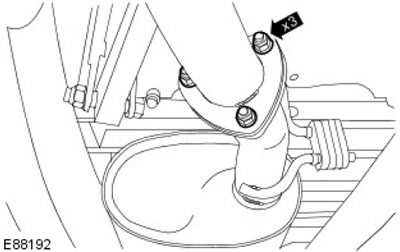
5. Release the outlet pipe from the intermediate one.
- Loosen and discard 3 nuts.
- Remove the gasket and discard it.
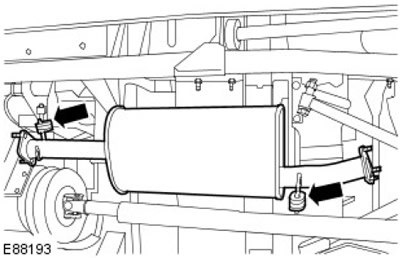
6. Remove the intermediate pipeline and muffler.
7.
NOTE: Mark the position of the front propeller shaft in relation to the transfer case drive flange.
Remove and discard 4 nuts. Use a suitable clamp to secure the cardan shaft to the side.
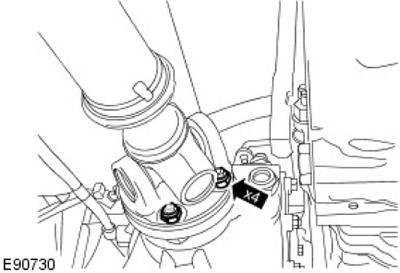
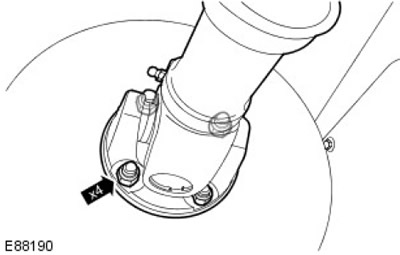
8. Remove the 4 nuts securing the rear driveshaft to the transfer case. Mark the position of the driveshaft relative to the drive gear flange.
9. Attach the rear driveshaft to the chassis using a suitable clamp.

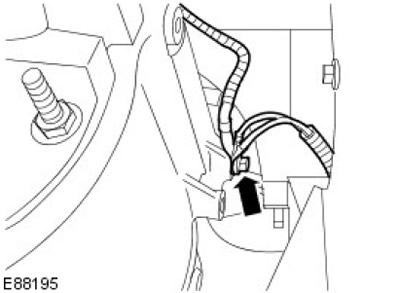
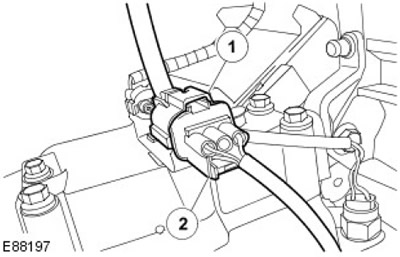
10. Disconnect from a distributing box an electric socket of an electronic speedometer.

11. Disconnect the left side ground cable from the transfer case. Remove the nut.
12. Disconnect the right side ground cables from the transfer case. Turn out a bolt.
13.
NOTE: Plug all openings. Use new plugs.
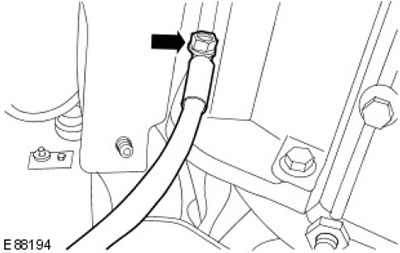
Remove the transfer case breather pipe bolt. Remove the sealing washers and discard them as no longer needed.
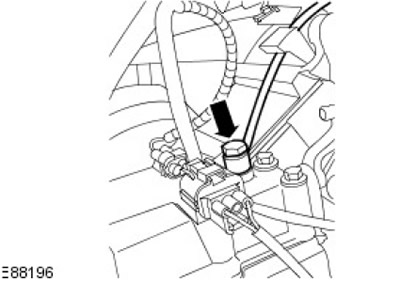
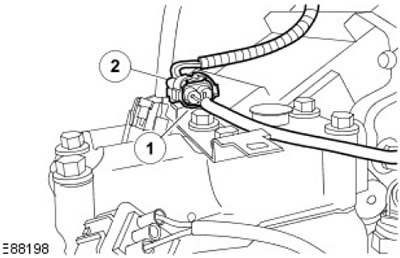
14. Disconnect the transmission range switch warning light electrical connector.
- 1. Disconnect the electrical connector.
- 2. Release the electrical connector from the bracket.
15. Disconnect the differential lock detection switch electrical connector.
- 1. Disconnect the electrical connector.
- 2. Release the electrical connector from the bracket.
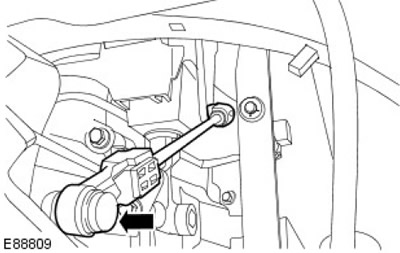
16. Disconnect the transmission range switch stem. To release the installed parts, press the button before disconnecting the stem.
17. Release the clip on the lower end of the swing arm.

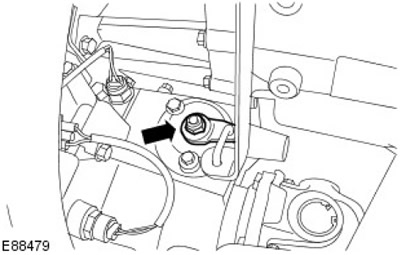
18. Remove the differential lock control rod. Remove the nut.
19. Disconnect the transmission wiring harness. Loosen the nut and remove the bolt.
20. Drain the transmission fluid from the transfer case.
For more information, refer to the chapter: Draining the transmission fluid from the transfer case and filling the transmission fluid into the transfer case (308-07A Transfer Case - ID4 2.4L Diesel Engine, General Procedures).
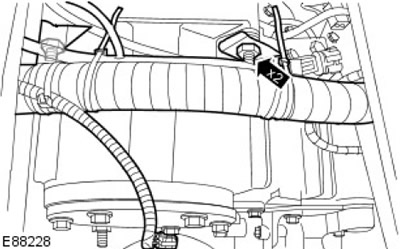
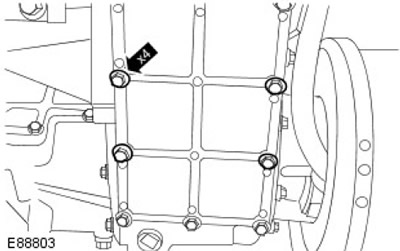
21. Turn out 4 bolts.
22. Install the special tool.
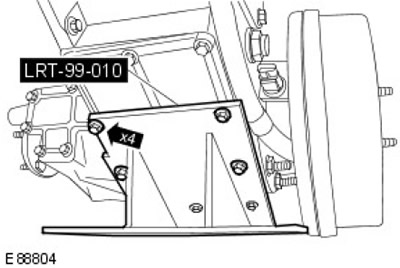
23. Install the special tool.
24.
NOTE: Raise the transmission jack.
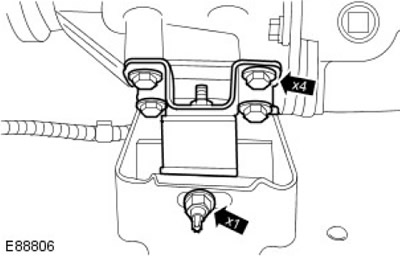
Remove the right-hand transfer box mount.
- Turn out 4 bolts.
- Remove the nut.
25. Together with a partner, remove the transfer case.
- Turn out 4 bolts.
- Loosen 2 nuts.
Comments on this article