


Contents: Dismantling ⇩ Installation ⇩
Dismantling
1. Disconnect the negative battery terminal.
2. Remove the rear cross member.
FRONT SUSPENSION, REPAIR WORK, Front subframe.
3. Remove the exhaust pipe.
COLLECTORS AND EXHAUST SYSTEM: MOD. K, V6 engine, REPAIR WORK, Downpipe: except for North American market countries.
4. North American models: Remove the right catalytic converter.
POISONING SYSTEM, Positive crankcase ventilation valve: Td4 engine, Right bank catalytic converter: KV6 engine, North American market countries.
5. North American models: Remove the left exhaust manifold gasket.
COLLECTORS AND EXHAUST SYSTEM: MOD. K, V6 engine, REPAIR WORK, Left exhaust manifold gasket(s): North American market countries.
6. Drain the oil from the transfer case.
TRANSFER CASE, ADJUSTMENTS, Changing the transmission oil in the transfer case: except for North American market countries.
TRANSFER CASE, ADJUSTMENTS, Changing the transmission oil in the transfer case: North American market countries.
7. Drain the oil from the gearbox.
AUTOMATIC TRANSMISSION: JATCO, ADJUSTMENTS, Replacement of working fluid in the box.
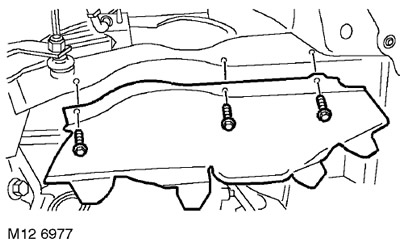
8. Unscrew the 3 bolts securing the right mudguard panel and remove the panel.
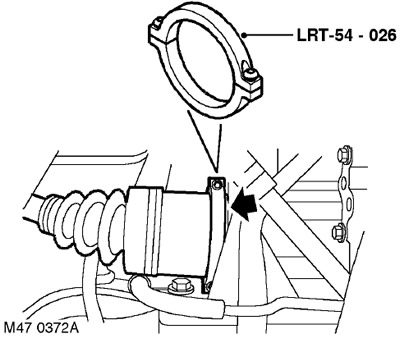
9. Install the LRT-54-026 tool onto the inner joint of the drive shaft. Using a lever, release the drive shaft from the transfer case.
10. With the help of a partner, move the hub outward and remove the drive shaft from the transfer case.
CAUTION: When removing the drive shaft, be careful not to damage the oil seal.
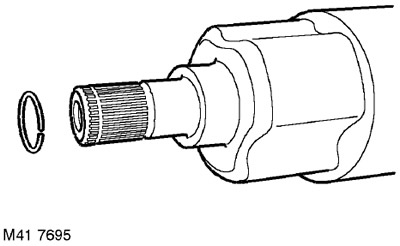
11. Remove and discard the drive shaft retaining ring.
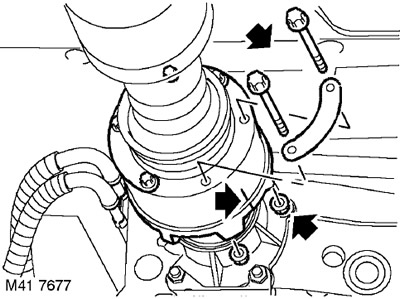
12. To facilitate subsequent assembly, apply position marks to the front propeller shaft.
13. Raise one rear wheel so that you can rotate the driveshaft to gain access to the bolts.
14. Unscrew 6 nuts and remove the bolts securing the propeller shaft to the drive flange of the transfer case.
15. Remove the propeller shaft from the transfer case drive flange and tie it to the side.
CAUTION: When removing the three-roller joint from the transfer case, care must be taken. To avoid damaging the boot, it must not be completely stretched, and the joint housing must be protected from impacts.
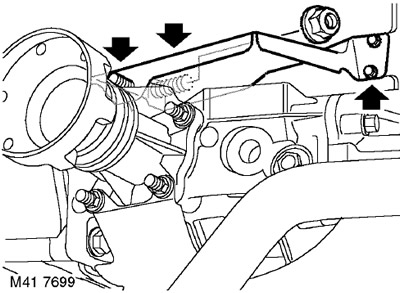
16. Loosen the nut securing the heat shield to the transfer case.
17. Loosen the nut securing the heat shield to the rear axle drive shaft housing.
18. Unscrew the 2 heat shield mounting bolts and remove the shield.
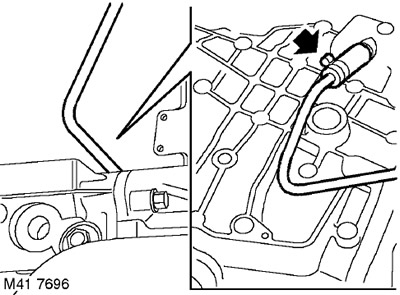
19. Disconnect the breather hose from the transfer case housing.
20. Install a container to collect the leaking coolant.
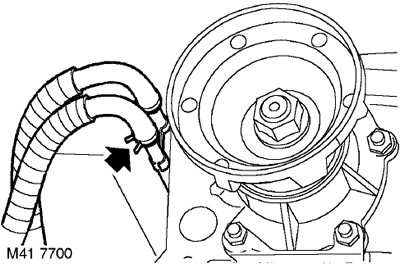
21. Loosen the clamp and disconnect the cooling system hoses from the transfer case.
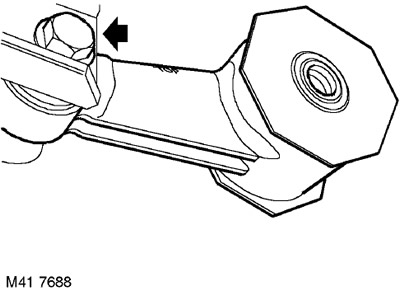
22. Unscrew the bolt securing the lower engine crossmember to the transfer case bracket.
23. Remove the lower engine crossmember. The 'TOP' mark should be at the top.
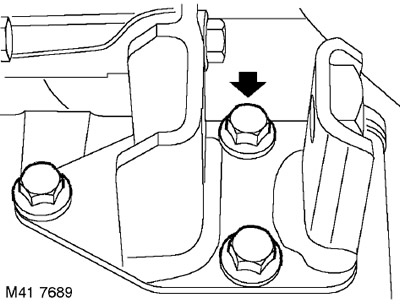
24. Remove the 3 bolts securing the transfer case bracket to the pan.
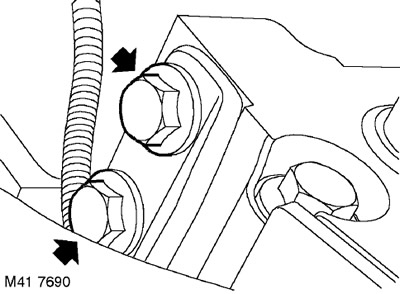
25. Unscrew the 2 bolts securing the transfer case bracket to the front engine plate.
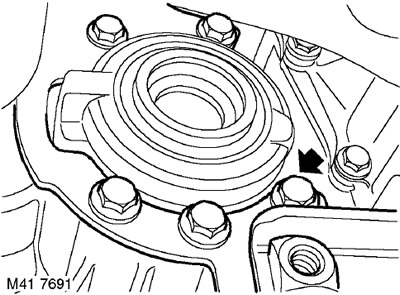
26. Remove the 5 bolts securing the bracket to the transfer case.
27. Remove the bracket.
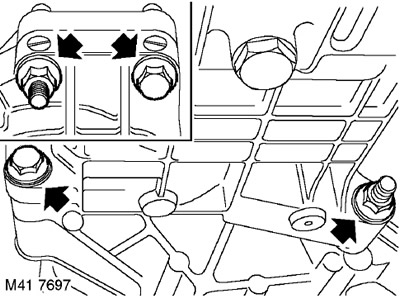
28. Unscrew the 4 bolts securing the transfer case.
29. With the help of a partner, separate the transfer case from the gearbox and remove the transfer case.
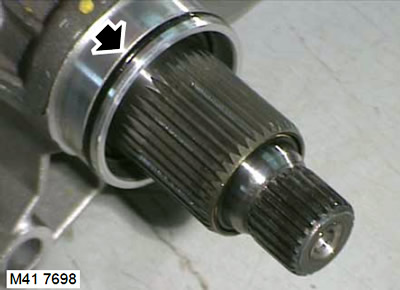
30. Remove the O-ring from the transfer case and discard it.
Installation
1. Clean the mating surfaces of the transfer case and gearbox.
2. Lubricate the new O-ring and install it in place.
3. With the help of a partner, install the transfer case.
4. Screw in the bolts securing the transfer case to the gearbox and pull their mating surfaces together without tightening the bolts completely.
5. Install the transfer case bracket and tighten the mating surfaces together.
6. Finally tighten the bolts securing the transfer case to the gearbox. Tightening torque 90 Nm.
7. Finally tighten the transfer case bracket bolts in the following sequence:
- Five bolts for fastening the bracket to the transfer case with a torque of 50 Nm
- Two bolts securing the bracket to the front engine bracket with a torque of 50 Nm
- Three bolts for fastening the bracket to the pan with a torque of 88 Nm.
8. Install the lower engine mount crossmember with the 'TOP' mark facing up. Screw in the bolt, but do not tighten it completely.
9. Connect the cooling system hoses and secure them with clamps.
10. Connect the breather hose to the transfer case.
11. Install the heat shield of the manifold and tighten the nut securing it to the rear axle drive shaft housing using your finger.
12. Screw in the heat shield mounting bolts to the transfer case bracket and tighten them to a torque of 9 Nm.
13. Fit the heat shield mounting nut to the transfer case and tighten it to 45 Nm.
14. Finally tighten the nut securing the heat shield to the rear axle drive shaft housing and tighten it to a torque of 25 Nm.
15. Clean the propeller shaft flange and the mating flange.
16. Install the cardan shaft on the drive flange of the transfer case so that the previously applied marks are aligned. Tighten the nuts and bolts to a torque of 40 Nm.
17. Check the condition of the drive shaft seal and replace it if it is damaged or worn.
18. Clean the drive shaft and splines.
19. Install a new snap ring onto the end of the drive shaft.
20. With the help of a partner, move the hub outward and insert the drive shaft into the transfer case, being careful not to damage the seal.
CAUTION: Press down on the drive shaft to ensure that the snap ring is seated in its groove and holds the shaft.
21. Install the mudguard panel and secure it with bolts.
22. Install the exhaust pipe.
COLLECTORS AND EXHAUST SYSTEM: MOD. K, V6 engine, REPAIR WORK, Downpipe: except for North American market countries.
23. Install the rear beam in place.
FRONT SUSPENSION, REPAIR WORK, Front subframe.
24. Finally tighten the lower crossmember mounting bolt to the transfer case bracket to a torque of 100 Nm.
25. Fill the transfer case with oil to the required level.
TRANSFER CASE, ADJUSTMENTS, Changing the transmission oil in the transfer case: except for North American market countries.
TRANSFER CASE, ADJUSTMENTS, Changing the transmission oil in the transfer case: North American market countries.
26. North American Market Models: Install the right catalytic converter.
POISONING SYSTEM, Positive crankcase ventilation valve: Td4 engine, Right bank catalytic converter: KV6 engine, North American market countries.
27. North American models: Install the left exhaust manifold gasket.
COLLECTORS AND EXHAUST SYSTEM: MOD. K, V6 engine, REPAIR WORK, Left exhaust manifold gasket(s): North American market countries.
28. Fill the gearbox with transmission oil.
AUTOMATIC TRANSMISSION: JATCO, ADJUSTMENTS, Replacement of working fluid in the box.
29. Connect the negative battery terminal.
30. Fill the engine with coolant.
COOLING SYSTEM: MOD. K, KV6 engine, ADJUSTMENTS, Draining coolant, flushing and filling the system.
Comments on this article