Dismantling
1. Raise the front of the car.
WARNING: Do not work under a vehicle raised only on a jack or lift. Always install safety props.
2. Remove the front wheel.
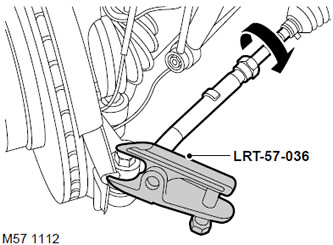
3. Loosen the locknut that secures the tip to the end of the tie rod.
4. Remove the ball stud nut and discard.
5. Screw an M14 nut onto the end of the ball stud, flush with the threaded end of the stud.
6. Using tool LRT-57-036, separate the ball pin from the steering knuckle. Remove the M14 nut and remove the ball pin from the steering knuckle.
7. Remove the tie rod end, remembering the number of turns on the thread, so as not to be mistaken during assembly.
8. Remove and discard retaining ring.
Assembly
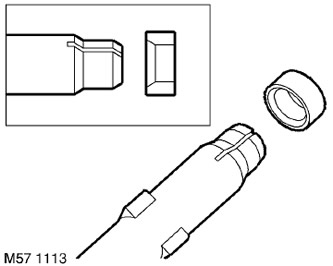
1. Put on a lock ring so that its internal conical surface was turned to the end of steering draft.
2. Screw the tie rod end onto the tie rod by turning it the number of revolutions recorded during removal.
3. Clean the tapered surfaces of the ball pin and knuckle socket from dirt.
4. Connect the fingers of the ball joints with the steering knuckles, install new nuts and tighten them to a torque of 80 Nm.
5. Reinstall the wheel and tighten the nuts to 140 Nm.
6. Remove props and lower the car.
7. Check up and if necessary adjust corners of installation of forward wheels.
STEERING, ADJUSTMENTS, Front wheel alignment - check and adjustment.
Comments on this article