Dismantling
1. Raise the front of the car.
WARNING: Do not work under a vehicle that is only supported by a jack. Always install safety props.
2. Remove the front wheel.
3. Turn away a bolt of fastening of the spherical hinge to an adjusting draft.
4. Remove the nut from the ball stud and discard it.
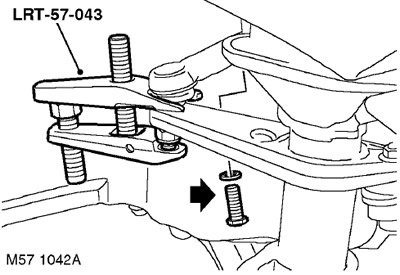
5. Screw an M12 nut onto the end of the ball stud, flush with the threaded end of the stud.
6. Using tool LRT-57-043, separate the ball pin from the steering knuckle. Loosen the M12 nut and remove the ball pin from the pivot arm.
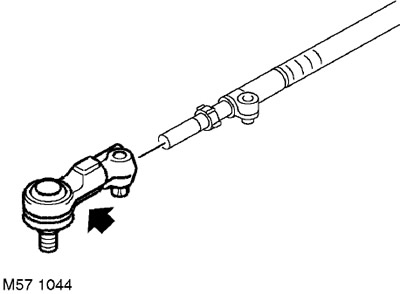
7. Remove the tie rod end, remembering the number of revolutions so as not to make a mistake during assembly.
Installation
1. Install the tie rod end on the adjusting rod by screwing it in the same number of turns as needed to remove it.
2. Install the bolt that secures the tip to the adjusting rod, but do not completely tighten it yet.
3. Clean the tapered surfaces of the ball pin and knuckle socket from dirt.
4. Insert the ball stud into the pivot arm. Fit a new nut and tighten it to 55 Nm.
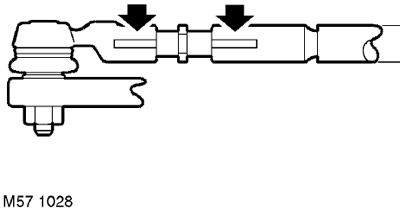
CAUTION: Make sure the slots on the tie rods are in line.
5. Replace the wheel (wheels) and tighten the nuts to a torque of 115 Nm.
6. Remove props and lower the car.
7. Check up and if necessary adjust corners of installation of forward wheels.
STEERING, ADJUSTMENTS, Checking and adjusting the angles of the front wheels.
CAUTION: After completing the front wheel alignment check, make sure the tie rod to tie rod bolts are tightened to the specified torque.
Comments on this article