


NOTE: The A-pillar reinforcement panel is supplied assembled with the A-pillar panel assembly. Therefore, before installing the A-pillar reinforcement panel, it is necessary to separate it from the A-pillar of the body side panel. This allows the necessary welding operations to be performed on the A-pillar reinforcement panel.
Dismantling
1. Disconnect the negative battery terminal.
2. Disconnect the generator.
3. Remove the side panel of the "A" pillar.
REPAIR WORK, Side body panel - front "A" pillar.
Repair works
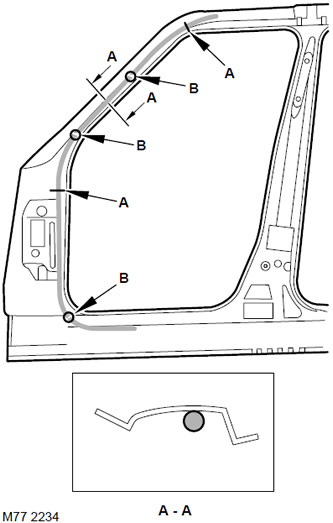
1. Before removing the front pillar reinforcement panel, read the following warning.
CAUTION: When cutting the upper section of the A-pillar, do not cut through the reinforcement panel as there is a rubber drain tube behind it. The approximate position of the drain tube is shown in the figure.
NOTE: Arrows "A" and "B" show the approximate location of the drain tube retainers.
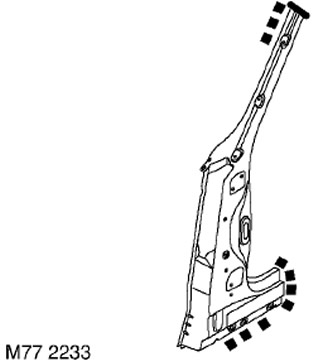
2. Remove damaged panels, prepare joint edges and install new panels in accordance with the Body Panel Repair Guide. Punch or drill holes in the panel to be installed for the plug weld as shown in the figure. CAUTION: Before welding the upper part of the A-pillar reinforcement panel, spot weld a small plate to protect the drain pipe from excess heat.
Assembly
1. Weld the side panel of the "A" pillar.
REPAIR WORK, Side body panel - front "A" pillar.
2. Connect the generator.
3. Connect the negative battery terminal.
Comments on this article