Removing
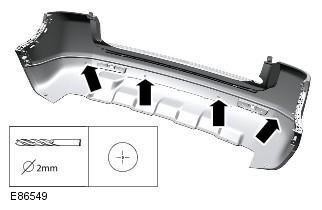
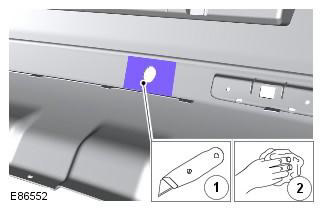
NOTE: The new bumper trim is shipped without the four parking aid sensor holes.
1. Raise and support the vehicle.
WARNING: Do not work on or under a vehicle supported only by a jack. Be sure to install reliable supports under the car.
2. Remove both rear wheels complete with tires. Refer to procedure: Wheel and tire (204-04 Wheels and tires, Removal and installation).
3. Remove the rear lights assembly. Refer to procedure: Rear light assembly (417-01 Outdoor lighting, Removal and installation).
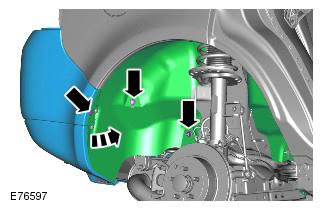
4.
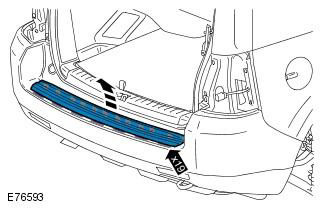
5.
6.
7.
8.
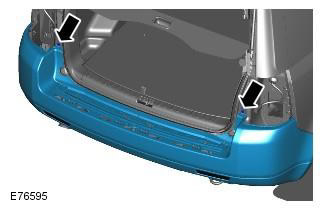
- Release the rear lower edge of the rear fender mudguard.
- Repeat the above procedure on the other side of the vehicle.
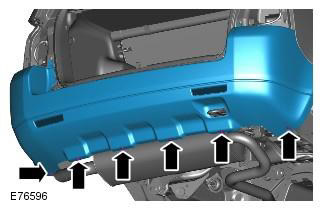
9.
- Disconnect the parking aid sensor wiring harness connector (in the presence of).
- Repeat the above procedure on the other side of the vehicle.
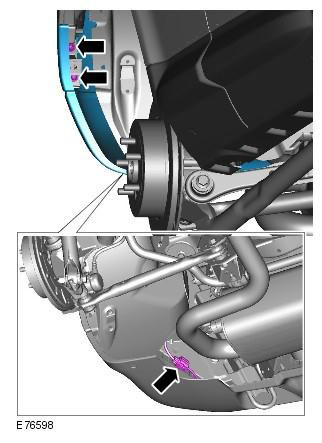
10.
11. Remove the Parking Assist Sensor Harness (in the presence of).
NOTE: Do not proceed with disassembly if the element is being removed only to gain access.
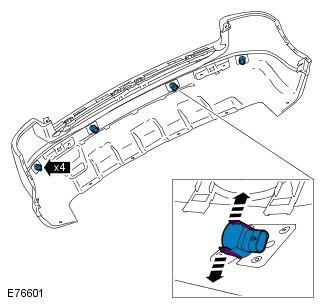
12. Remove the four parking aid sensors (in the presence of).
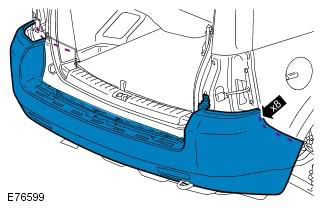
13.
Installation
1.
2.
3.
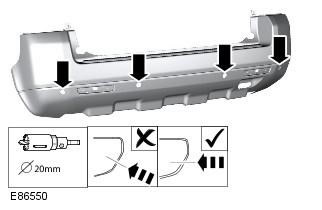
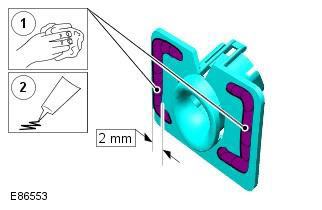
CAUTION: Align the cutting edge of the special tool with the contour of the bumper trim. Make sure that it does not rotate when cutting the hole.

4.
5. See the specifications section for adhesive information. Refer to procedure: Specifications (501-19 Bumpers Specifications).
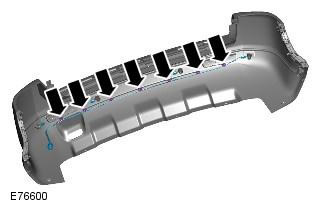
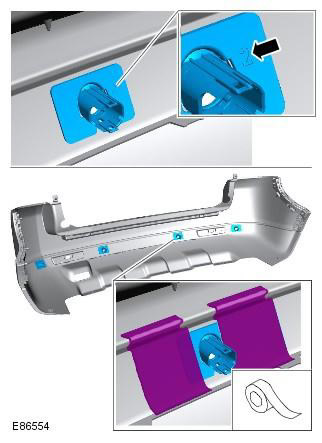
CAUTION: To avoid expelling excess adhesive through the hole cut in the bumper, apply adhesive as shown when installing trim panels.
6.
CAUTION: Allow 2 hours for the adhesive to cure before beginning bumper installation.
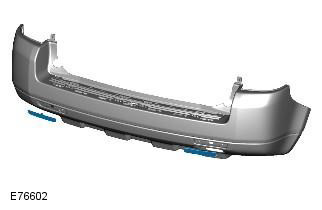
7. Install reflectors.
8. Install the parking aid sensors.
9. Install the parking aid sensor harness.
10. Establish facing of a back bumper.
11. Attach the wing mudguard.
12. Establish the panel of finishing of facing of a bumper.
13. Establish back lanterns in gathering. Refer to procedure: Rear light assembly (417-01 Outdoor lighting, Removal and installation).
14. Install wheels. Refer to procedure: Wheel and tire (204-04 Wheels and tires, Removal and installation).
Comments on this article