Contents: Removal ⇩ Installation ⇩
NOTE: The roof is serviced as a separate welded panel, without its own reinforcements.
NOTE: Along the right and left side of the panel, the new weld spots should not be aligned with the original spots, but should be placed next to them.
Removal
1. In combination with the roof panel, replaces:
- Lifting tailgate
- Windshield
2. For additional information regarding this repair procedure, refer to: For additional information, refer to: Body and Frame (501-26 Body Repairs - Special Vehicle Information and Tolerance Checks, Description and Operation) / Standard Service Station Techniques (100-00 General Information, Description and Operation).
3. Disconnect both cables from the battery.
4. Remove the liftgate. For more information, refer to the chapter: Liftgate (501-03 Lockable Body Parts, Removal and Installation).
5. Remove the windshield. For more information, refer to the chapter: Windshield (501-11 Glass, Frames and Mechanisms, Removal and Installation).
6. Remove both front seats. For more information, refer to the chapter: Front Seat (501-10 Seat, Removal and Installation).
7. Remove the rear seat.
8. Remove both side curtain airbag modules. For additional information, refer to: Side Airbag Module (501-20B Supplemental Restraint System, Removal and Installation).
9. Remove the seat belt retractors from both front seats. For additional information, refer to the chapter: Front Seat Belt Retractor (501-20A Seat Belt System, Removal and Installation).
10. Remove both rear seat belt retractors. For additional information, refer to: Rear Seat Belt Retractor (501-20A Seat Belt System, Removal and Installation).
11. Release the wiring harness and place it aside.
12. Remove 10 bolts with 21 mm head.
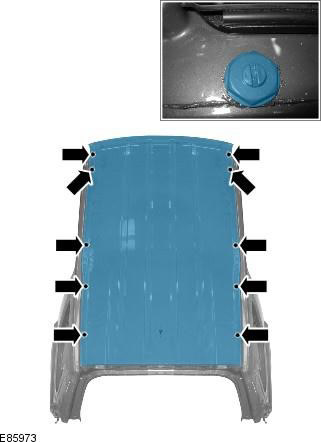
13. Mill out the weld spots.
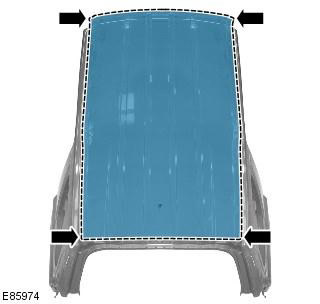
14. Cut the adhesive to separate the reinforcements from the roof panel.
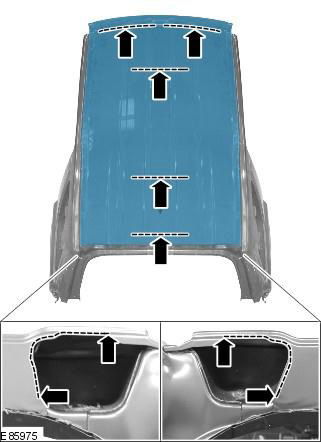
15. Separate the remaining connections and remove the old panel.
Installation
1. Prepare the connecting surfaces of the old and new panels.
2. Apply glue to the areas shown.
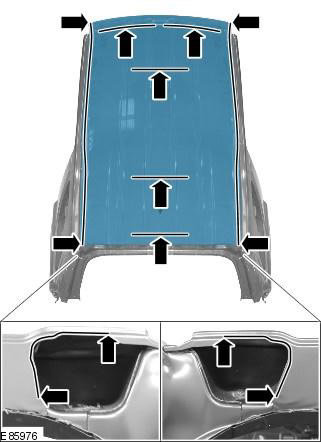
3. Apply the new panel and fix it in place. Check the alignment, if correct, proceed to the next step, if not, correct and check again before proceeding to the next step.
4. Screw in 10 bolts with 21 mm head.
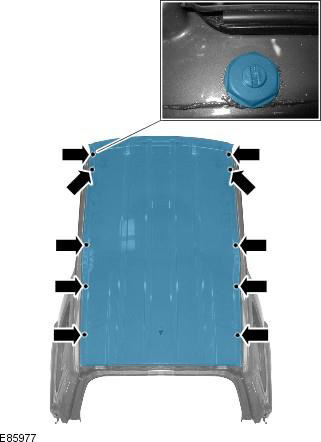
5. Spot welding.
NOTE: Along the right and left side of the panel, the new weld spots should not be aligned with the original spots, but should be placed next to them.
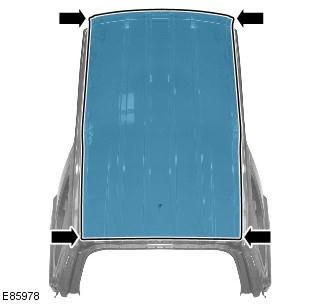
6. Clean all welded joints.
7. To install the relevant panels and mechanical components, perform the removal procedure in reverse order.
Comments on this article