Removing
1. Remove rear wheels.
2. Using a suitable hose clamp, secure the flexible brake hose over the rear axle.
3. Remove the brake line from the rear brake caliper.
4. Cap the ends of the piping to prevent dirt from entering.
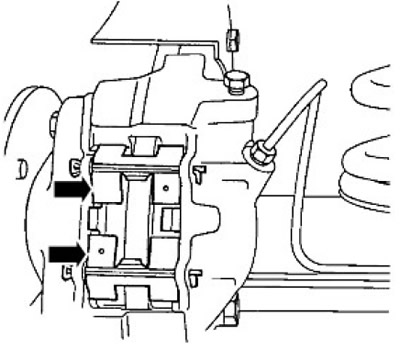
5. Remove fingers and springs and take blocks. If the pads are to be returned to their place, mark them so that they can be installed in their original position during subsequent assembly.
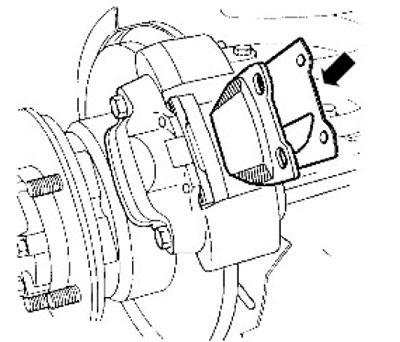
6. Turn out two bolts and remove a support from the back bridge.
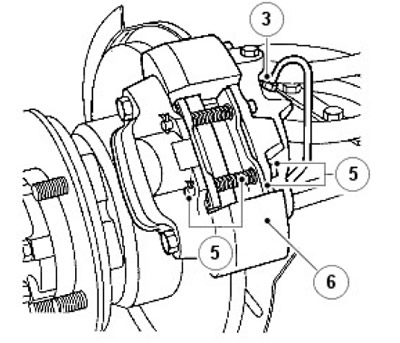
WARNING: Do not disconnect caliper sections.
7. Clean the outer surfaces of the caliper with an aerosol brake cleaner.
8. CAREFULLY remove the pistons from the cylinders by applying pressurized air to the brake fluid inlet port. It is unlikely that both pistons were pushed out at the same time; adjust the force with a suitable piece of wood inserted between the two pistons.
9. Remove the pistons and mark each piston and its corresponding cylinder.
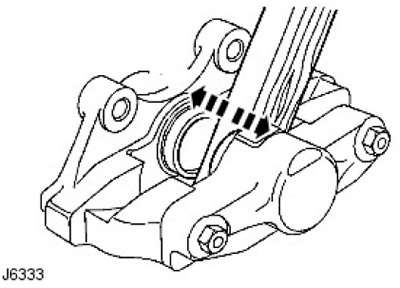
10. Remove the boot holder by inserting a blunt screwdriver between the holder and boot and carefully pry the holder off the cylinder inlet.
11. Being careful not to damage the seal grooves, remove the boot and oil seal.
Installation
1. Clean the passages, pistons and especially the seal grooves using only clean brake fluid. If the caliper or pistons show signs of corrosion or their condition is not perfect, new elements should be installed.
2. Apply brake fluid to the new seals. Insert the seals into the grooves of the cylinders. After the seals are seated, the edge farthest from the cylinder inlet feels raised to the touch.
3. Apply brake fluid to the pistons. Insert them into the cylinders without twisting. Do not tilt the pistons when installing, leave them 8mm protruding from the cylinders.
4. Apply brake fluid to the new covers and install them on the new holders. Slide on the assembled elements (compaction must come first) on the protruding piston into the grooves in the cylinder.
5. Using piston clamp (special tool LRT-70-500) reinsert the boot holder and plunger. Follow the same procedure to install the pistons and seals on the outside.
6. Install the calipers and pads on the car.
7. Install the caliper on the bridge. Tighten the two bolts evenly to 82 Nm.
8. Connect the brake pipeline to a support. Tighten to 15 Nm.
9. Remove the clamp from the flexible brake hose.
10. On vehicles prior to model year 2002, install pads and springs, secure with new pins and flare the ends of the pins, or install new cotter pins (depending on the model).
11.
NOTE: Vehicles from model year 2002 have chamfered rear pads on the leading and trailing edges.
On vehicles from model year 2002, check that the shim is installed correctly (see fig.).
12. Remove air from the brake system.
For more information, refer to the chapter: Bleeding the brake system (206-00 Brake system - General information, General procedures).
13. Squeeze out the brake pedal to the stop several times so that the brake pads take a stable position.
14. Install the wheels, remove the supports from under the bridge. Tighten the wheel nuts to the prescribed torque:
- 1. Wheels with alloy wheels - 130 Nm.
- 2. Wheels with steel rims - 100 Nm.
- 3. High performance wheels - 170 Nm
15. Road test the vehicle. Keep in mind that new brake pads must be run in for several hundred kilometers before the brakes will perform at their best.
Comments on this article