Disassembly
1. Mount the engine on a suitable engine stand.
2. Drain the engine oil.
- Place a container to collect the engine oil.
- Remove the drain plug.
- Allow the engine oil to drain.
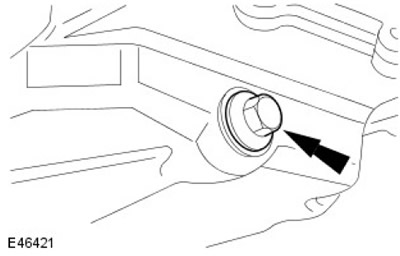
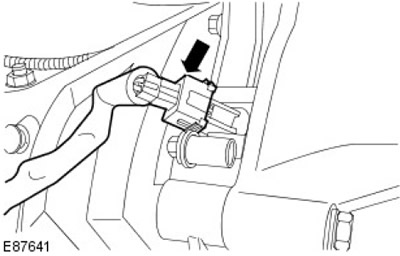
3. Disconnect the crankshaft position (CKP) sensor electrical connector.
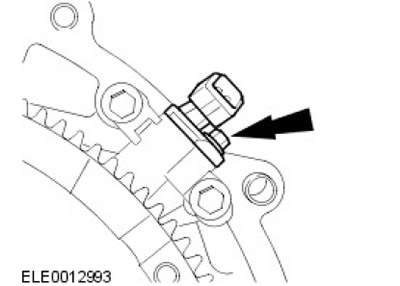
4. Remove the CKP sensor. Unscrew the bolt.
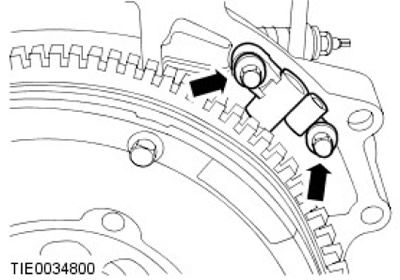
5. Remove the CKP sensor bracket. Remove the two bolts.
(Details can be found on the website: LRMAN.RU)
6.
CAUTION: Loosen the clutch pressure plate bolts two turns at a time in the sequence shown.
Remove the clutch slave and pressure plates. Unscrew 6 bolts.
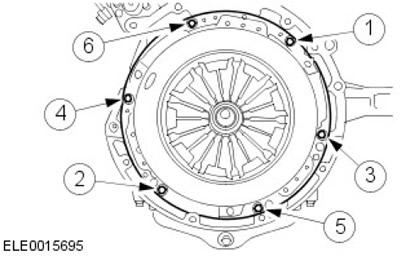
7. Remove the flywheel. Unscrew and discard the 8 bolts.
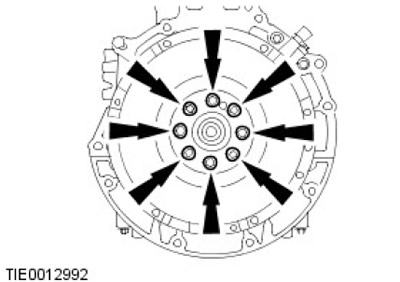
8. Remove and discard the rear crankshaft oil seal. Remove the 8 bolts.
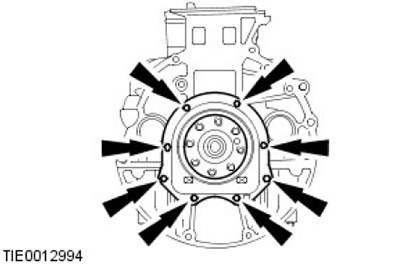
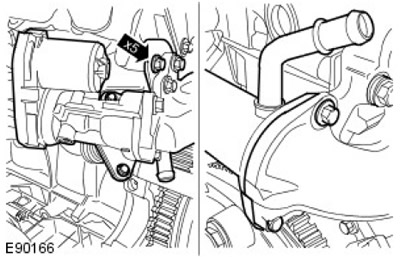
9. Install the EGR valve assembly with the heat exchanger.
- Disconnect the EGR valve electrical connector.
- Remove 5 bolts.
- Discard two gaskets.
10. Disconnect the camshaft position (CMP) sensor electrical connector.
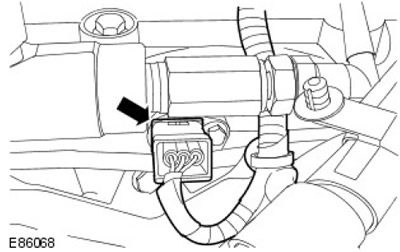
11. Release the engine wiring harness. Release the clamp.
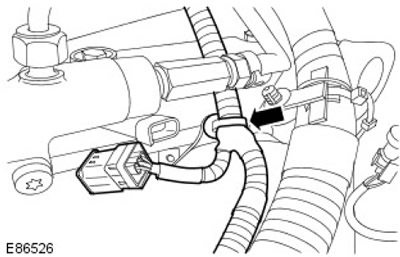
12.
iCAUTION: Plug all openings. Use new caps.
Remove the high pressure fuel pump fuel supply line. Remove the bolt.
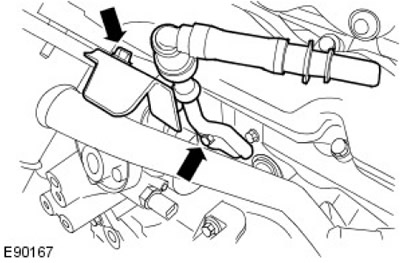
13. Release the EGR valve outlet pipe. Remove the bolt.
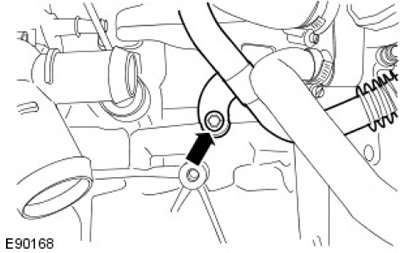
14. Remove the EGR valve outlet pipe and intake manifold assembly.
- Loosen the 9 bolts completely.
- Remove eight seals and discard them.
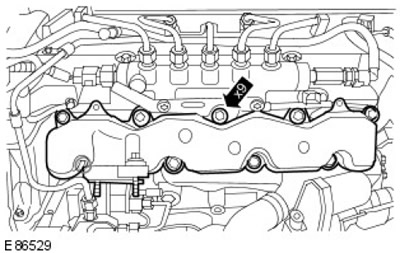
15. Release the engine wiring harness. Release the 3 clamps.
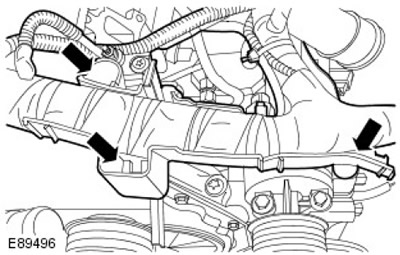
16. Disconnect the electrical connector of the engine oil pressure (EOP) sensor.
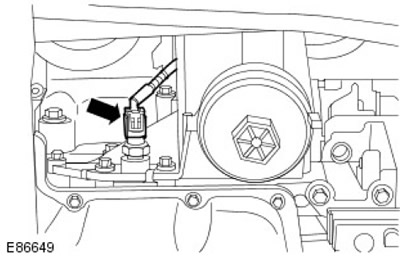
17. Disconnect the electrical connectors of the fuel metering valve and the fuel temperature sensor.
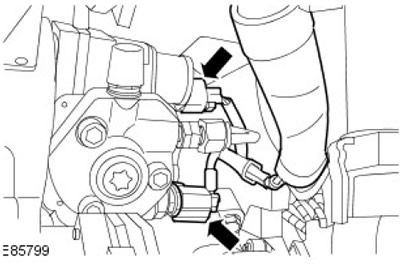
18. Disconnect the coolant hose. Release the clamp.
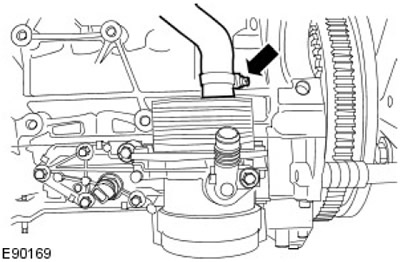
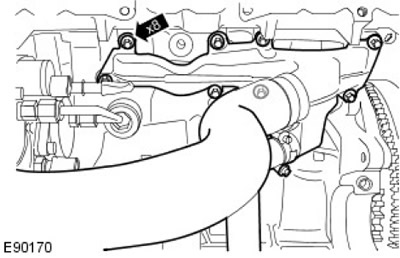
19. Release the coolant manifold.
- Remove 8 bolts.
- Remove the gasket and dispose of it.
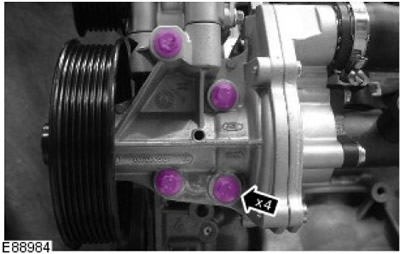
20. Release the coolant pump.
- Remove 4 bolts.
- Remove the gasket and dispose of it.
21. Remove the coolant pump and coolant manifold assembly.
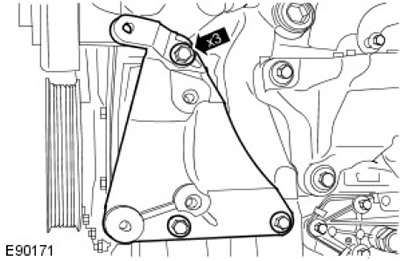
22. Remove the power steering pump bracket. Remove the 3 bolts.
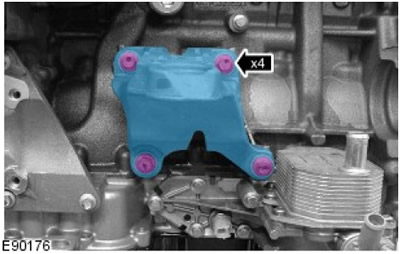
23. Remove the left engine mount bracket. Remove 4 bolts.
24.
CAUTION: Plug all openings. Use new caps.
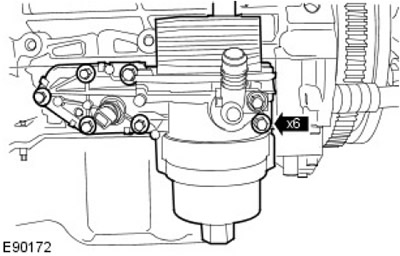
Remove the oil filter housing assembly.
- Remove 6 bolts.
- Remove the gasket and dispose of it.
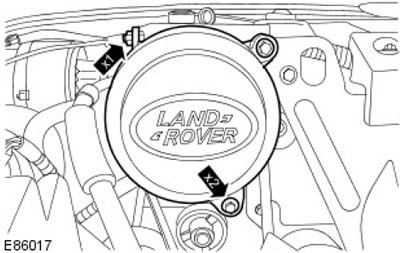
25. Remove the air conditioning compressor pulley housing.
- Remove two bolts.
- Remove the nut.
- Remove the accessory drive belt.
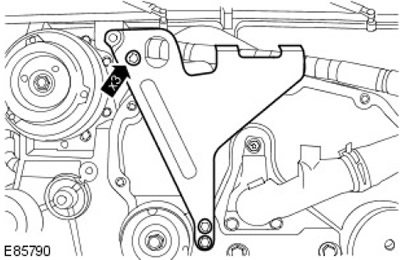
26. Remove the engine lift bracket. Remove 3 bolts.
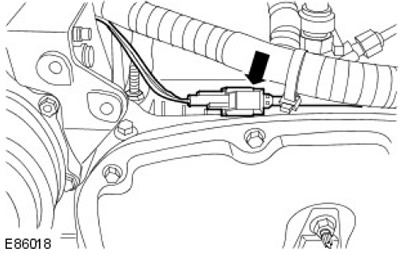
27. Disconnect the air conditioning compressor electrical connector.
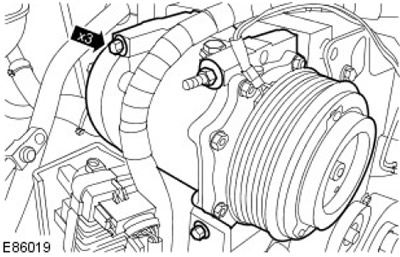
28. Remove the air conditioning compressor. Unscrew the 3 bolts.
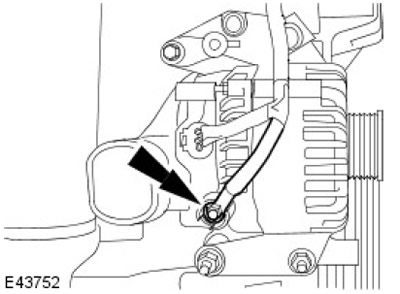
29. Disconnect the positive battery cable from the alternator. Remove the nut.
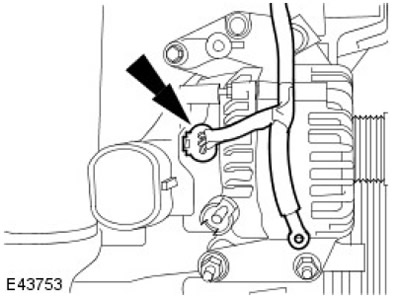
30. Disconnect the generator electrical connector.
31. Remove the generator. Unscrew 3 bolts.
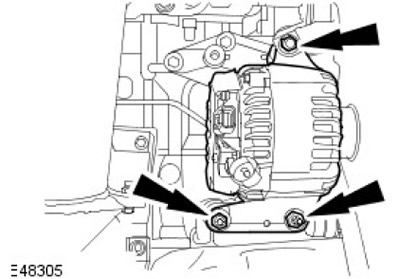
32. Release the turbocharger heat shield bracket. Remove the bolt.
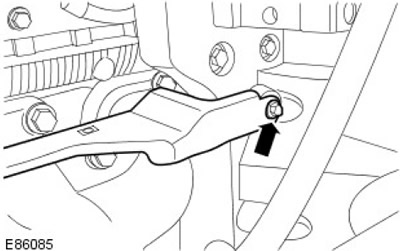
33. Remove the turbocharger heat shield bracket. Remove the bolt.
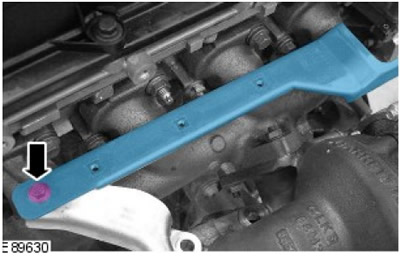
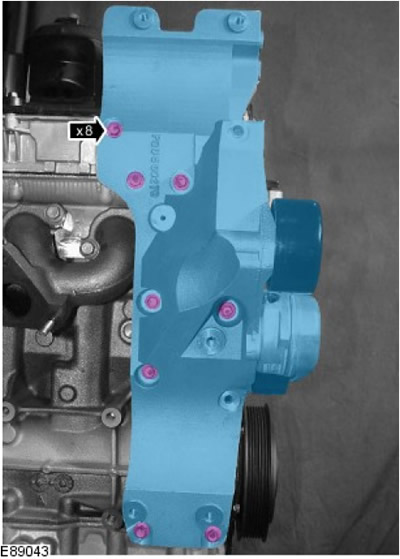
34. Remove the generator support bracket. Unscrew the 8 bolts.
35. Release the mass air flow (MAF) sensor wiring harness. Cut the clamp.
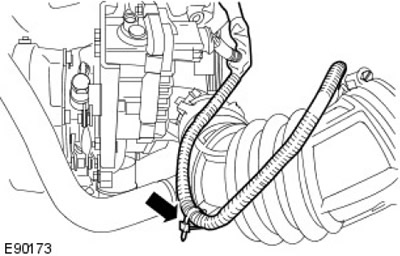
36. Disconnect the turbocharger drive electrical connector.
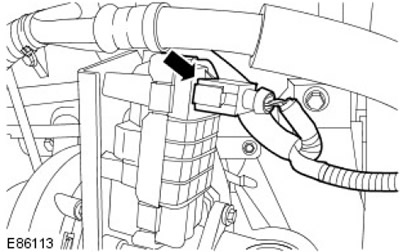
37. Disconnect the breather pipe. Release the clamp.
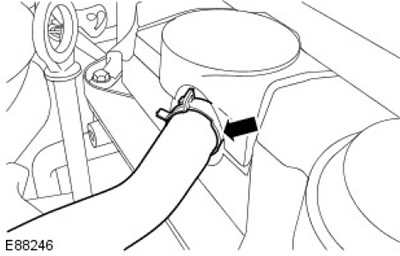
38.
CAUTION: Plug all openings. Use new caps.
Disconnect the turbocharger oil supply line.
- Remove the hollow bolt.
- Remove the sealing washers and discard them.
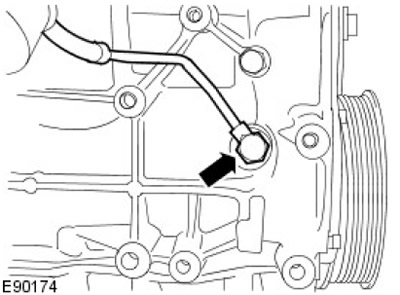
39.
CAUTION: Plug all openings. Use new caps.
Remove the oil level indicator tube and the oil level indicator.
- Remove the bolt.
- Disconnect the wiring harness.
- Remove the sealing ring and dispose of it.
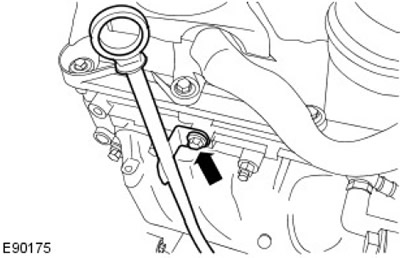
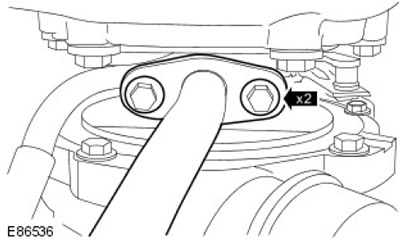
40. Disconnect the turbocharger return oil line.
- Remove two bolts.
- Remove the gasket and dispose of it.
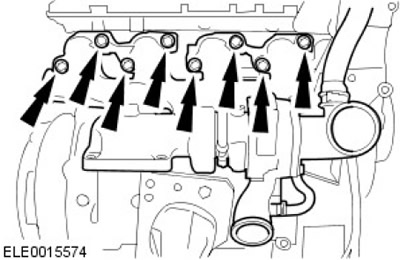
41. Remove the exhaust manifold assembly with the turbocharger.
- Unscrew the two nuts and discard them.
- Remove 6 bolts.
- Remove the gasket and dispose of it.
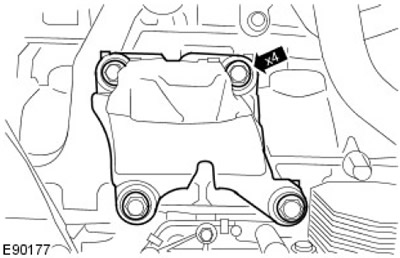
42. Remove the right engine mount bracket. Unscrew the 4 bolts.
43.
CAUTION: Plug all openings. Use new caps.
Remove the turbocharger oil return line.
- Remove the bolt.
- Remove the clamp.
- Remove the sealing ring and dispose of it.
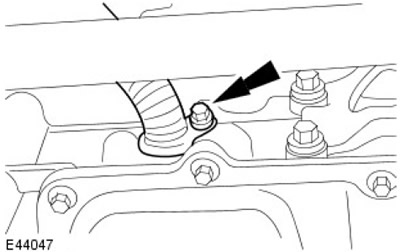
44. Remove the engine casing. Unscrew the two bolts.
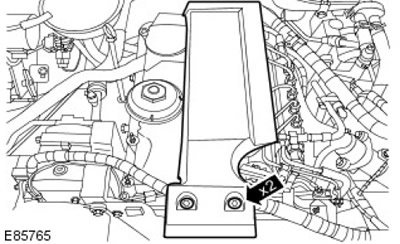
45. Disconnect the fuel rail pressure (FRP) sensor electrical connector.
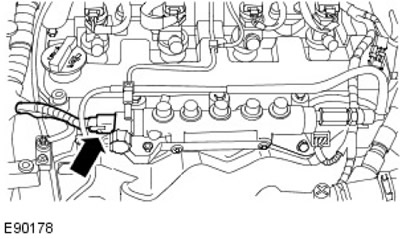
46. Disconnect the four injector electrical connectors.
- Disconnect the injector wiring harness.
- Release the 7 clamps.
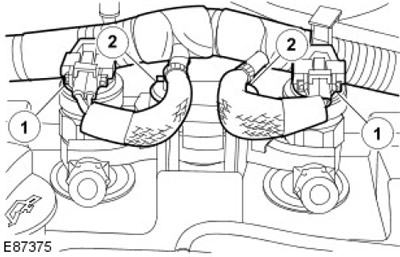
47. Install the engine wiring harness support bracket.
- Remove the nut.
- Remove the bolt.
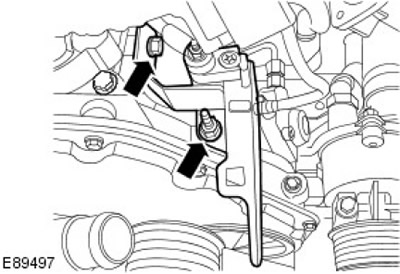
48. Release the glow plug wiring harness. Remove the four nuts.
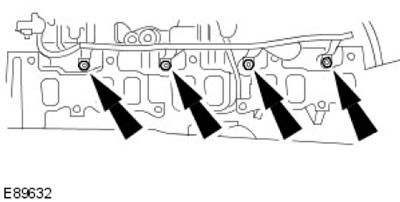
49. Remove the engine wiring harness.
50.
CAUTION: Plug all openings. Use new caps.
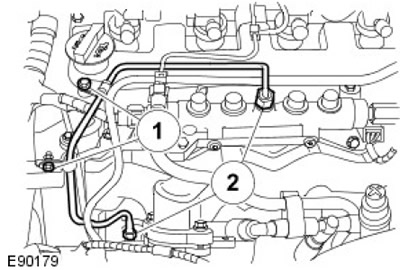
Remove the high pressure fuel supply line and discard it. Release the two clamps.
51.
CAUTION: Plug all openings. Use new caps.
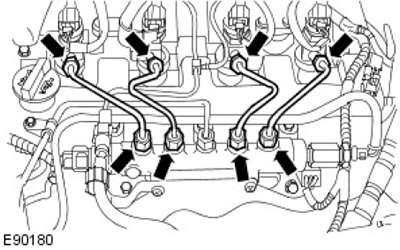
Remove the 4 high pressure fuel lines supplying the injectors and discard them.
52.
CAUTION: Plug all openings. Use new caps.
Disconnect the injector return fuel line. Remove the 4 clamps.
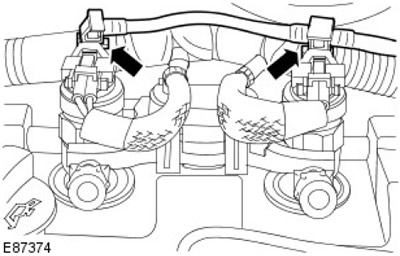
53. Remove the 2 injector clamp covers.
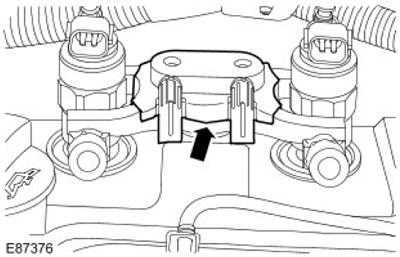
54. Remove 2 injector clamps. Unscrew two bolts.
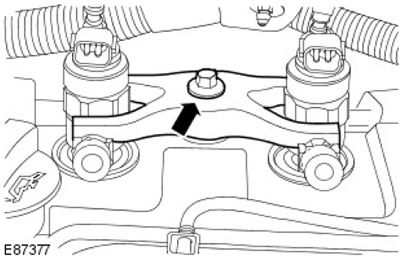
55. Remove 4 injectors. Remove and discard the sealing washer.
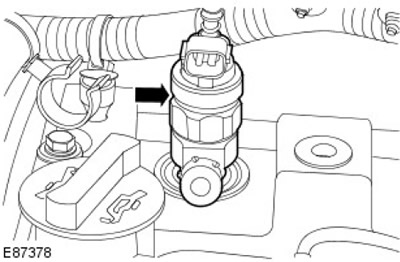
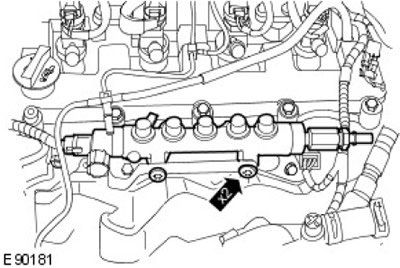
56. Remove the fuel rail.
- Remove two bolts.
- Remove the bracket.
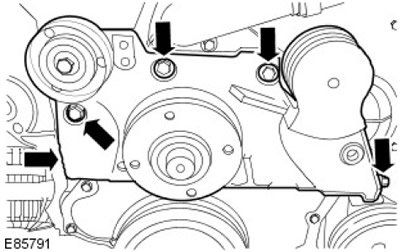
57. Remove the accessory drive belt tensioner pulley. Remove the 5 bolts.
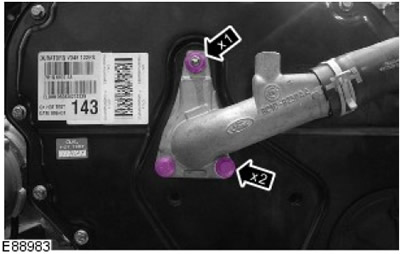
58. Remove the coolant outlet elbow pipe from the cylinder block.
- Remove the nut.
- Remove two bolts.
- Remove the sealing ring and dispose of it.
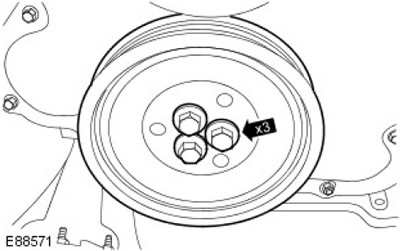
59. Remove the crankshaft pulley. Unscrew and discard the 3 bolts.
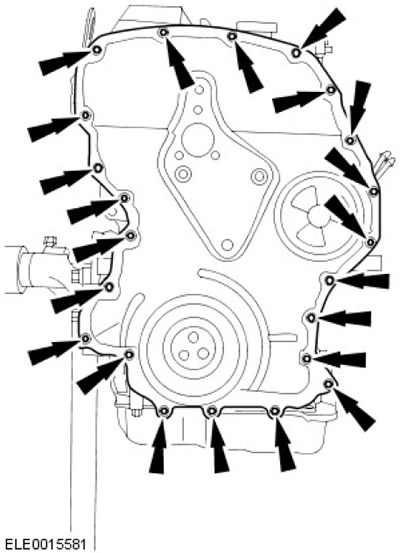
60. Using a suitable tool, remove and discard the timing belt cover.
- Remove 20 bolts.
- Unscrew the two nuts.
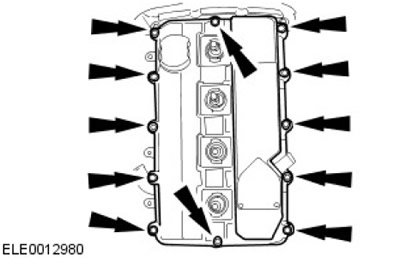
61. Remove the cylinder head cover.
- Remove 12 bolts.
- Remove the gasket and dispose of it.
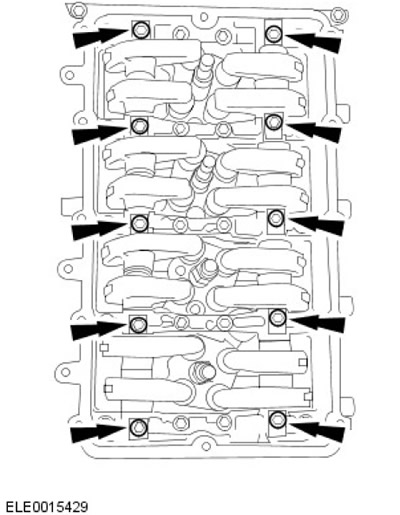
62. Remove the rocker arm shafts. Unscrew and discard the 10 bolts.
63. Loosen the 6 camshaft sprocket bolts.
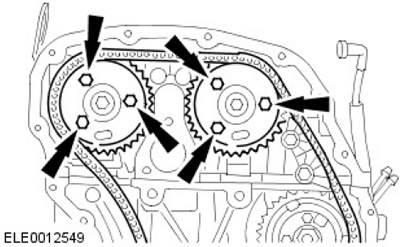
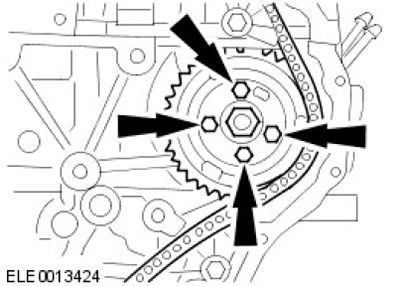
64. Loosen the 4 bolts of the fuel injection pump sprocket.
65. Loosen and secure the timing chain tensioner.
- 1. Take the dog away.
- 2. Press in the latch.
- 3. Insert the pin.
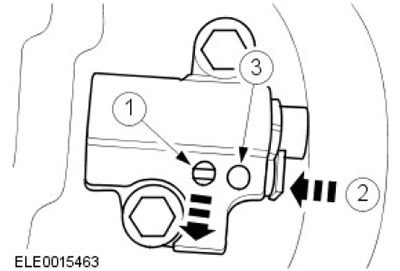
66. Remove the timing chain tensioner and the right timing chain guide.
- Remove two bolts.
- Remove the nut.
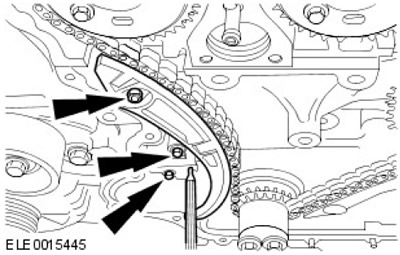
67. Remove the upper timing chain guide. Remove the two bolts.
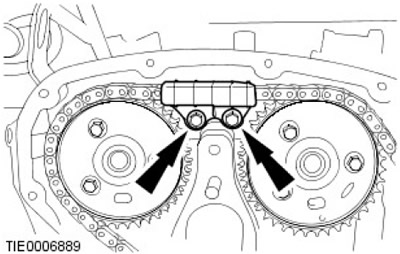
68. Remove the camshaft sprockets and timing chain. Remove 6 bolts.
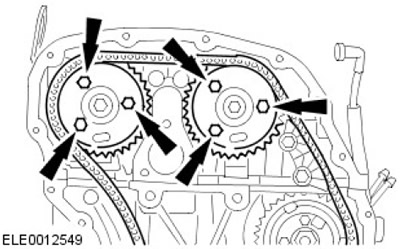
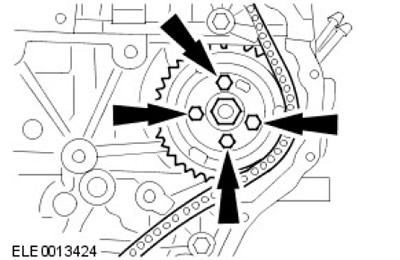
69. Remove the high pressure fuel pump sprocket. Unscrew the 4 bolts.
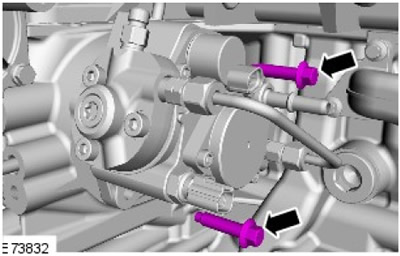
70. Remove the high pressure fuel pump.
- Remove two bolts.
- Remove the sealing ring and dispose of it.
71.
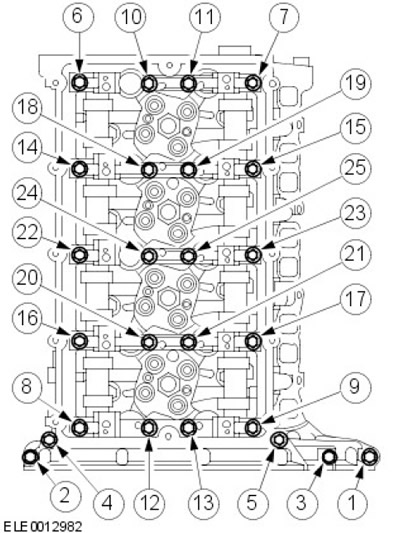
CAUTION: Remove the bolts in the order shown. Failure to do so may result in damage to the vehicle.
Remove the camshaft housing. Remove 25 bolts.
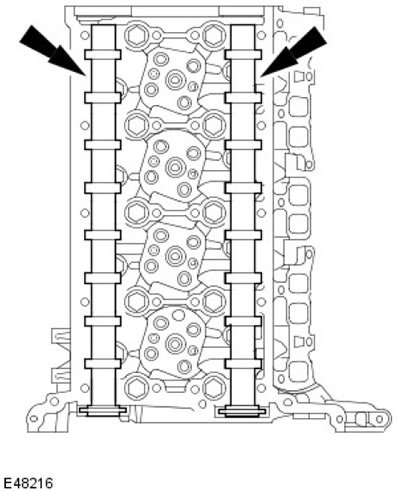
72. Remove the camshafts.
73.
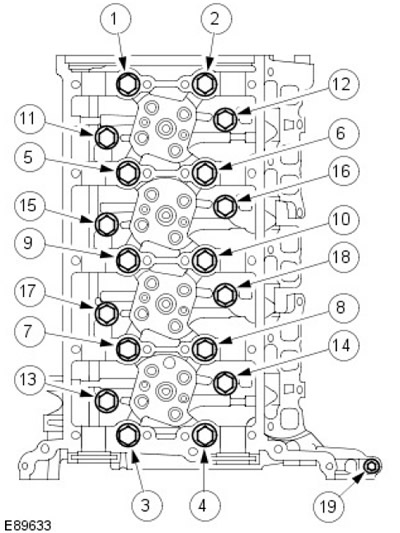
CAUTION: Never place the cylinder head face down. Failure to do so may result in damage to the vehicle.
Remove the cylinder head.
- Remove and discard bolts 1 through 18.
- Remove bolt 19.
- Remove the gasket and dispose of it.
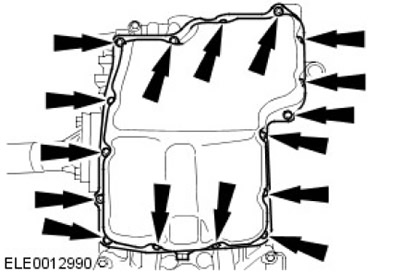
74. Remove and discard the oil pan.
- Remove 11 bolts.
- Unscrew 5 nuts.
- Remove 5 studs.
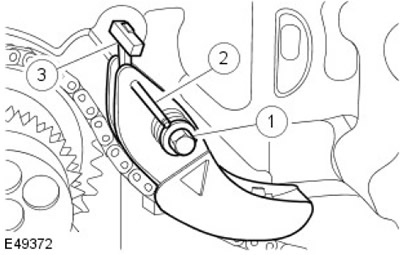
75. Remove the oil pump chain tensioner.
- 1. Insert the bolt and secure the tensioner.
- 2. Lock the tensioner by inserting the pin.
- 3. Remove the leaf spring from the stud.
- Remove the bolt.
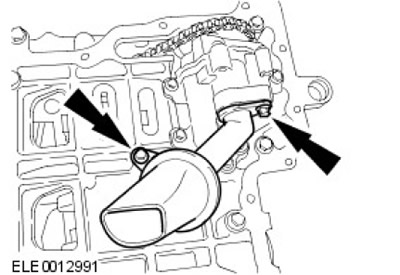
76. Remove the oil pump intake pipe.
- Remove two bolts.
- Remove the sealing ring and dispose of it.
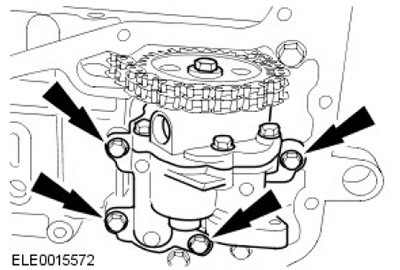
77. Remove the oil pump.
- Remove 4 bolts.
- Disconnect the chain from the crankshaft sprocket.
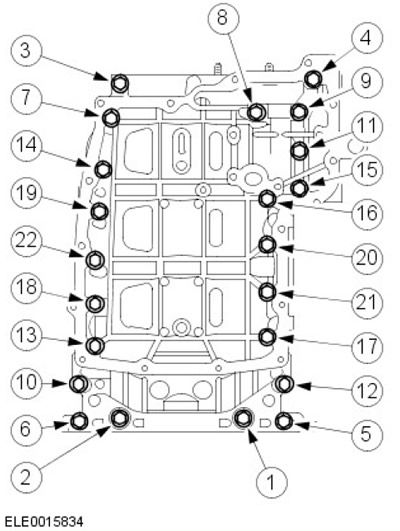
78.
CAUTION: Remove the step frame bolts in the sequence shown.
Remove the step frame.
- Remove 22 bolts.
- Discard the gasket.
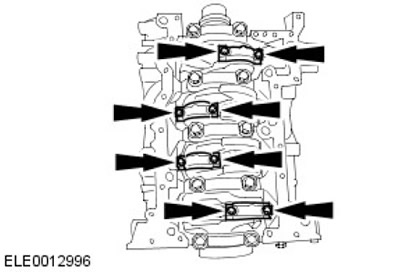
79. Remove the connecting rod bearing caps. Unscrew 8 bolts.
80. Remove the connecting rods and pistons.
81. Remove the crankshaft main bearing caps. Unscrew 10 bolts.
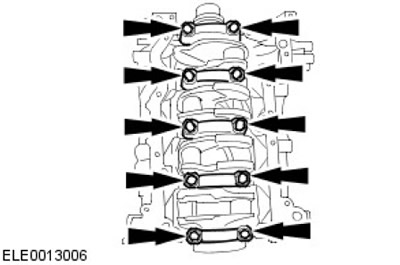
82. Remove the crankshaft.
- Remove the crankshaft thrust rings.
- Remove the crankshaft main bearing shells.
Comments on this article