Contents: Dismantling ⇩ Installation ⇩
Dismantling
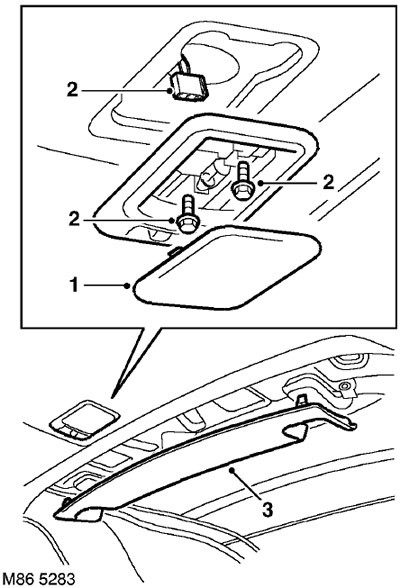
1. Remove the ceiling light.
2. Unscrew 2 screws, release the lampshade and disconnect the connector.
3. Separate the rear trim panel from the roof lining and remove the panel.
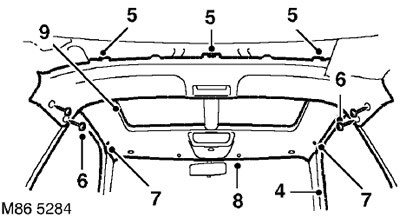
4. Remove the door frame seals to expose the headliner.
5. Unscrew the 3 studs securing the rear edge of the roof trim to the roof panel.
6. Remove the 4 screws securing the roof trim to the B-pillar.
7. Unscrew the 2 studs securing the side parts of the roof trim to the body.
8. Lower the front section of the roof lining.
9. Release the hatch seal.
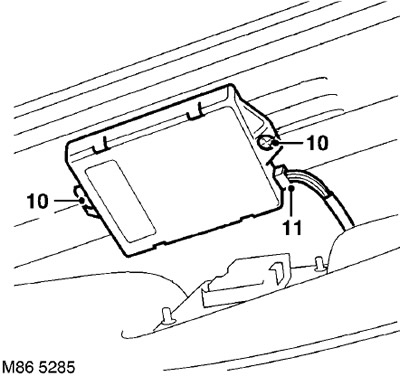
10. Remove 2 screws from the interior volume control sensor.
11. Disconnect the connector from the volume sensor and remove the sensor.
Installation
1. Install the volume sensor in place and connect the connector block.
2. Install the sensor and secure it using screws.
3. Install the roof lining onto the B-pillar and secure using screws.
4. Secure the headliner behind the rear vent rubbers.
5. Install the rear headliner trim panel.
6. Install door frame seals.
7. Secure the roof lining to the sunroof seal.
8. Position the lampshade in place and attach the connector.
9. Install the lampshade and secure it with screws.
10. Install the lens into the ceiling light.
Comments on this article